Adding and Configuring Pipelines for your Project
The XNAT Pipeline engine is a powerful tool that allows users to import data from XNAT, run complex operations and processes on them, then export new resource files and data assessors back into XNAT. Moreover, assessor data generated by pipelines is fully searchable in XNAT, providing users with new capabilities for data mining and reporting.
With all of this power comes complexity, but fortunately most of that is hidden from the user for the simple task of enabling and configuring a pipeline in your project.
This documentation assumes that pipelines have already been installed in your XNAT. Site Administrators can install new pipelines as needed. See: Installing Pipelines in XNAT
Enabling and Configuring An Installed Pipeline In Your Project
Pipelines are typically created for specific data-types in the project. For example, a site may have a freesurfer pipeline which can be invoked on MRSession data or a site can have a PET processing pipeline which can be invoked on a PETSession data. A pipeline can specify the data-type for which the pipeline is relevant. This is done using the appliesTo attribute of the xnatInfo element. (If this element is absent, it is assumed that the pipeline is applicable to All Datatypes)
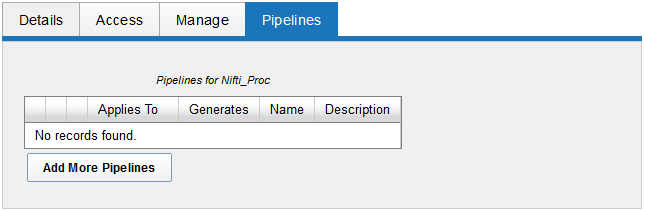
1. To enable a pipeline in your project, click on the Pipelines tab on your project home page. If no pipelines are enabled, you will see an empty table and a button that allows you to add more pipelines. Click this to continue.
2. The Pipelines tab will toggle to a table of pipelines that have been installed in XNAT.
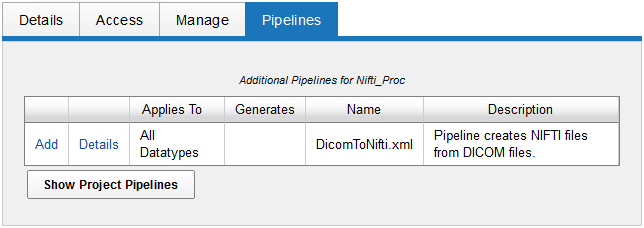
3. Click Add to add a pipeline to your project. This will bring up a pipeline configuration popup. This will step through the parameters that this pipeline expects, and will allow you to set project-specific default values for these parameters.
4. If desired, you can set a pipeline to auto-run as a session is archived. This is the first setting in your pipeline configuration screen.
5. Click Submit to save your configuration and register this pipeline for your project. The popup will show you a success dialog, and the project page will refresh to show you the registered pipeline.
Disabling A Pipeline In Your Project
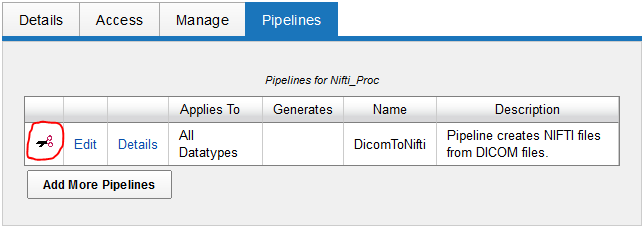
Once a pipeline has been added to your project, you can go back to the Pipelines tab of your project report page and either edit the current configuration or remove the pipeline from your project. To remove or disable a pipeline, click on the scissors icon in the pipelines listing for your project. You will be asked to confirm this action, then the pipeline will be disabled.
This will not remove any data from your XNAT. It only prevents users from running this pipeline in the future.
You can re-add a pipeline to your project at any time. This action does not remove or uninstall the pipeline from the XNAT web application.