Adding Contrast Data to Image Sessions
New in XNAT 1.9.3, support has been added for importing contrast metadata from DICOM headers and adding them to your image session report pages and search listings.
For image sessions that are captured after an injection of contrast, metadata about that contrast and its application and dosage can be added to your XNAT image sessions. For newly imported sessions, this will happen automatically. For previously imported sessions, this will require some manual steps, but these can be scripted.
How Contrast Data is Extracted and Stored
Beginning with XNAT version 1.9.3, any data that is uploaded to an XNAT instance that contains contrast information will automatically have the its contrast data extracted at upload time. For instance, if you upload data that contains contrast information using the compressed uploader, the metadata will be extracted during upload and be visible to you within XNAT automatically. Within the first iteration of contrast data extraction within XNAT – released in 1.9.3 – only the contrast agent name will be pulled from the DICOM headers and input into the database. All other contrast fields will be stored as experiment resources; these fields are easily viewed from within the experiment page – functionality which is outlined in the section “How to View Contrast Metadata within XNAT” below. However, this data is not available to be accessed directly from the XNAT database.
How To Enable Contrast Metadata Viewing Within Your Project
Contrast data is not automatically visible within a project. As a project owner, in order to turn on the ability to view contrast data for users of your project, you must turn on the Contrast Visible feature flag. To do this, navigate to your project page and select the “Access” tab. Then click the “Manage Features” button to bring up the feature flag page. The page will have a table that looks something like this:
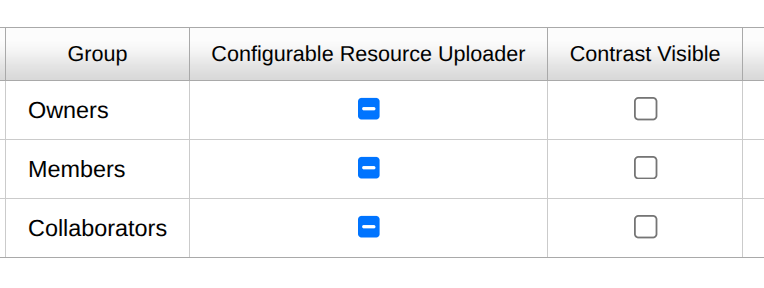
From here, select the checkbox under “Contrast Visible” which corresponds to the user group(s) that you wish to be able to view contrast data. For instance, if you only want users with Owner level access to be able to view contrast data, only click the checkbox within the “Owner” row.
How to View Contrast Metadata within XNAT
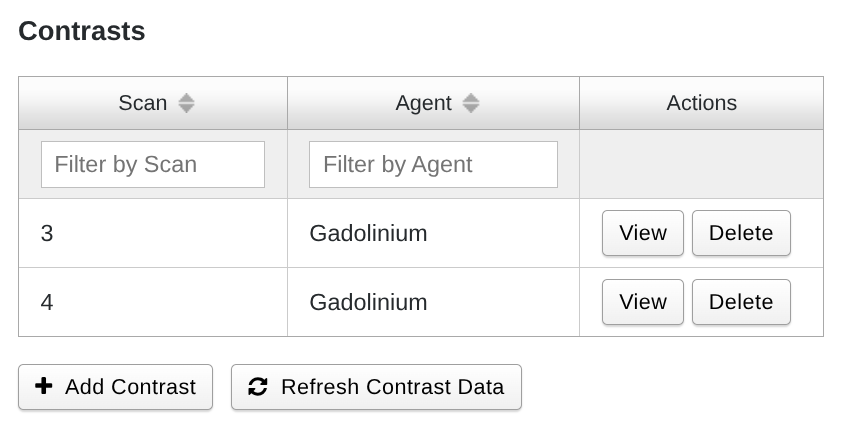
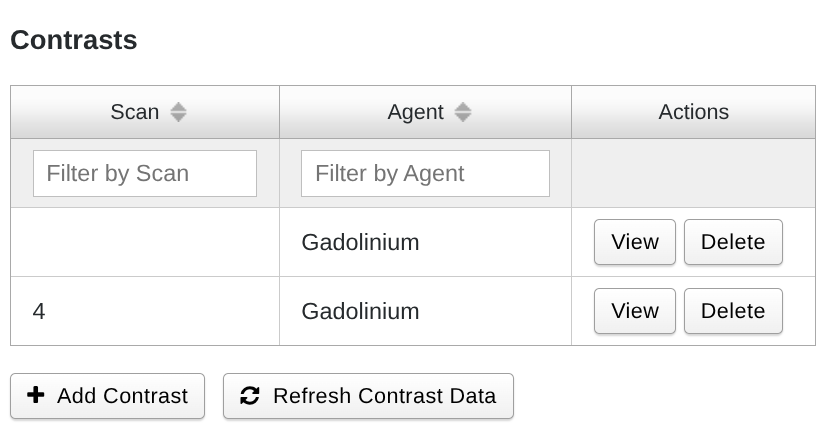
Once the contrast metadata has been extracted upon upload, you can view the information from within XNAT by navigating to the given experiment page. Once you arrive there, an experiment containing contrast data will have a table that looks something like the one below:
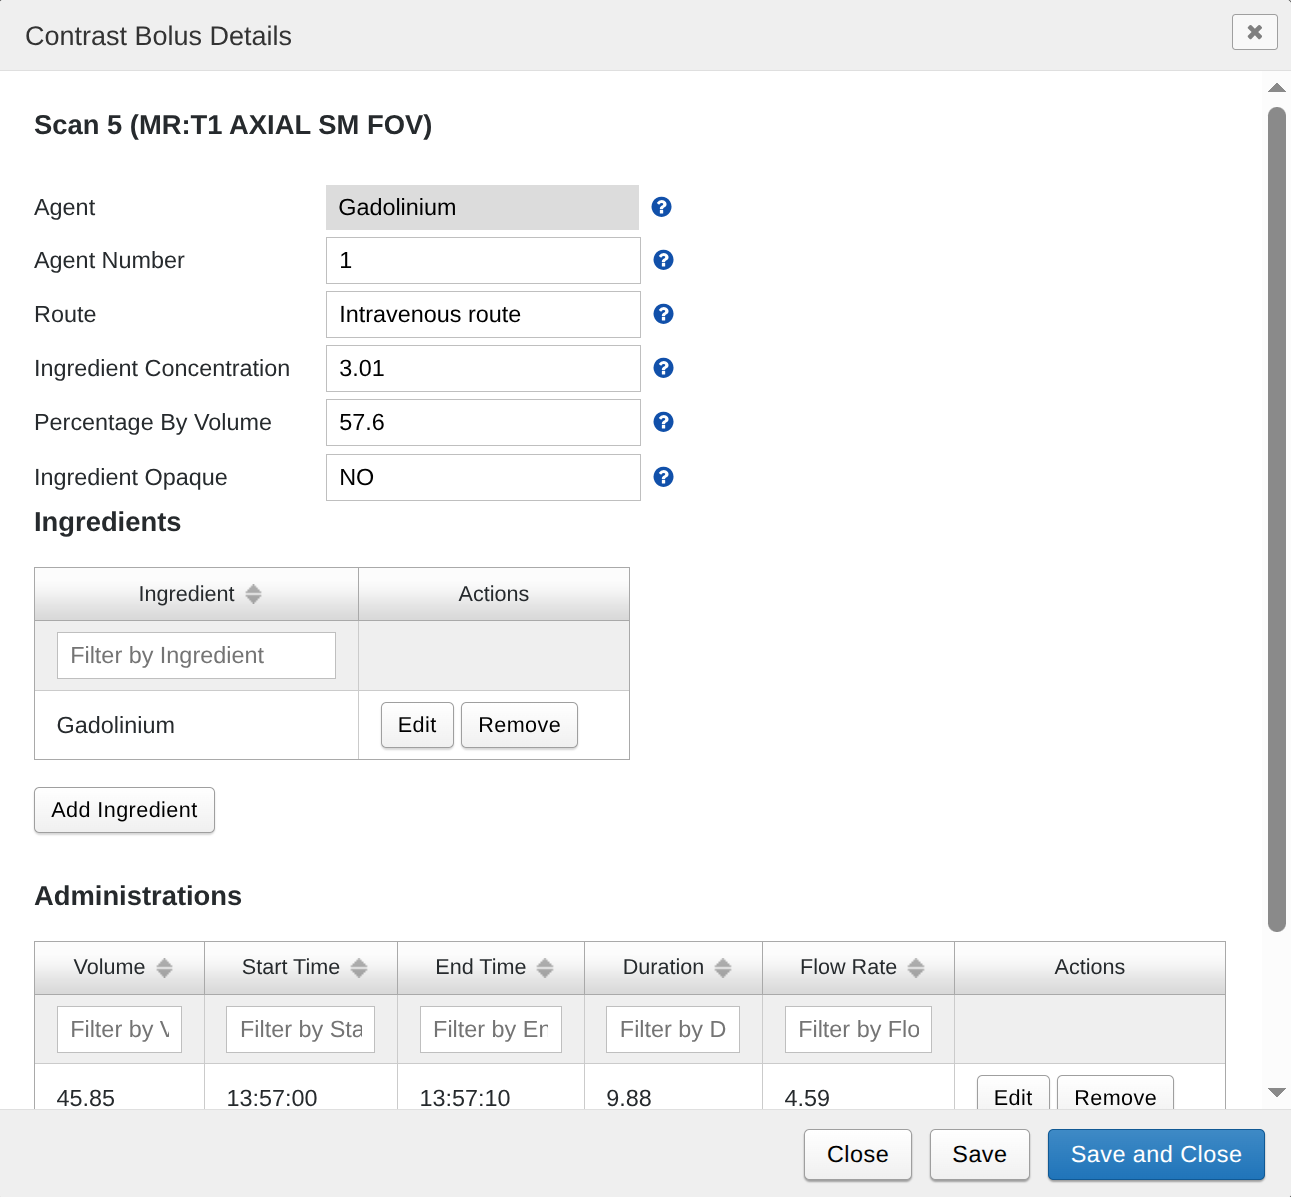
As noted above, the extraction phase will only input the Agent name into the XNAT database; this agent name, along with the scan number, will be used to differentiate between different contrasts. In order to view the detailed contrast information stored within the experiment resources, click the “View” button within the “Actions” column of the row for that contrast element. This will open up a modal similar to the one below:
How to Manually Edit Contrast Metadata via the UI
From within the above modal, you can also edit the existing contrast metadata for a given contrast element. To do so, simply change any of the values within the modal and click either the “Save” or the “Save and Close” button in the bottom right corner of the modal. Hitting “Save” will update the contrast metadata while keeping the modal open for viewing or further editing. Pressing “Save and Close” will update the contrast metadata and close the modal. In case you wish to undo the unsaved changes you have made, clicking “Close” will close the modal without saving any of the changes you have made since you last clicked “Save”.
As noted above, the scan number and agent name will be used to differentiate between different contrast elements. As such, neither of these fields can be edited within the edit modal. However, all other fields can be changed as you see fit.
Most of the fields should be easy to edit – if you have any confusion as to the purpose of a field, simply hover over the “?” icon next to it to understand it’s purpose. However, two of the elements, Ingredient and Administration are a bit more complicated to edit. We will outline the workflows for those fields now.
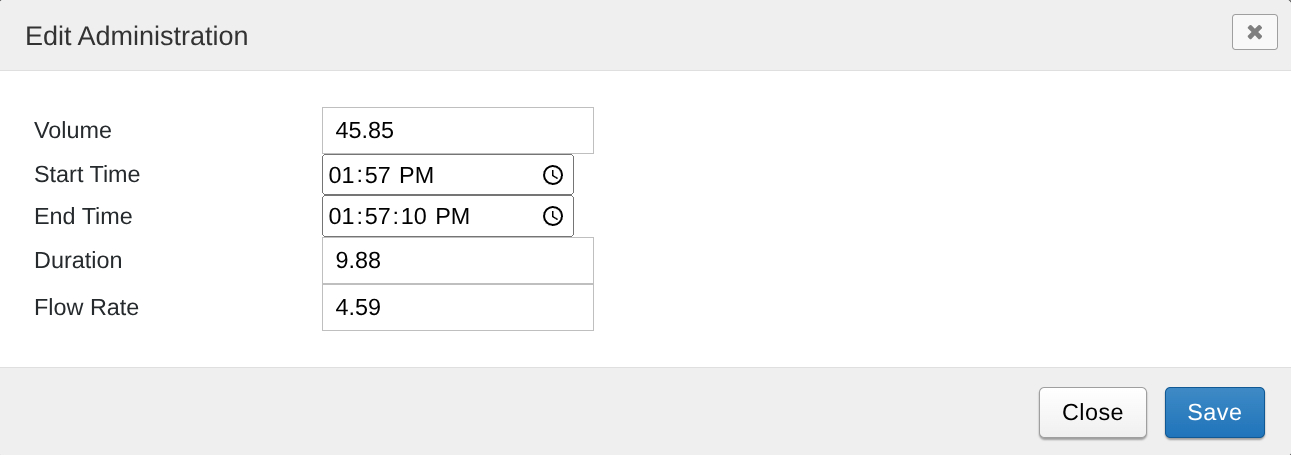
In order to edit an existing Ingredient or Administration field, click the “Edit” button within the “Actions” column within the row for that element within its respective table. This will bring up another modal such as the one shown below. From here, you can edit the contents of the given Ingredient or Administration:
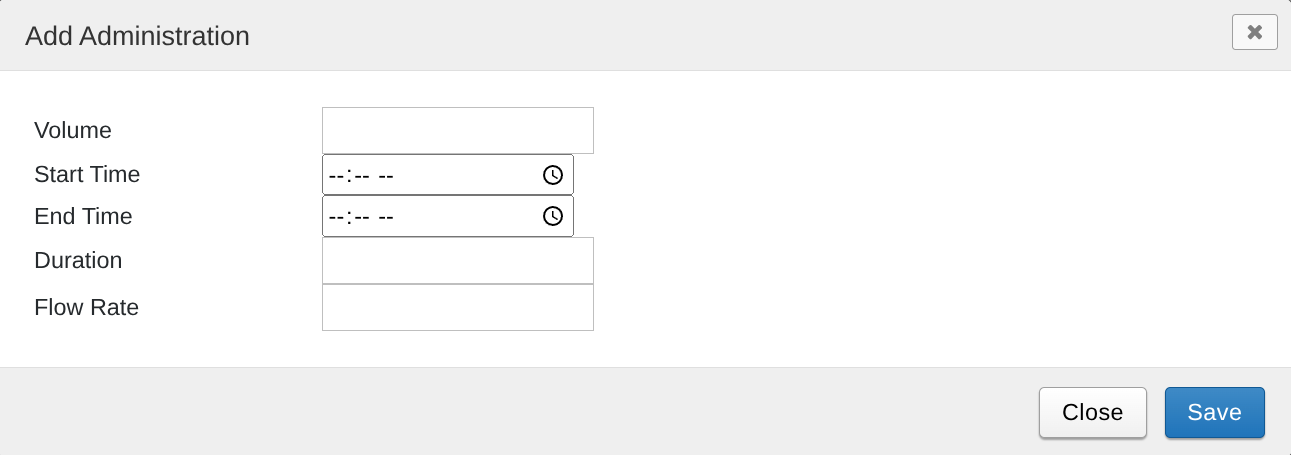
To add a new element to one of these tables, simply click the “Add Ingredient” or “Add Administration” button which will bring up a similar modal to create a new element for that table:
To remove an existing Ingredient or Administration, press the “Remove” button in the “Actions” column within the row of the Ingredient or Administration which you wish to remove.
How to Manually Add Contrast Metadata via the UI
You may also wish to add contrast elements which were not found within the originally uploaded DICOM data. In order to do this, navigate to the experiment page and locate the contrast subheading shown in the above sections. There, you should find an “Add Contrast” button. Clicking it will bring up a modal such as this one:
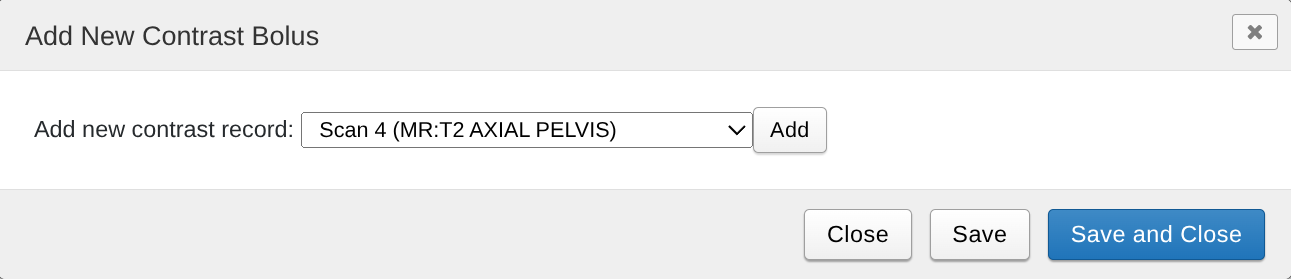
The drop down menu will contain all of the scans found within the current session. Selecting one and clicking “Add” will open up a modal similar to the Edit modal shown above:
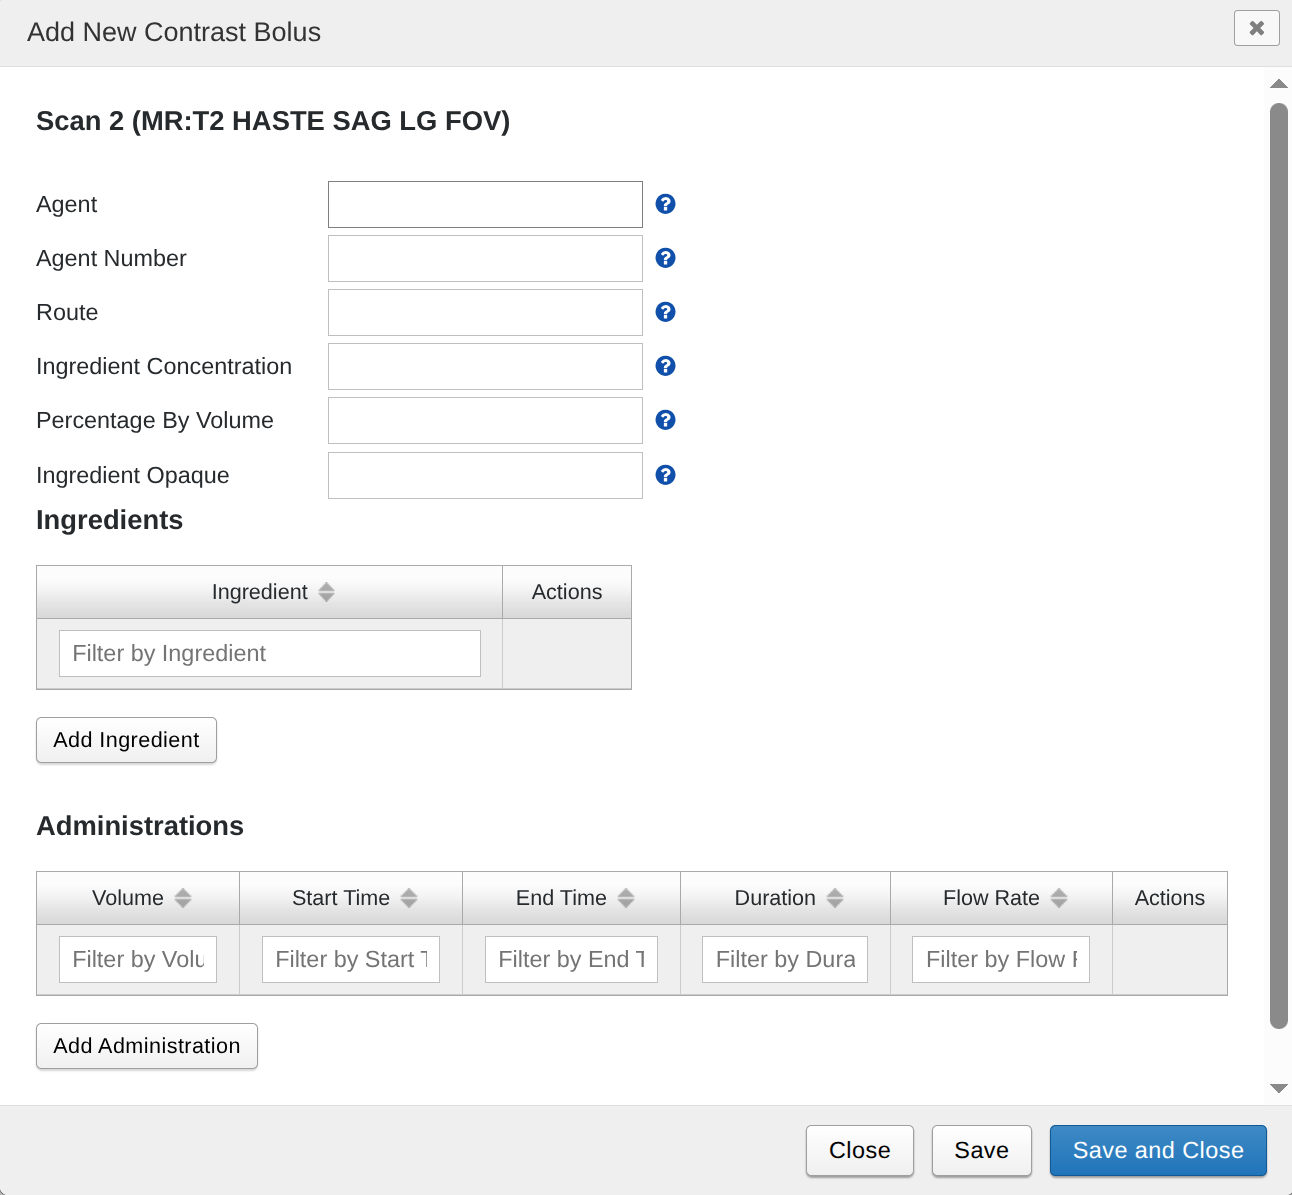
From here you can input your new contrast data. Only one field, “Agent,” which represents the Agent Name, is required. Once you have completed your data entry, click either “Save” or “Save and Close” as outlined within the Edit section above.
How to Delete Contrast Data via the UI
If you wish to delete a contrast element from a scan, you can do so by pressing the “Delete” button from within the “Actions” column for a given row within the “Contrasts” table shown above. This will delete the element from within the experiment resources. However, if the contrast was created within the upload process, rather than manually by the user, the line in the table will not be fully removed and will result in something like this:
This is due to the fact that, upon delete, XNAT is will not remove the contrast element from the original DICOM file. As such, the system will still recognize the contrast element as existing within the DICOM file – though not within the XNAT database. We plan to update this behavior in the future.
How to Manually Extract Contrast Data from Existing Sessions
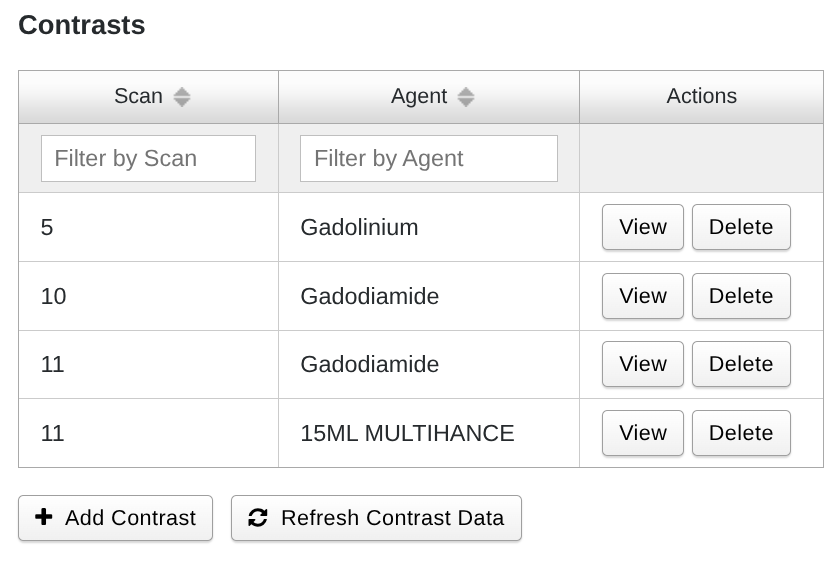
If you have recently upgraded from a pre-1.9.3 XNAT version (which did not include contrast metadata importing) to a version beginning with XNAT 1.9.3, you may notice that the contrast table found within a given experiment page looks like this:
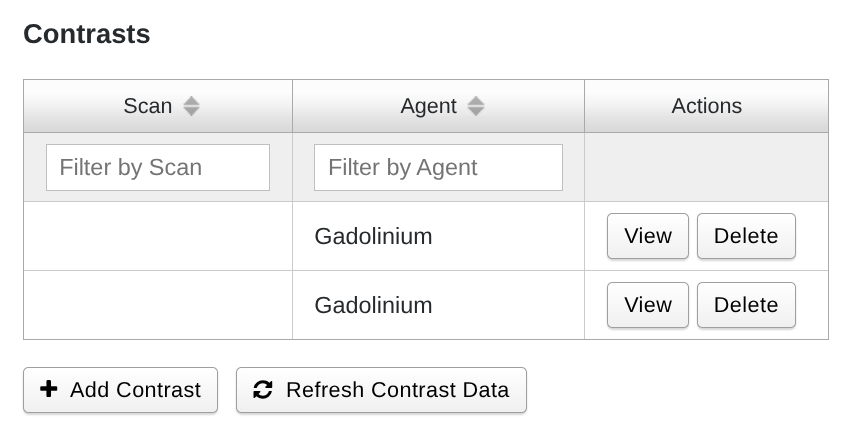
While there are elements inside of the table, the contrast metadata for each element is not properly aligned with a given scan. Additionally, opening any of the elements by clicking the “View” button will show that none of the fields are filled with data. This is due to the fact that the data was uploaded before XNAT could properly handle contrast metadata. In order for XNAT to properly handle the contrast elements, you must use the PullDataFromHeaders functionality to retrieve and display the DICOM header information. You may wish to use the XNAT API to do this – such as if you wish to script this action for all experiments containing contrast data from within your XNAT instance. However, if you are only interested in viewing the contrast data for the current experiment, you can also click the “Refresh Contrast Data” button found below the table. This button will call the PullDataFromHeaders API for you and extract the relevant contrast information. Once this process has been completed, the table will automatically update to show the proper connection between contrast and scan: