Custom forms can only be created by Site Admin or users with Custom Form Manager role.
A form is applicable to a datatype and a form can have a site wide scope or project(s) level scope. As multiple forms can exist for a given datatype, you can specify the display order for these forms.
Creating a form involves specifying:
a title for the form,
display order for the form,
the datatype,
the scope of the form,
the form elements (that is, the form schema).
Form creation is nothing but creating the form schema. A form schema is represented as a JSON internally in XNAT.
Creating a form as Site Admin or as a Custom Form Manager
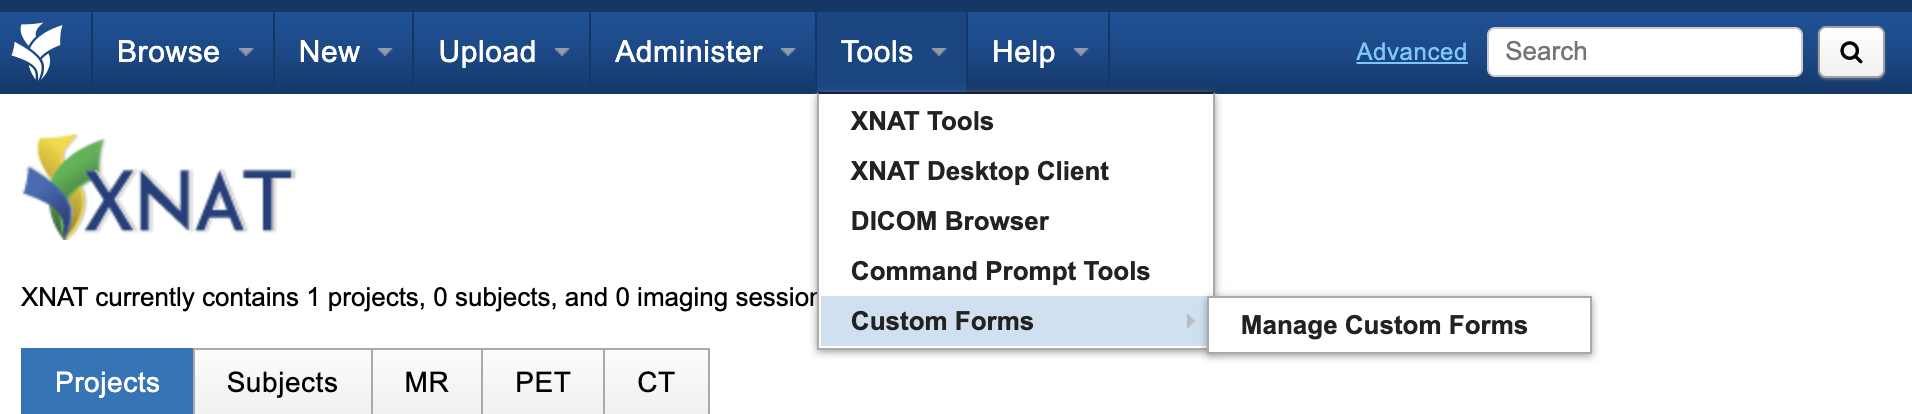
Login to XNAT as a Site Admin or as a Custom Form Manager user. Navigate to Tools → Custom Forms → Manage Data Forms.
You will be directed to the Custom Form Management dashboard.
Click on Add New to begin the process of creating a new form. The form creation wizard will walk you through three steps in order to create a form.
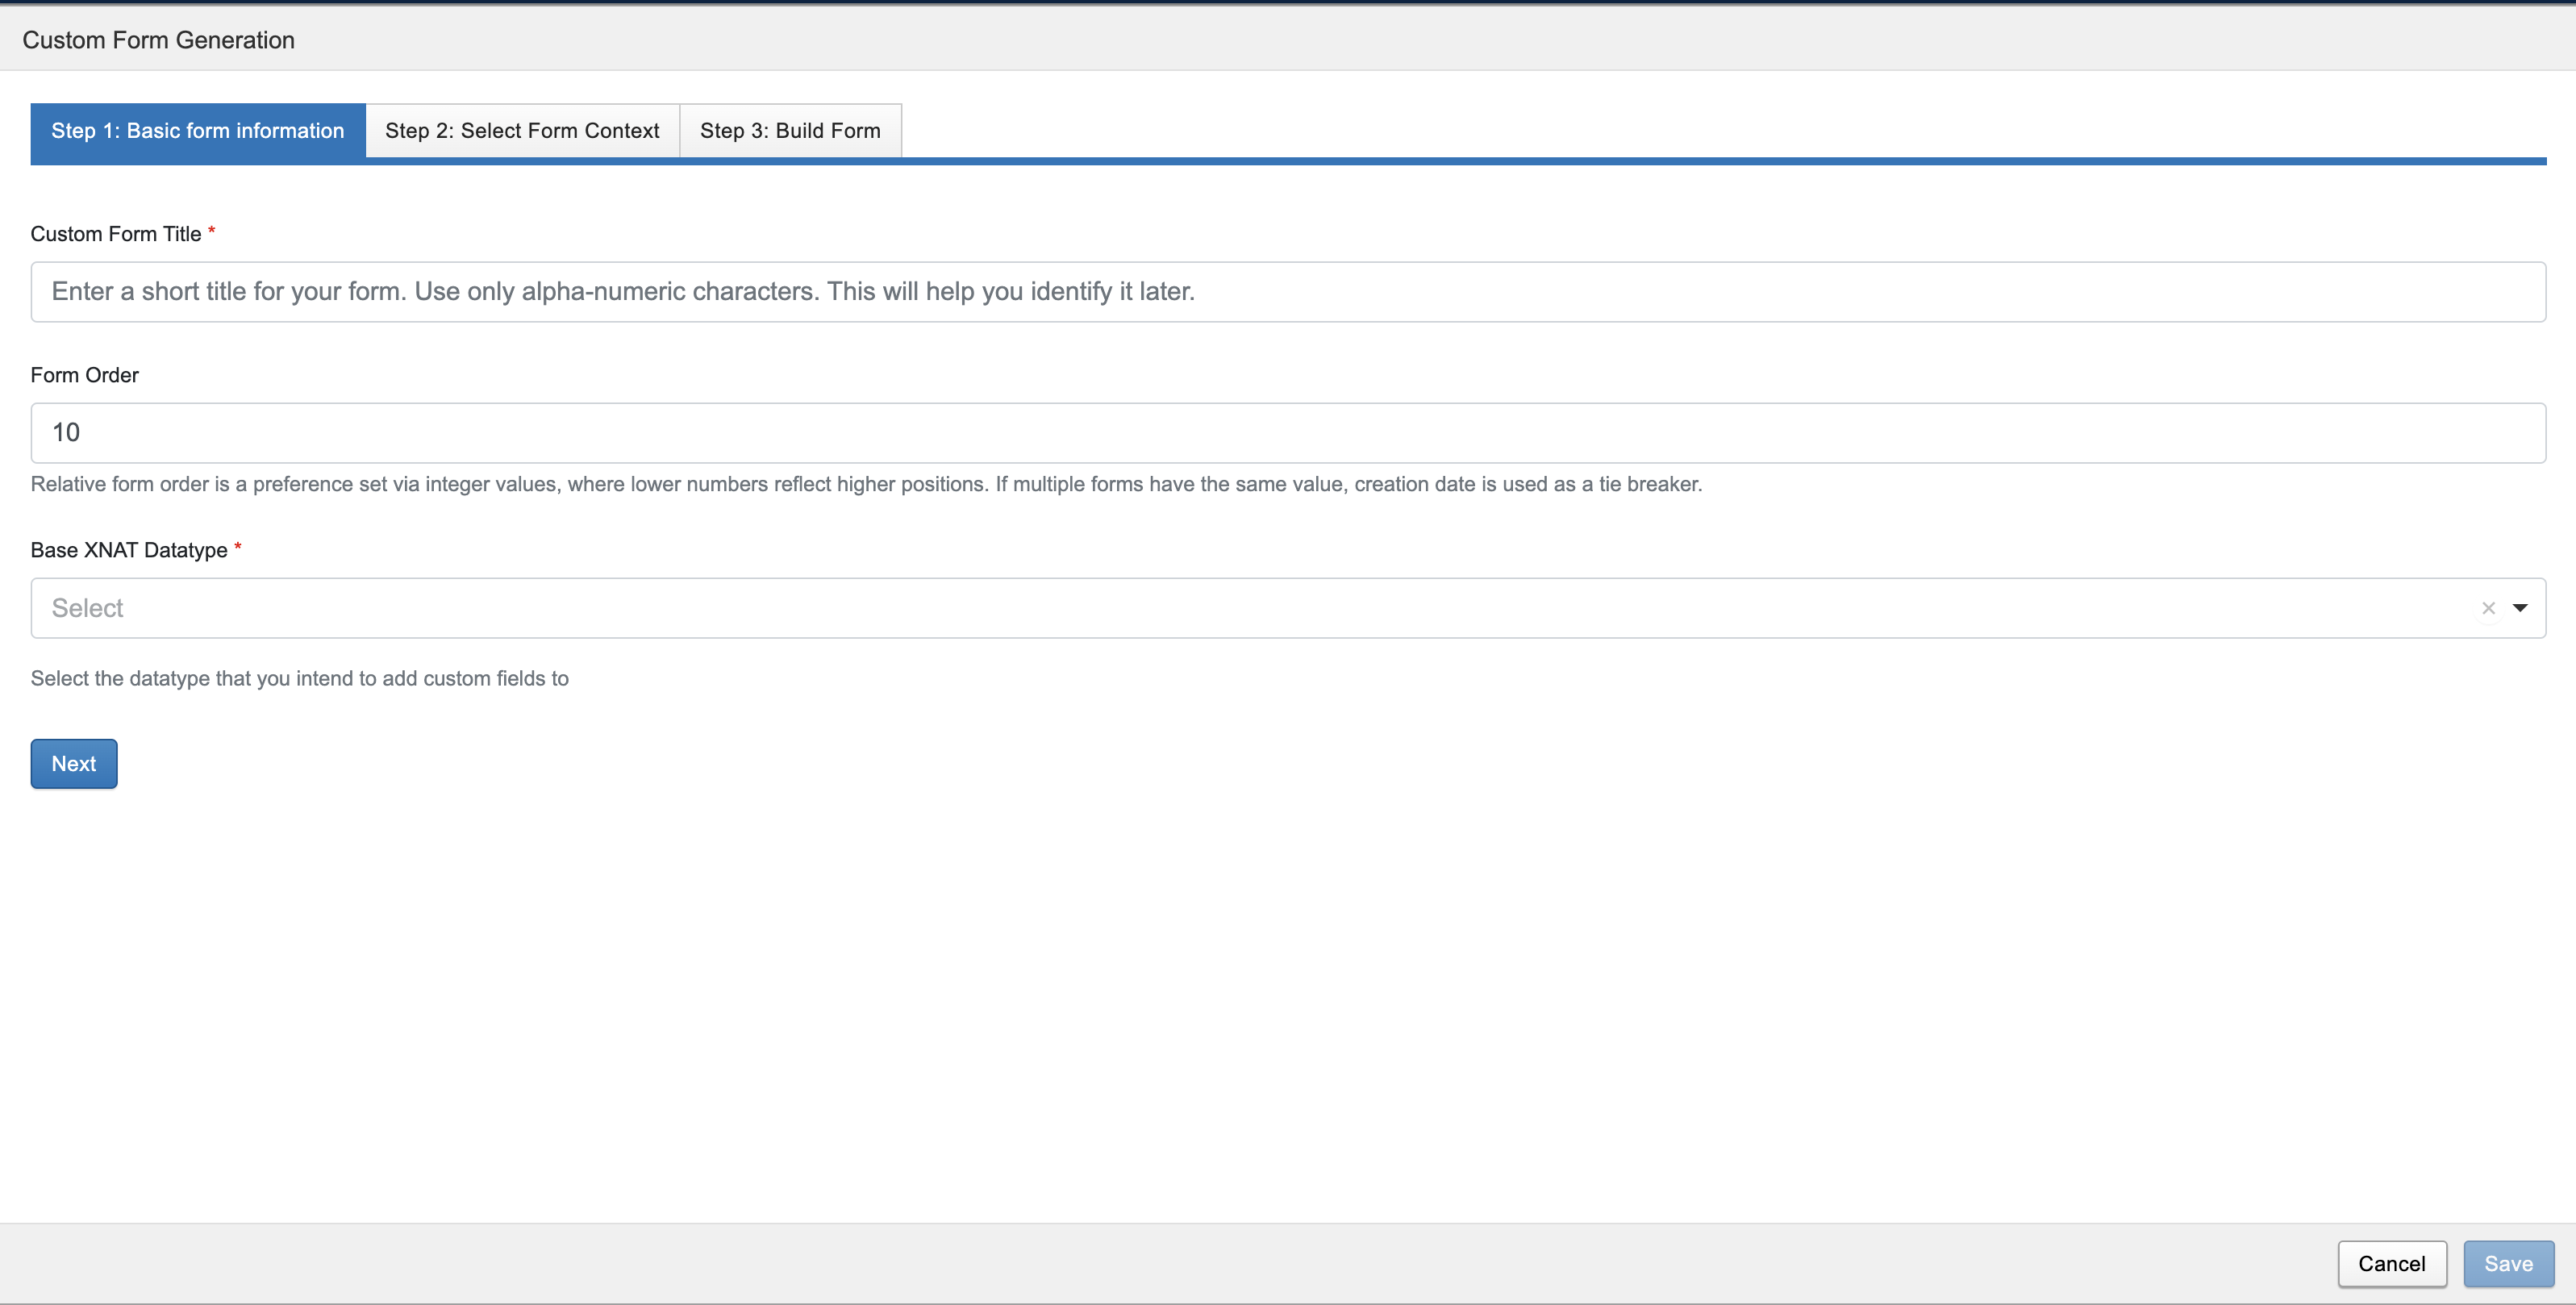
Step 1: Provide Basic Form Information
title for the form: an alpha-numeric string
form order: the form order, aka form display order, sets the order in which forms are displayed when multiple forms exists for a datatype. The order is an integer which specifies relative order when multiple forms exist for a datatype. Forms are displayed in increasing order of the display order value. If two forms have the same order, create date of the form is used to render the latest form before the form created earlier.
datatype: the datatype for which the form is being defined
Step 2: Specify form scope
Select the form scope - Site wide or specific to project(s).
If the form scope is site wide, the form will be displayed for the datatype in any project.
You can restrict the form to specific projects. In order to do so, select No and select the projects for which the form should be rendered for the datatype.
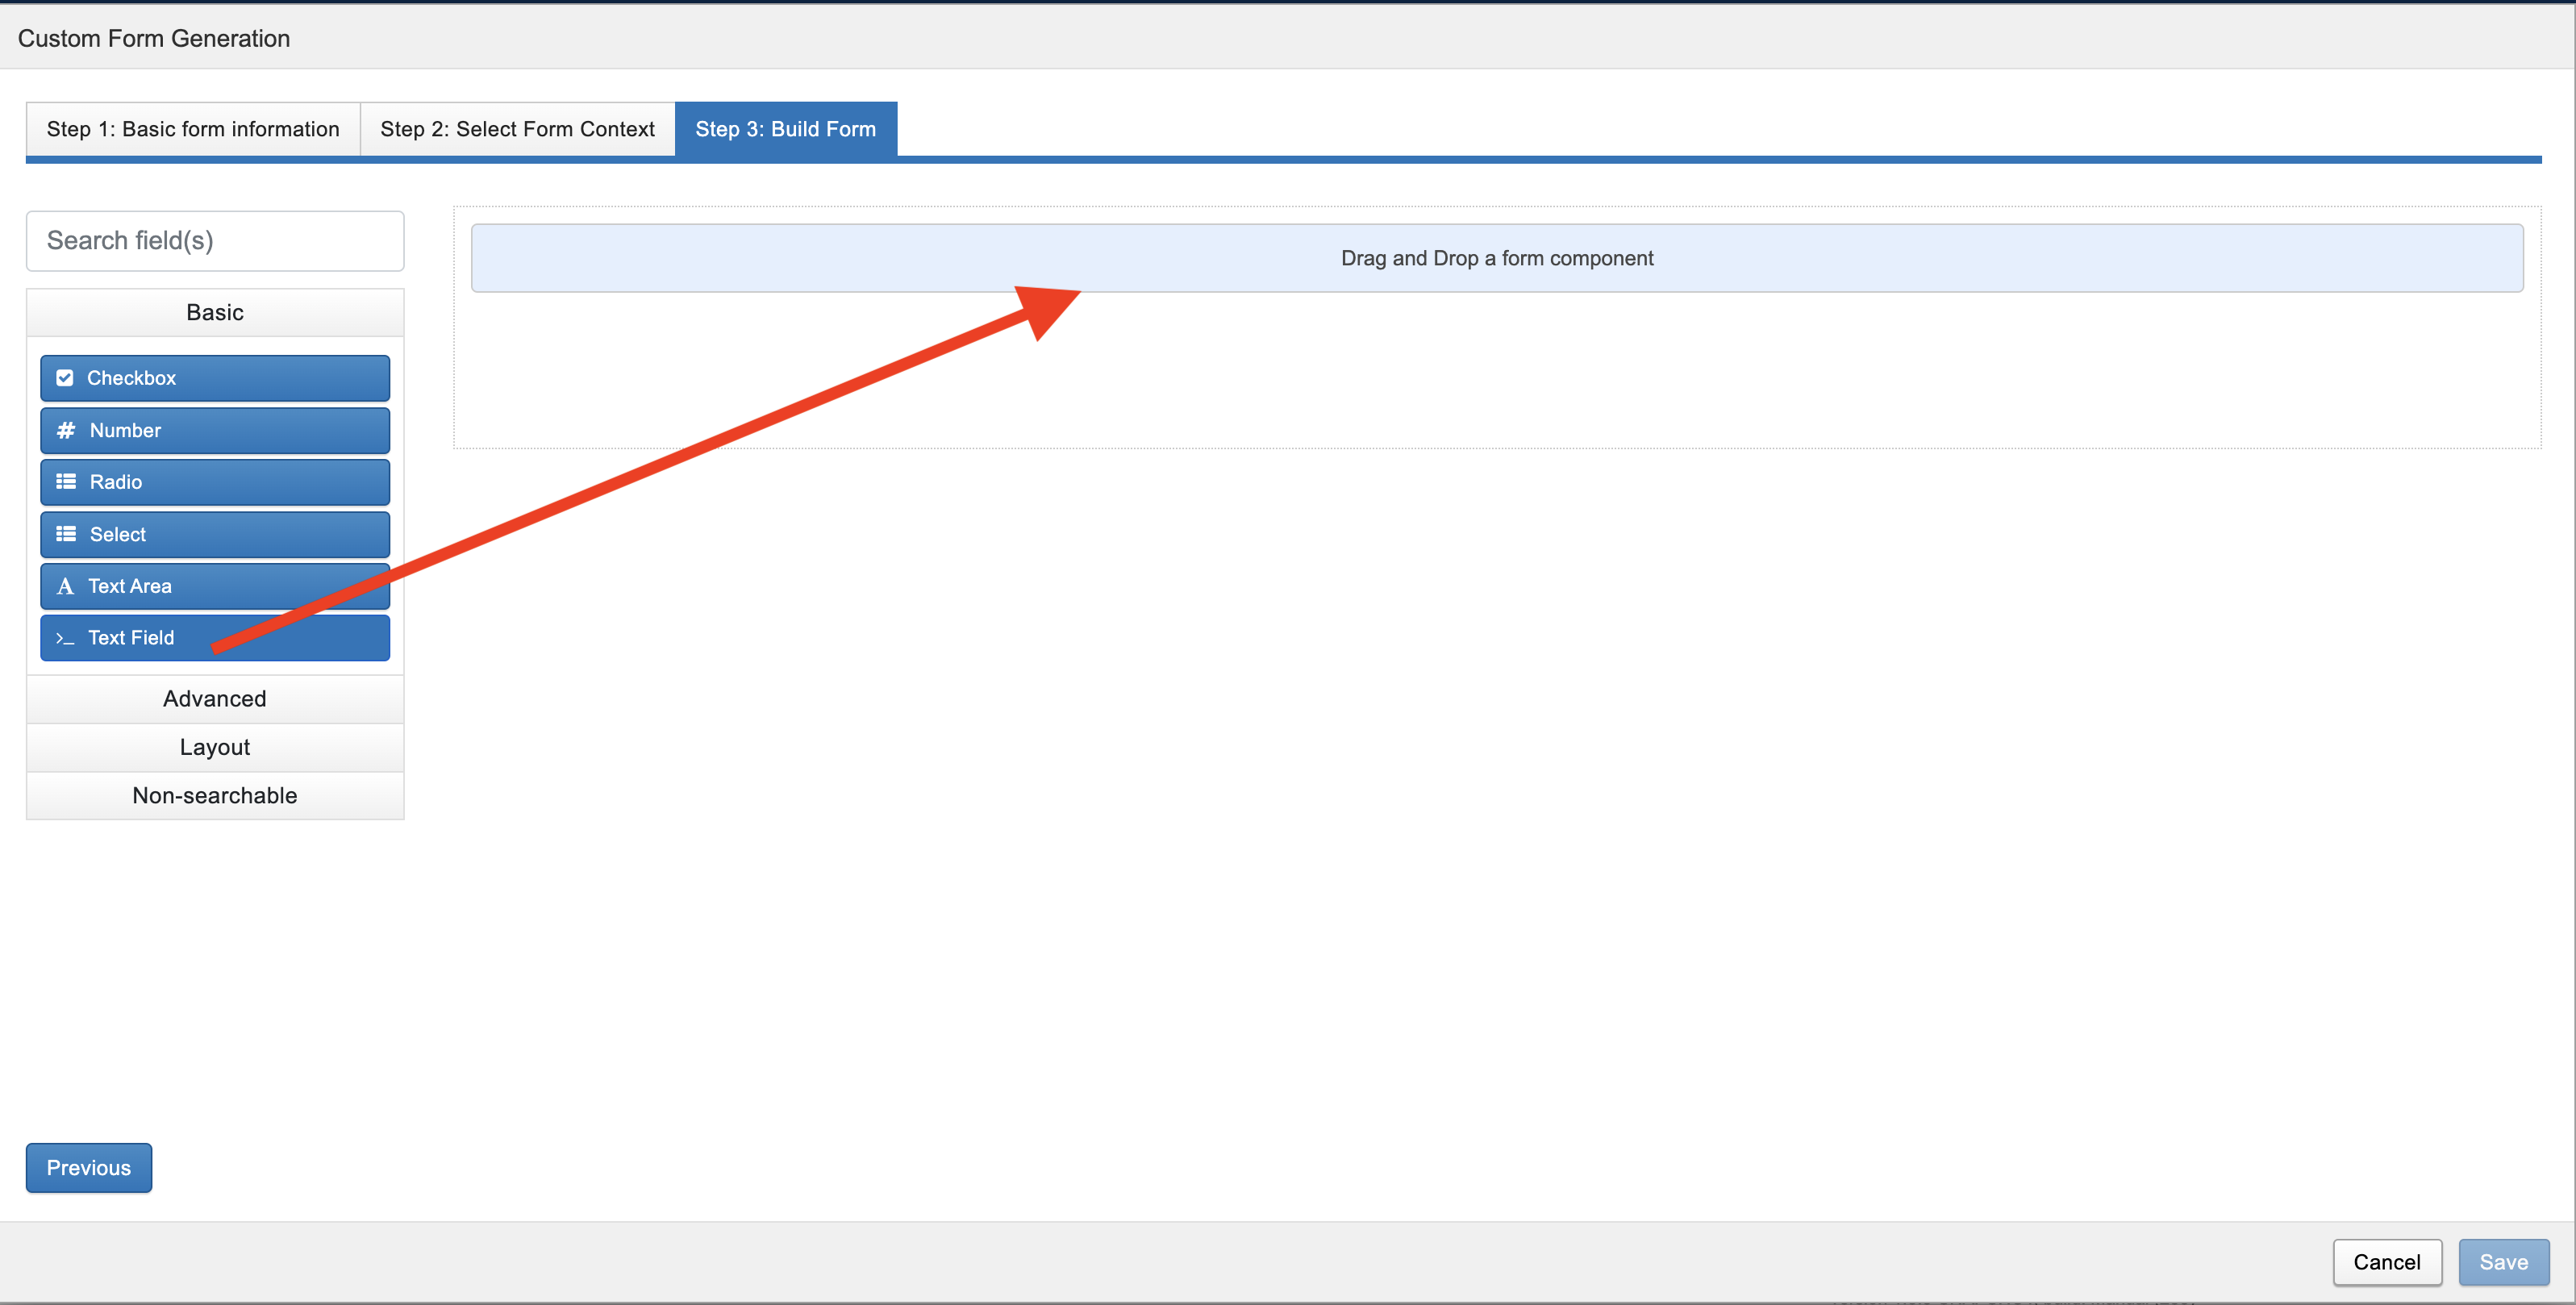
Step 3: Build form
You can drag and drop a form component to start creating the form definition (aka form schema).
Adding a component onto the form involves setting the properties of the component as per your needs.
Form Components
form.io has been customised to render and build forms in XNAT. Components that can be added onto a form are grouped into the following categories:
Basic: the collection of basic form components like Text Field, Number, Text Area etc.
Advanced: this submenu includes, Day, Date, Time, Email components
Layout: this submenu consists of components that can be used to lay out other components. This submenu includes columns, tabs, panel, table etc
Non-searchable: this submenu includes form components which can not be included in an XNAT search.
Each form component has properties which can be set while adding the component to the form.
More information about each form component is available here (XNAT version of the form component may not expose all properties of a component as mentioned on the form.io website).
Once added, against each component, you can access the component menu bar, as shown below, by hovering over the component.
The menu consists of:
Edit :which renders the UI to set the component properties
Move : the position of a component, after dropping it onto the form, can be changed by clicking the Move button and dragging the component in order to place the component in the new position.
Edit JSON : edit the properties of the component via JSON
Copy : copy the component onto the form
Remove : remove the component from the form.
Once all components have been added, click Save to save the form. The form dashboard will now show the form you have created.
Each form saved is assigned a universally unique identifier (UUID) by XNAT. The uuid of the form is displayed on the form dashboard below the form title. Once the form is saved, users can enter form data when creating a new entity for the datatype.
Form Rendering
All forms for a datatype are rendered in the Edit and Report pages of the datatype. For all the datatypes, the forms are rendered while creating an entity of the datatype. Once the entity data is saved, form data can be viewed in the report pages and included in search listing (all components other than the ones that belong to the Non-searchable group).
For the project datatype:
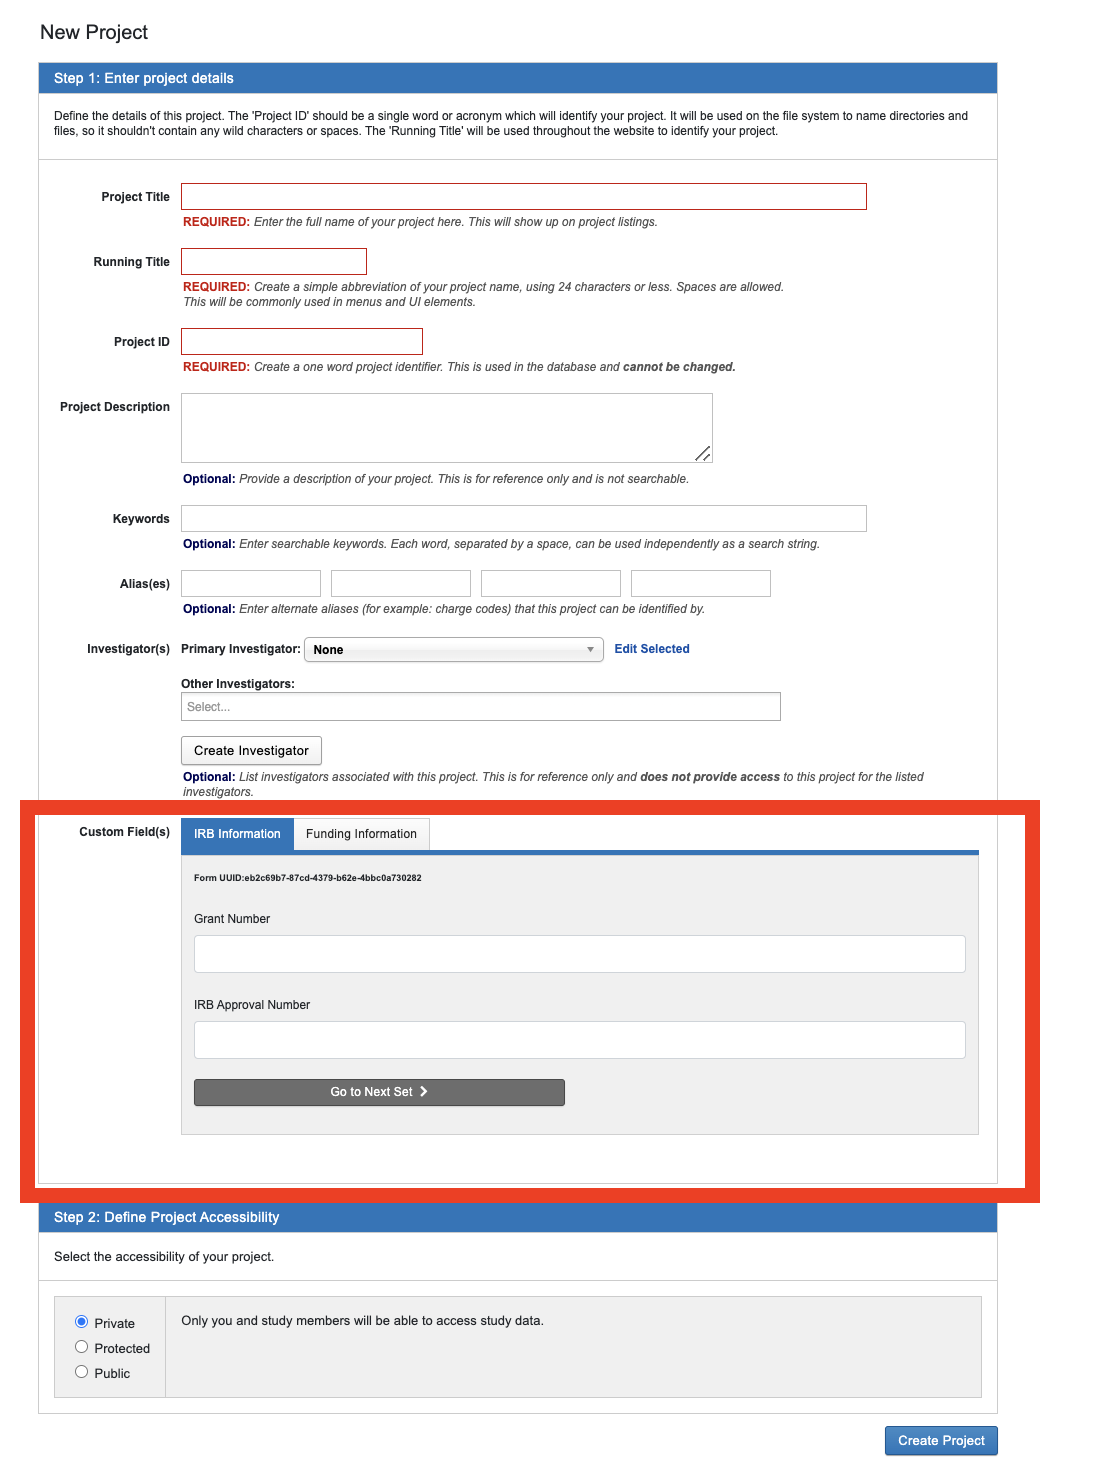
Form data can be entered while creating a new project.
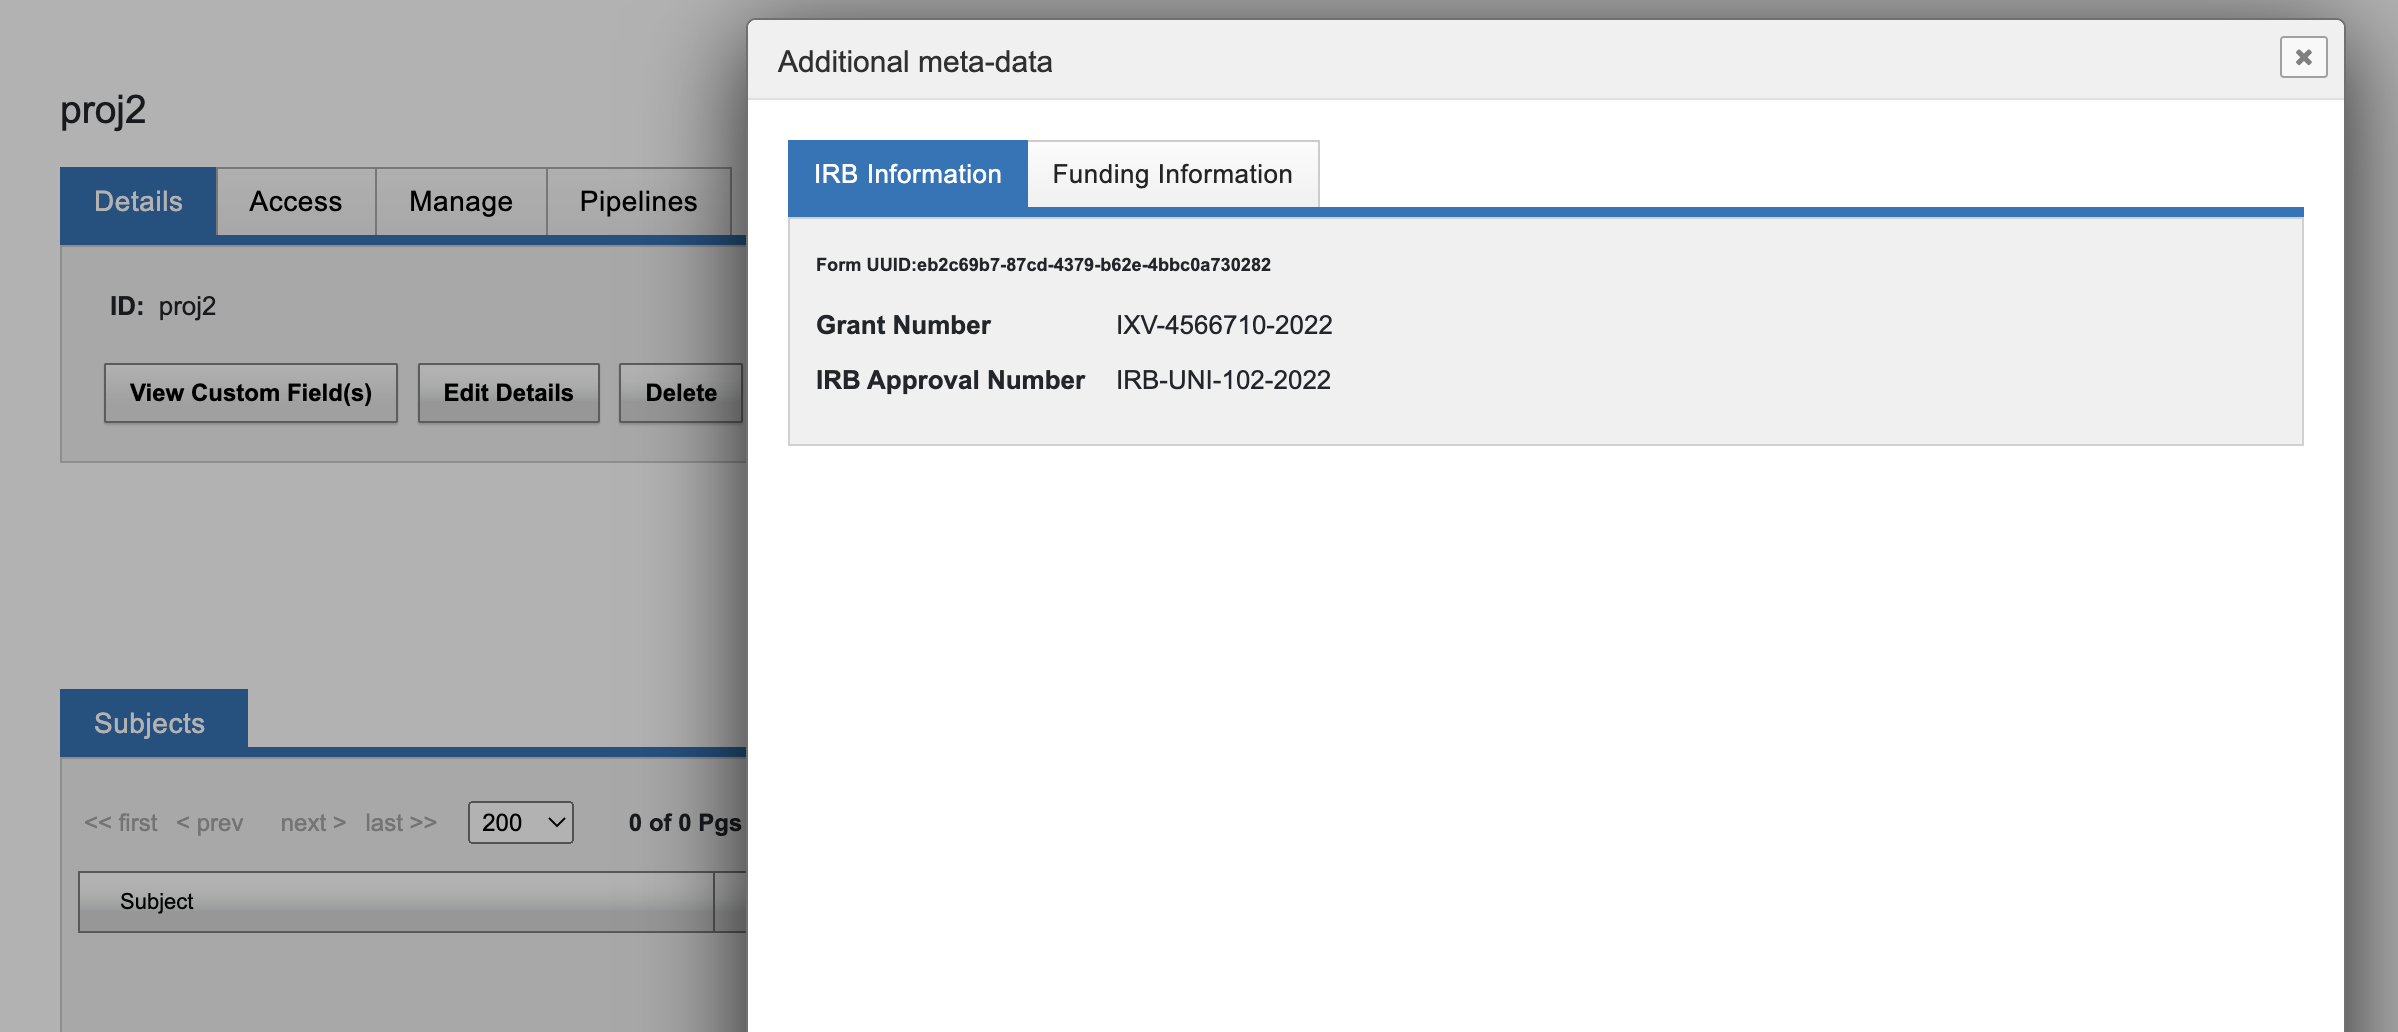
This data can be viewed from the Details tab on the project report page by clicking View Custom Fields.
Form data for a project, can be edited using Edit Details on the Details tab of the Project report page.
For the subject and experiment datatypes:
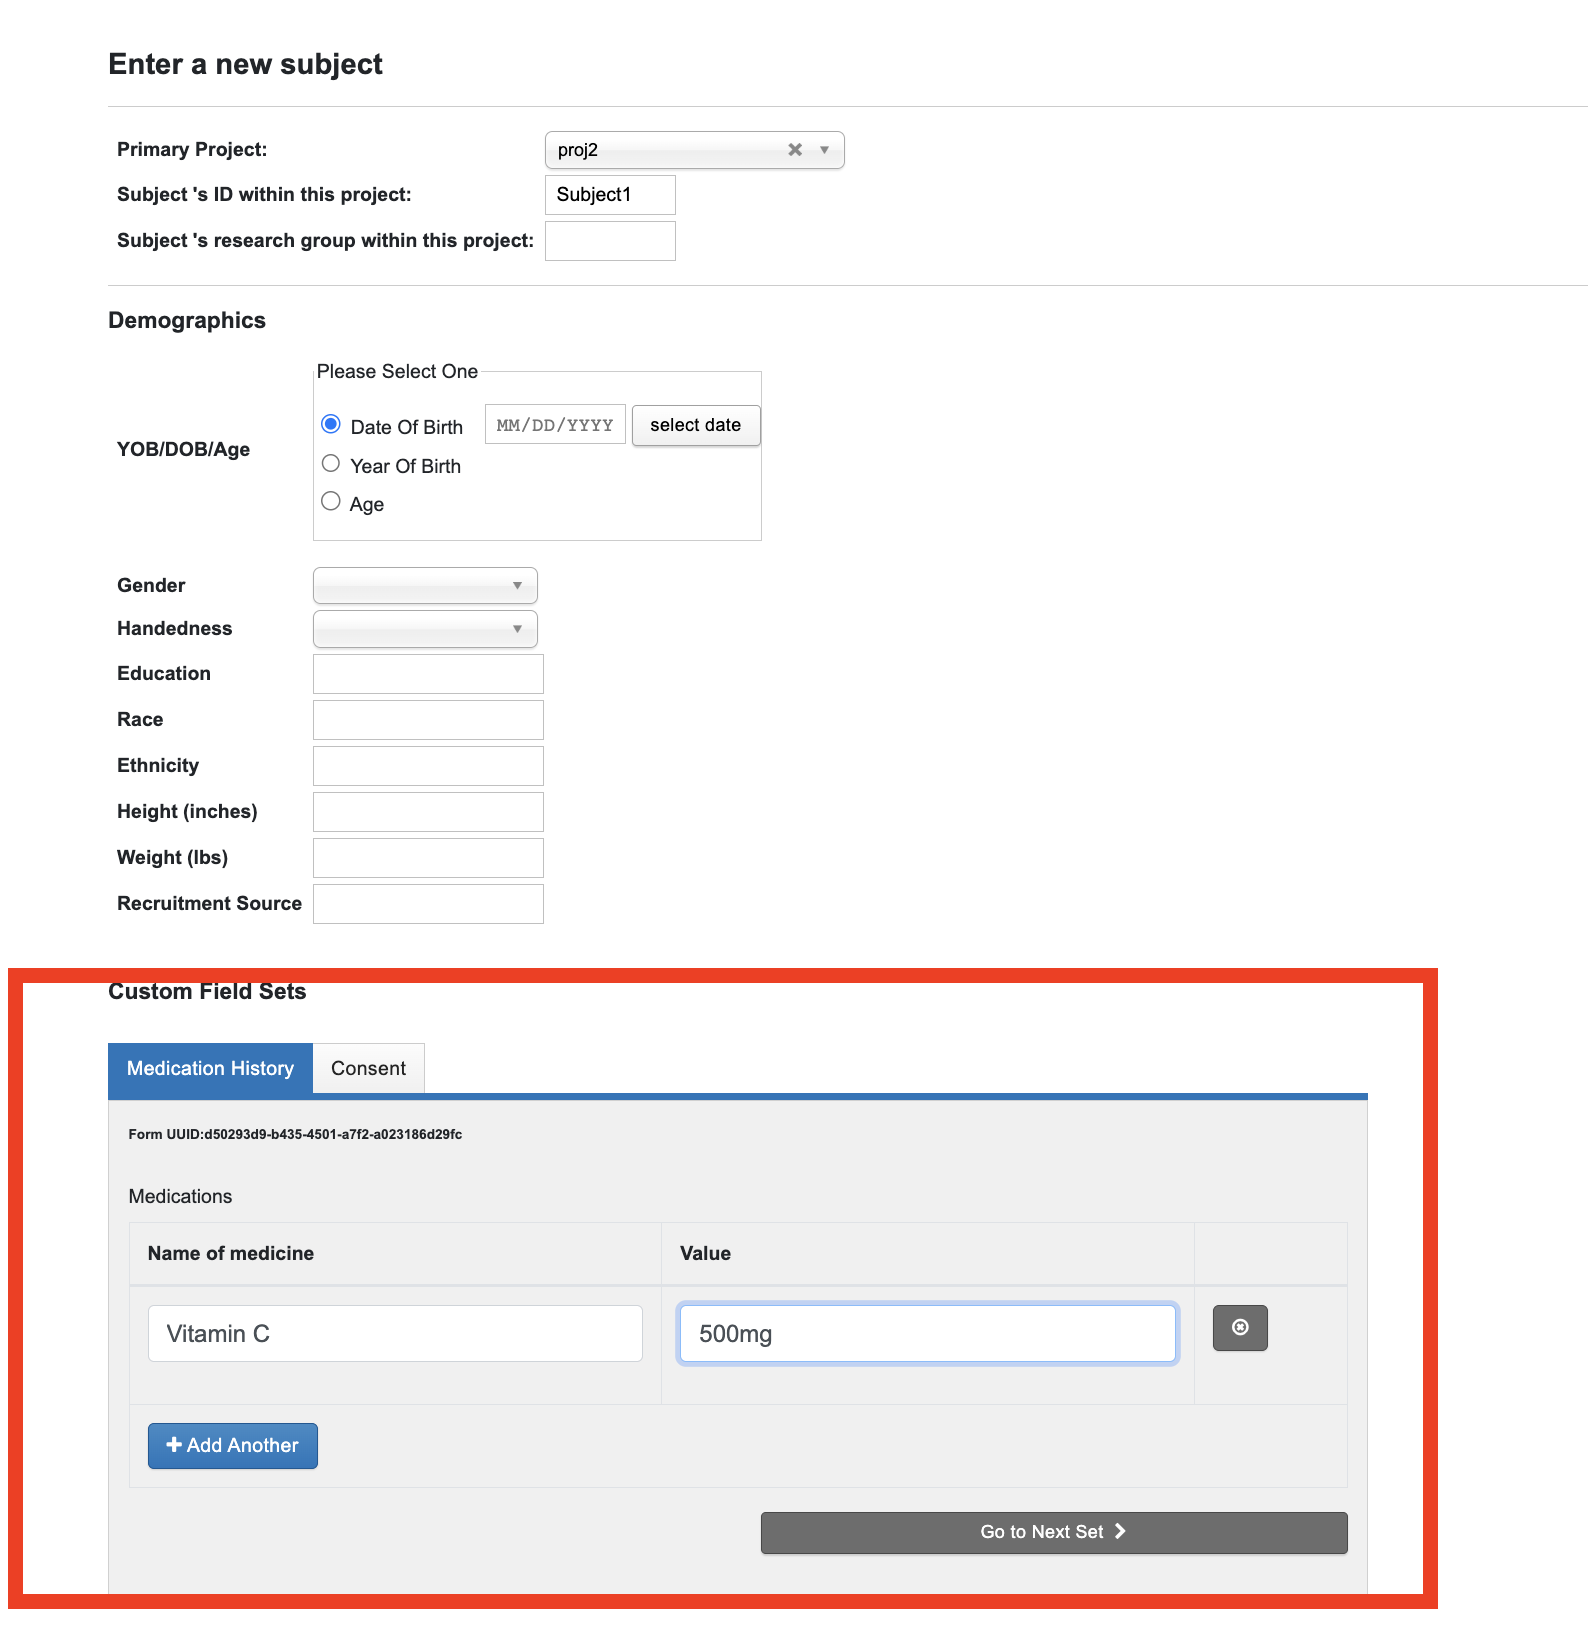
Form data can be entered while creating a new subject or an experiment.
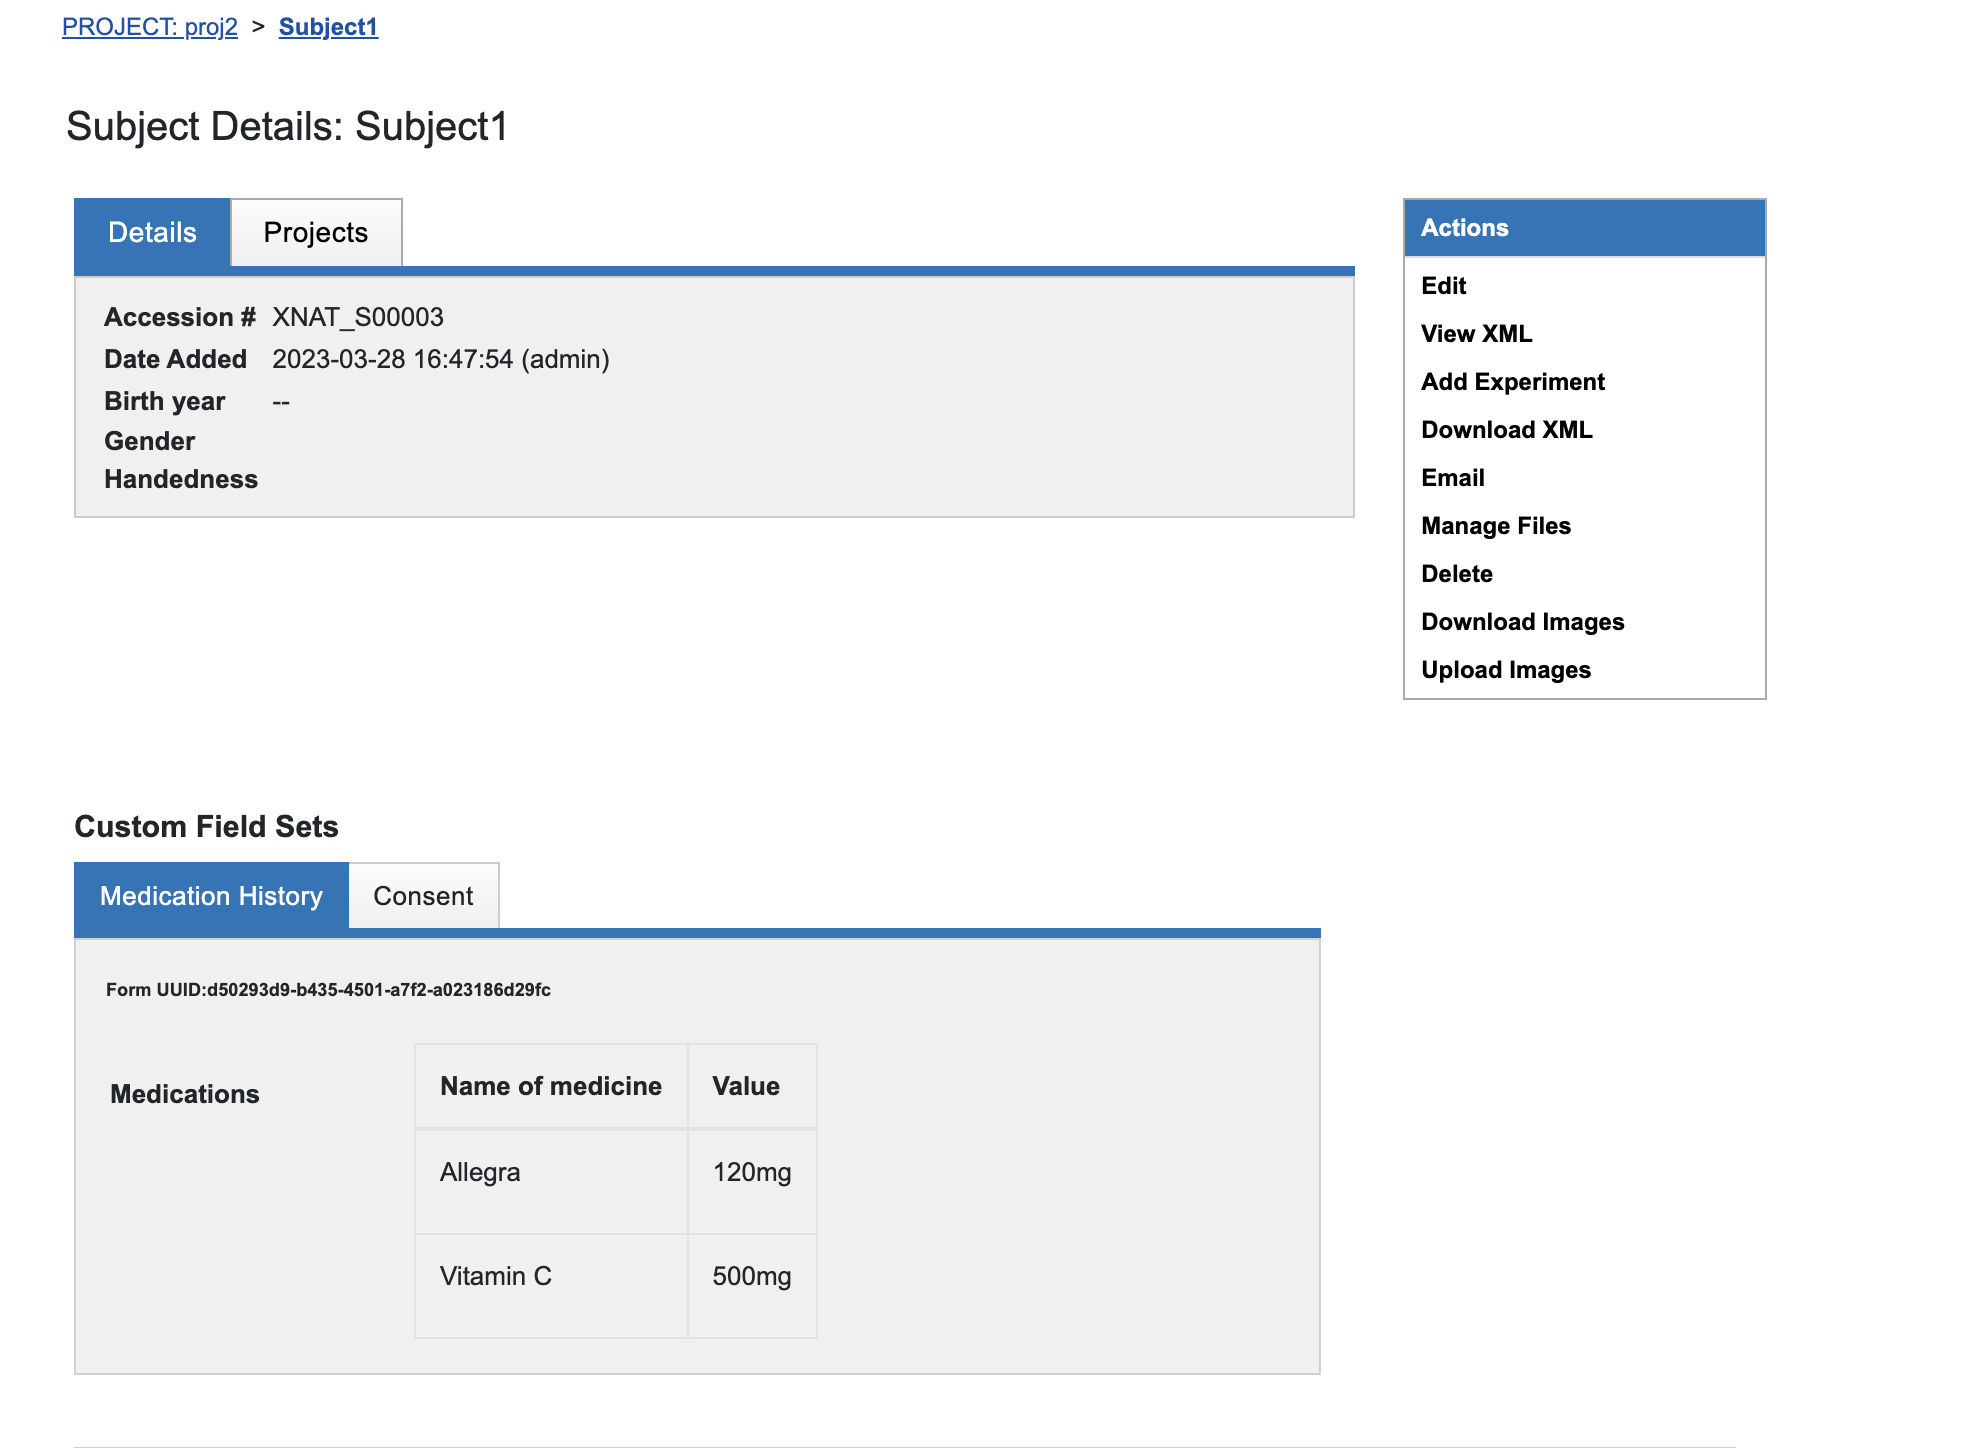
This data can be viewed on the report page of the subject (or experiment).
Existing form data can be edited using Edit link in the Actions box on the report page.
Form data
The form data is saved in XNAT under the custom_fields element for an entity. The custom_fields is also represented as a JSON. Data of a form is structured under the form uuid as key-value pairs in the custom_fields.
The value of Property Name property in the API tab of a component is the key against which the data of this component is saved in the custom_fields JSON. This value is automatically generated when a label is assigned for the component, however, you can modify this value.
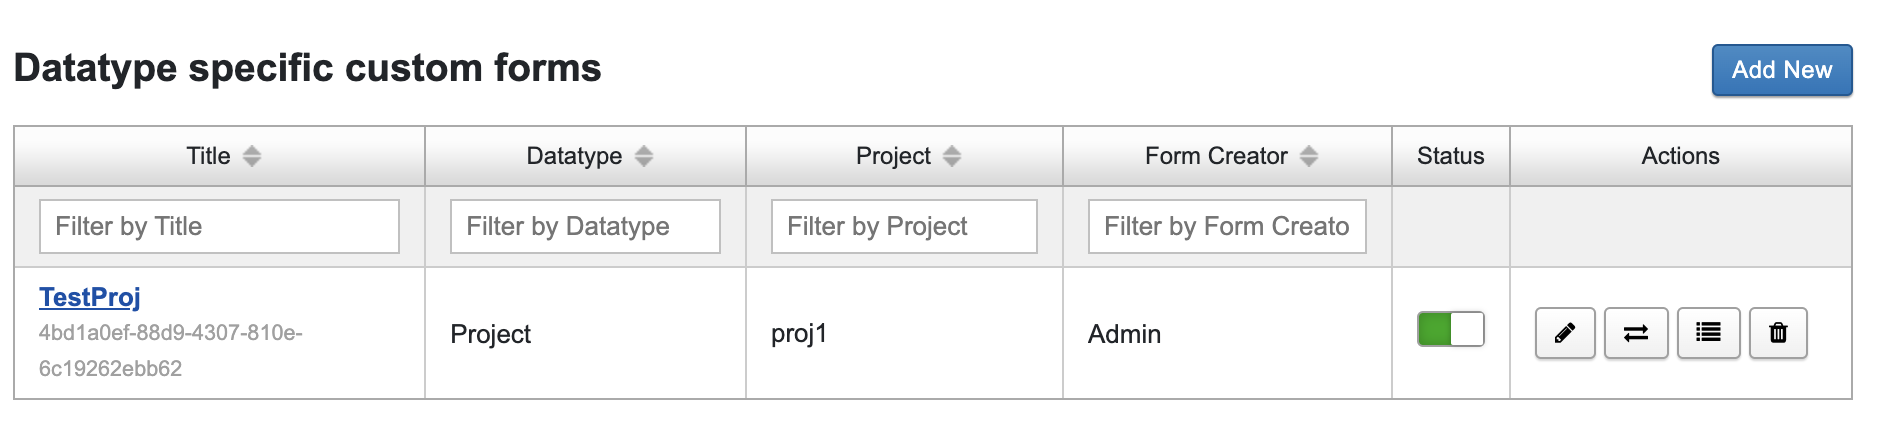
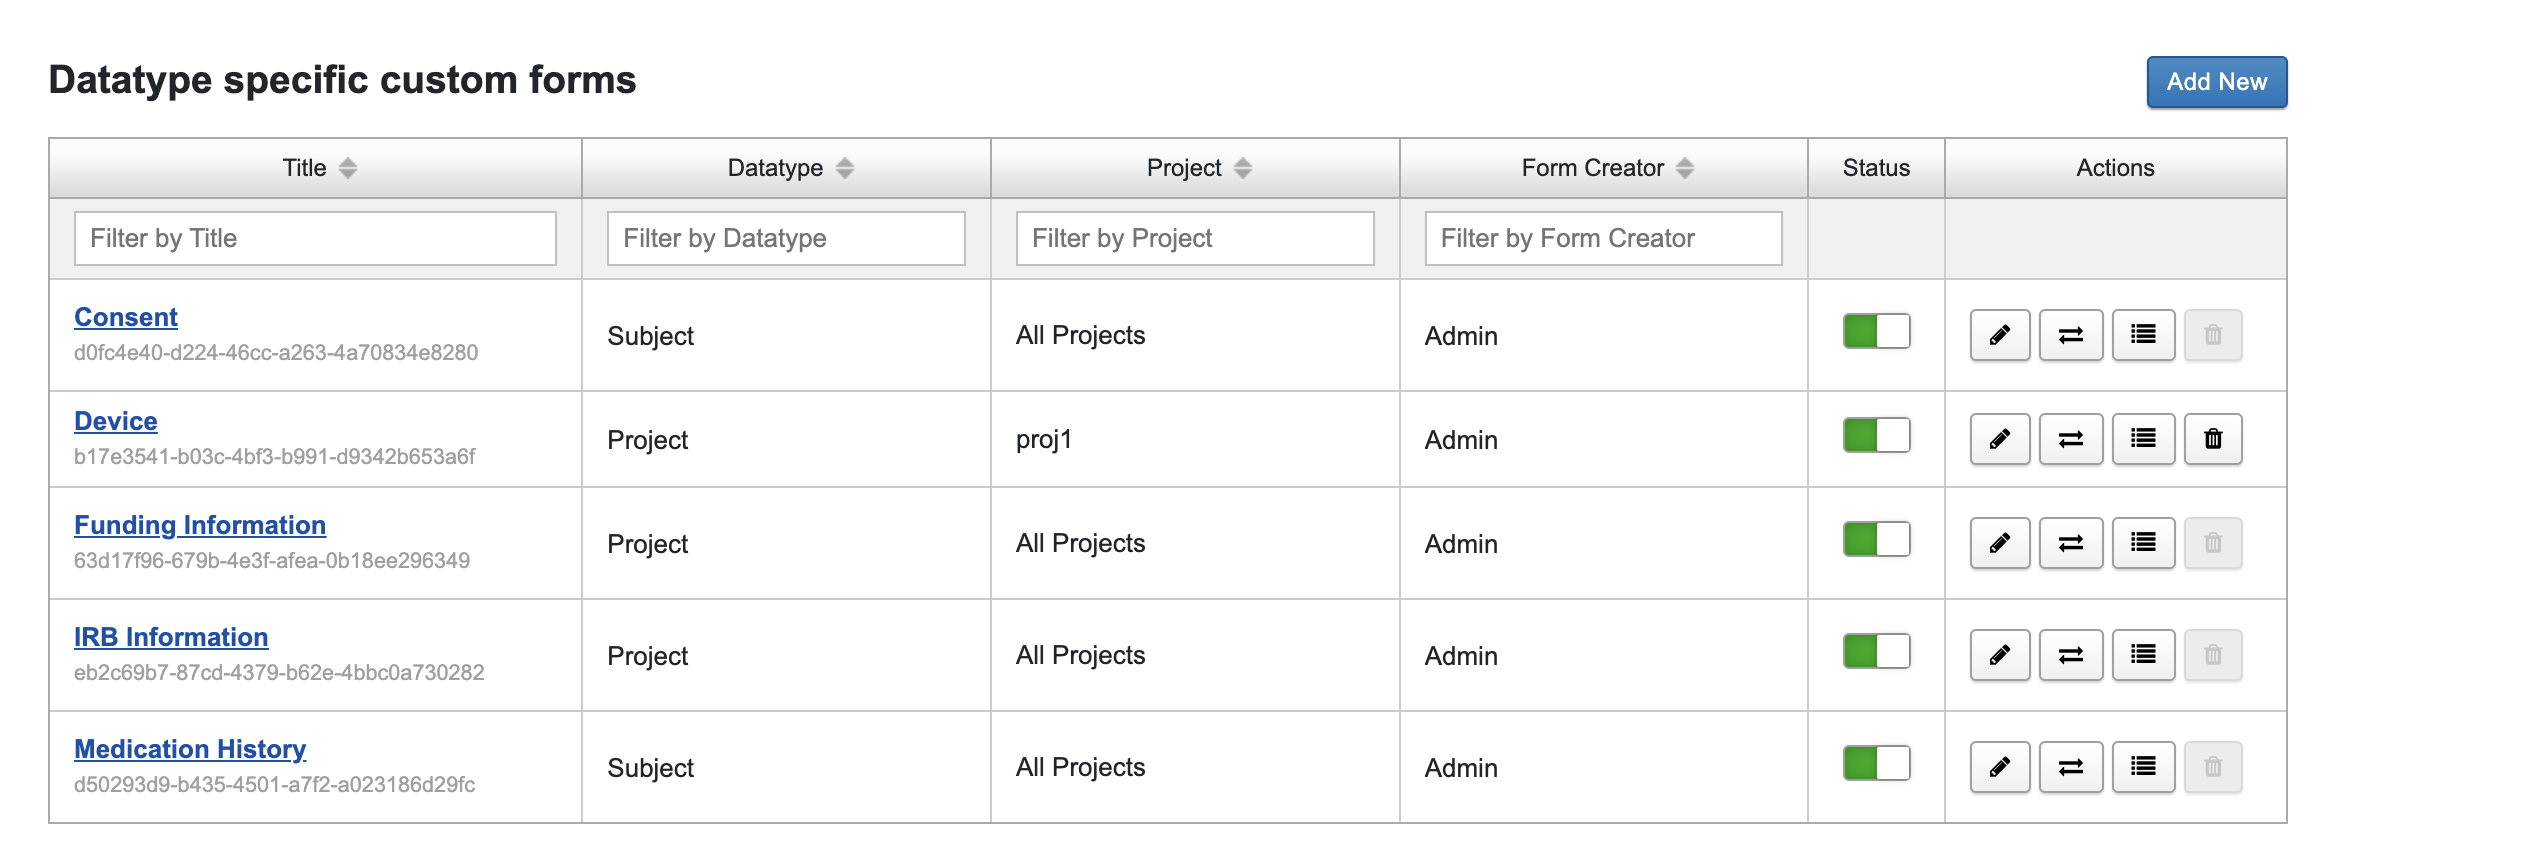
Form Management Dashboard
The form management dashboard displays forms available in a XNAT instance. The dashboard contains information about a form, the datatype it applicable to, its scope, the form creator and actions that can be performed for a form.
JavaScript errors detected
Please note, these errors can depend on your browser setup.
If this problem persists, please contact our support.