Generating Scan Snapshots and Montages in XNAT
Prior to XNAT 1.8, snapshot generation in XNAT required the use of the Autorun Pipeline and proper configuration of the XNAT Pipeline Engine. XNAT 1.8 introduces new functionality which uses an internal snapshot generation service, removing the dependency on the pipeline engine.
On-the-fly Snapshot Generation
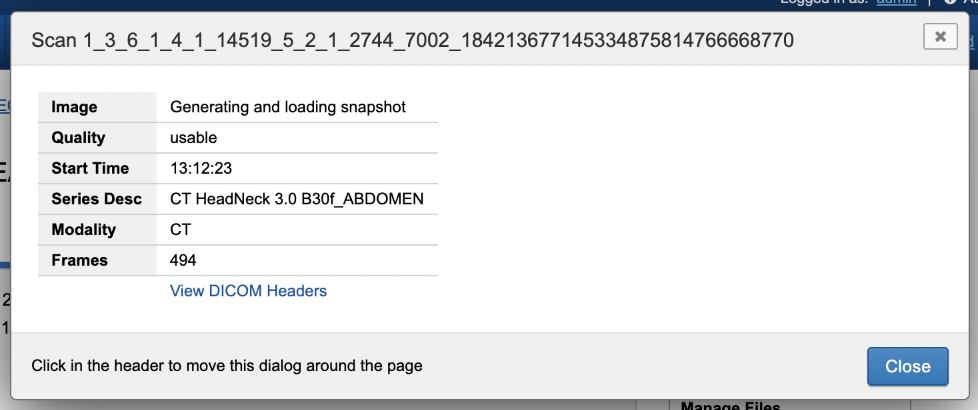
When a DICOM image session is archived, XNAT stores the DICOM image files as resources, but does not generate a snapshot preview until the user requests one.
When a user clicks to view scan information for the first time, they will see a temporary message, "Generating and loading snapshot".
Then, in a moment's time, the snapshot will be generated and this message will be replaced with an image of the center slice of the scan.
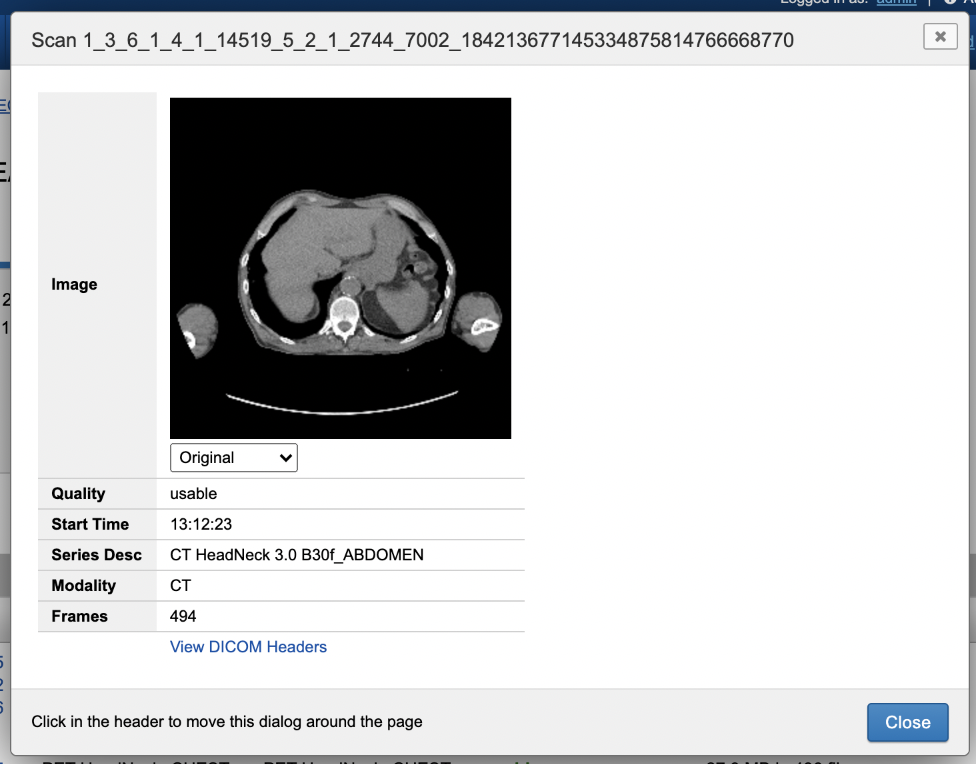
This image is clickable, and on click will open a full-size snapshot image in a new window.
Generating a Montage View
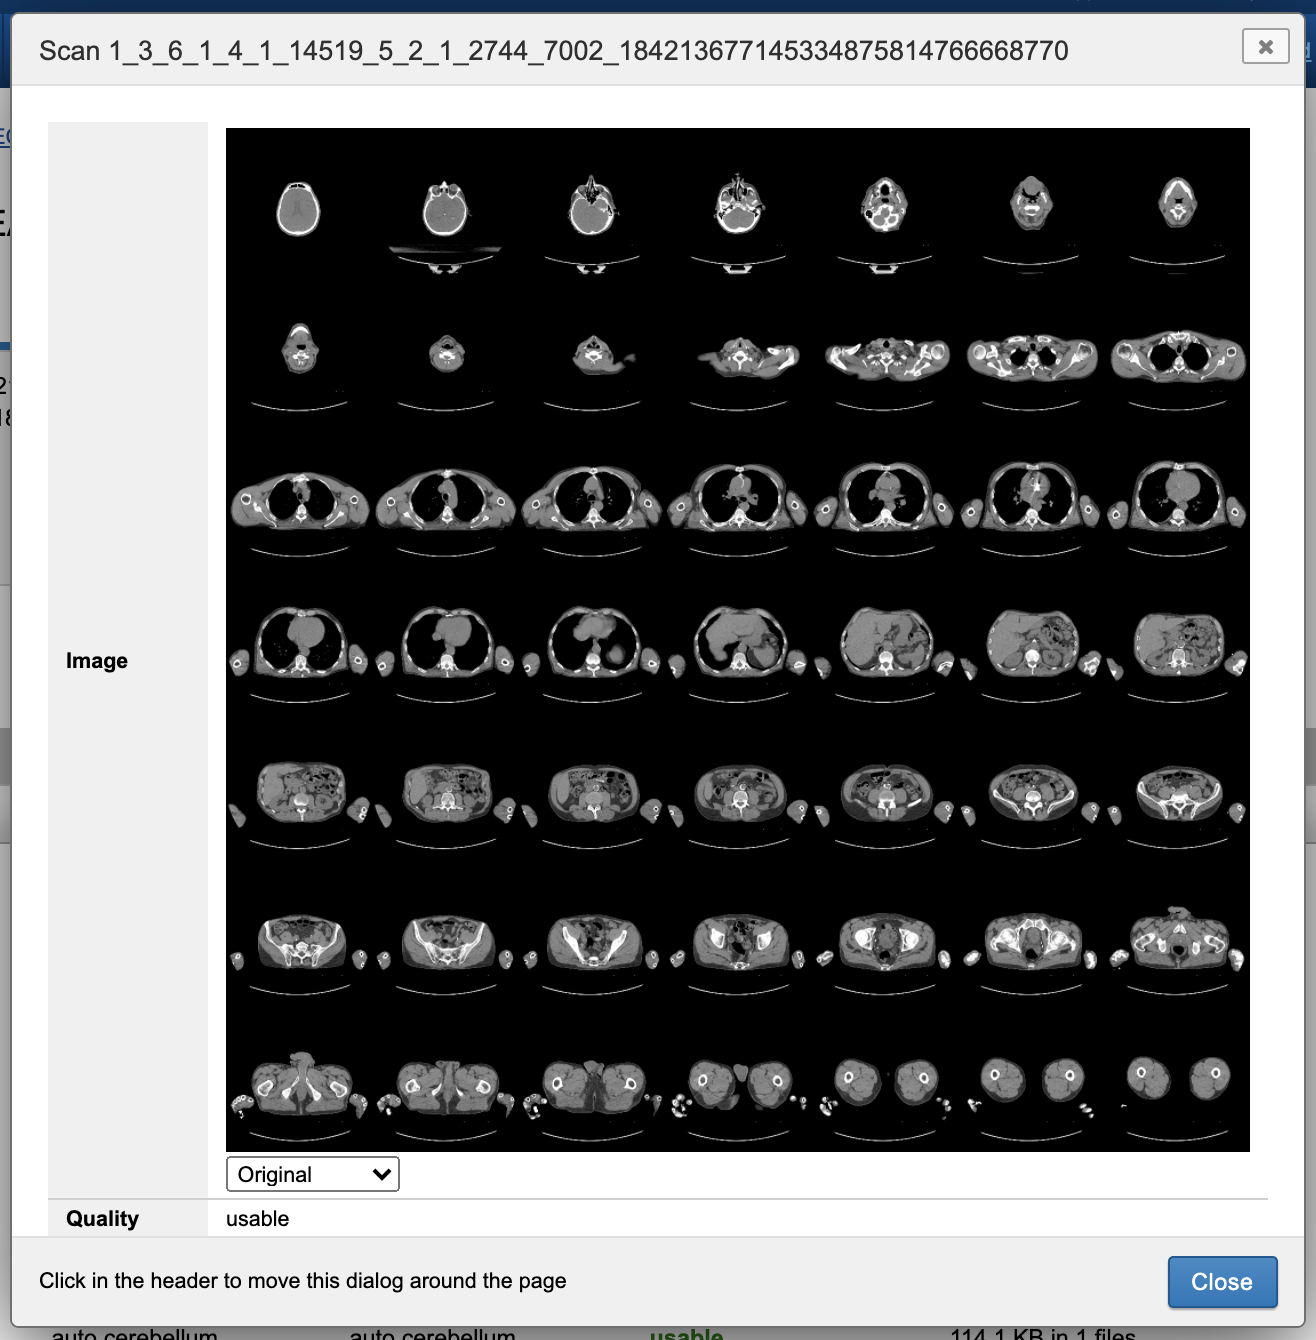
Below the snapshot image is a drop-down menu with a set of preset montage selections. Selecting one of these will send a request back to the XNAT server to generate a montage view on the fly, based on the grid that the user selects. To generate this montage, XNAT will interpolate the image stack and select equally-spaced images and stitch them together to populate the grid.
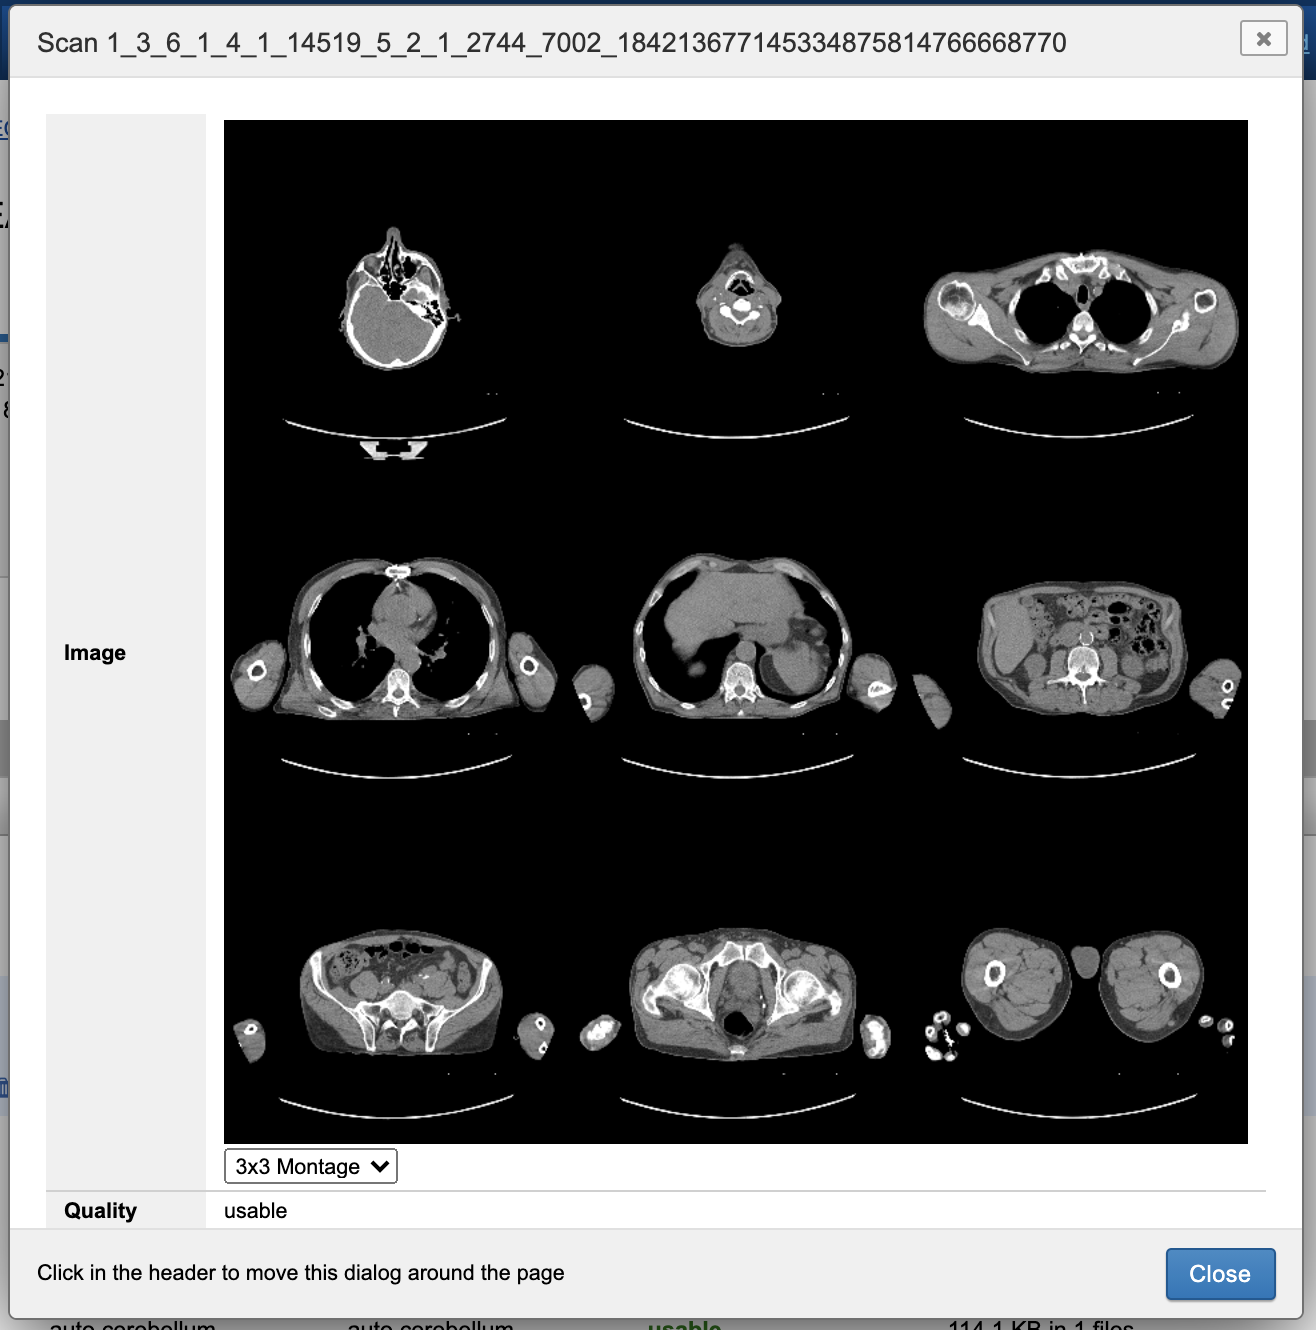
The image URL that serves up this image is a dynamic REST endpoint of the Scan Snapshot Generation API, where the X and Y dimensions of the grid are set at the end of the URL path. It is possible to generate a custom-shaped grid by submitting your own values for X and Y.
Uploading a Custom Snapshot
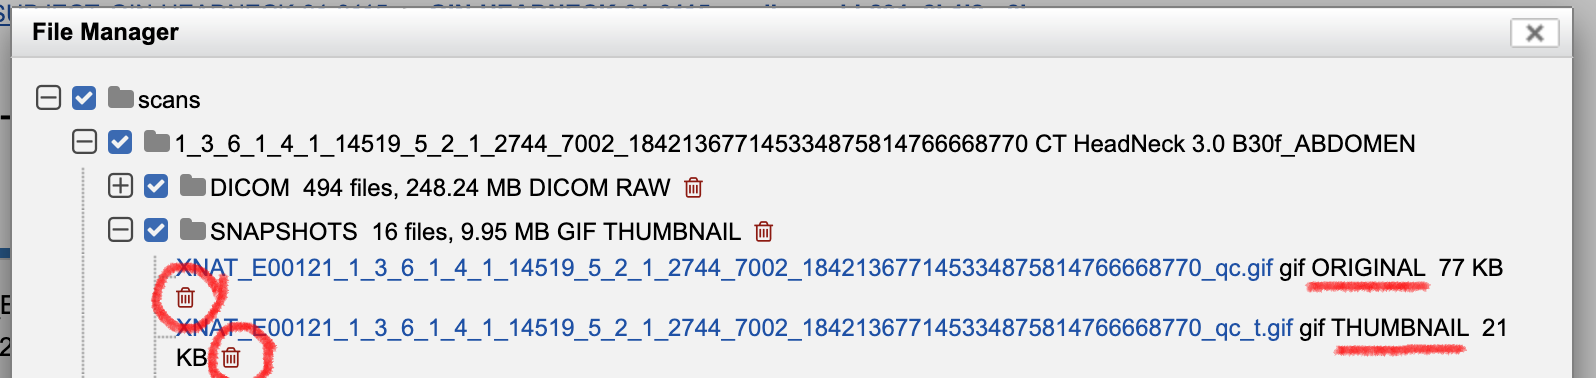
If you choose, you can create your own set of snapshot images for a given scan and upload them as scan resources. Once in place and properly named, XNAT will display the custom snapshot instead. For reference, open the Manage Files interface on an image session with generated snapshots. You will see (at least) two resource files for each scan, stored in the "SNAPSHOTS" resource collection. (If montages have been generated, those will also be stored here.)
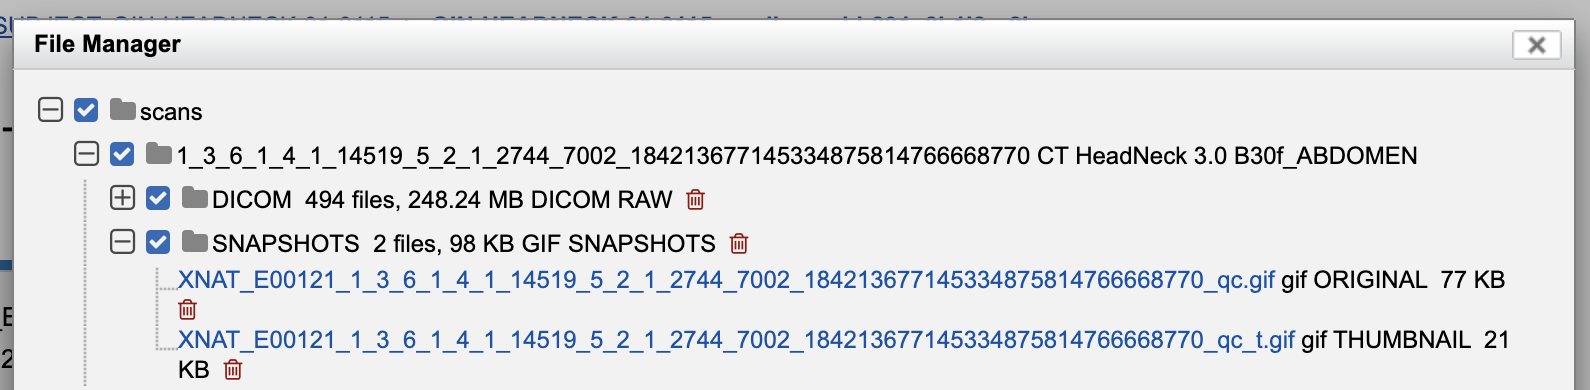
The snapshot tagged as "THUMBNAIL" displays in the scan preview dialog, and the snapshot tagged as "ORIGINAL" displays at full size when the user clicks the thumbnail. A user with the ability to write data to image sessions can set a new set of snapshot images to display. For example, we could generate and upload a 7X7 grid view and use that as our default thumbnail. Here are the step-by-step instructions.
1. Generate the "original" snapshot image for a 7X7 montage, using the API reference below. You can paste the full API endpoint, including the XNAT server address, into a new browser window to generate the montage image and save it to your desktop. Save the file as "7X7.gif".
2. Generate the "thumbnail" snapshot image for a 7X7 montage, using the API reference below. Follow the same process as above, using "/thumbnail" rather than "/snapshot" in the path. Save the file as "7X7_t.gif".
3. On the image session report page, open the Manage Files dialog and delete the current default thumbnail files. Look for the images with the content tags "ORIGINAL" and "THUMBNAIL", and click the trash icons next to both of them. Don't close the Manage Files dialog when you're done!
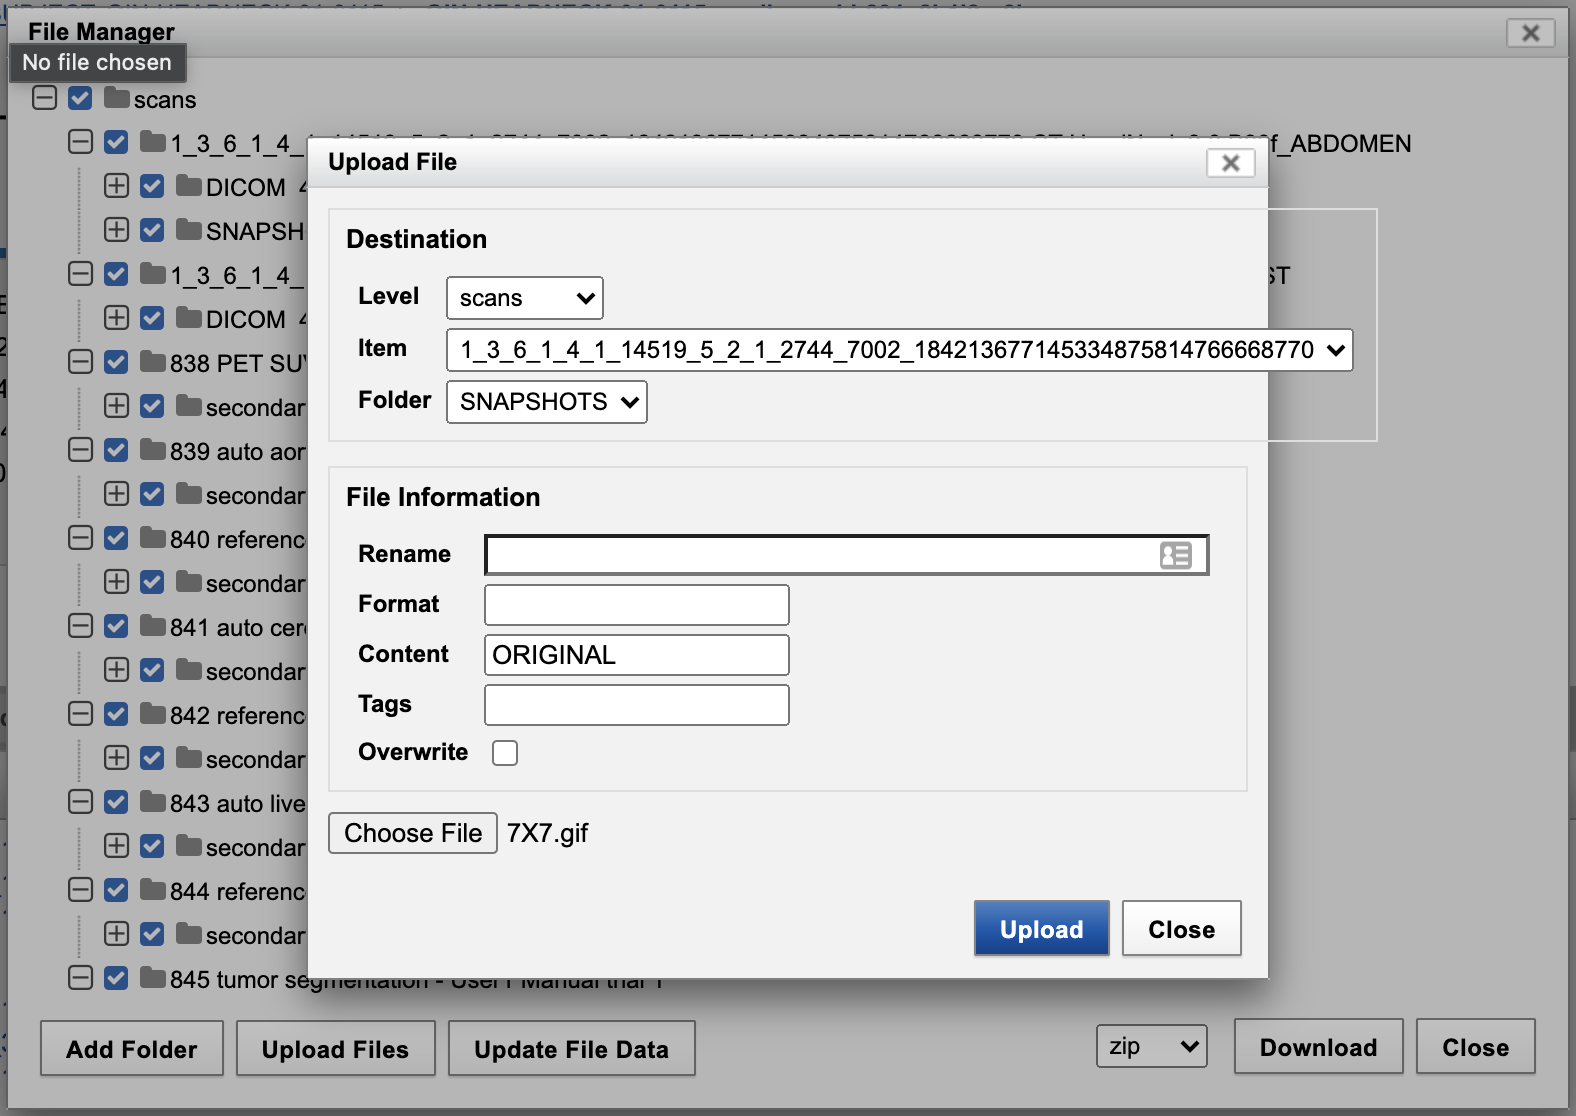
4. In Manage Files, upload your custom snapshots as scan resources. Click on "Upload Files" in the footer of the dialog. Select "scans" as the level, then select your scan, then select "SNAPSHOTS" as the resource folder. Choose your file, and be sure to add "ORIGINAL" or "THUMBNAIL" as the content label before uploading. Repeat this process for the original and the thumbnail image.
5. Close the Manage Files dialog and preview your scan. As long as your custom thumbnails are the only resource files in that folder with the content labels "ORIGINAL" and "SNAPSHOT", your custom thumbnail will appear in the preview window.
API Reference:
The snapshot generation API uses only GET calls, and each successful call returns an image. Thus, each API endpoint can be used as the "src" property on an HTML <img> tag, or be used as the browser address to generate an image in the browser.
Using "/snapshot" in the path generates a full-sized snapshot image
Using "/thumbnail" instead returns a smaller thumbnail image
Appending "/3X3" at the end of the path will generate a montage view 3 slices wide and 3 slices tall; these numbers can be replaced by your own values to generate a custom grid size
See: Scan Snapshot Generation API