Step 1: Preparing the XNAT Practical VM
Do you have an SSD?
Some of the instructions in this practical will differ depending on what kind of storage your laptop has. If you have an SSD, you will run certain commands that will rely on the speed of that kind of drive. If you have a spinning disk drive, the data speeds are not sufficient for some of the more intensive commands used in this practical, so you will run alternate commands.
If you aren't sure whether or not you have an SSD, you can find out.
Mac
Open a terminal. Execute the command
$ diskutil info disk0 | grep "Solid State"
   Solid State:              Yes
If the result is Solid State: "Yes", then you have an SSD. If not, you do not.
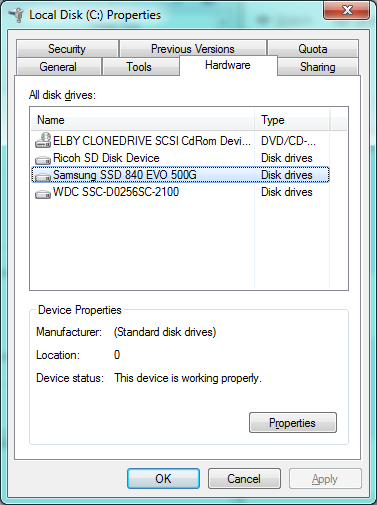
Windows
Open Windows Explorer and right-click your primary disks and click properties. Click the Hardware tab.
Set up the xnat-21 Virtual Machine
From terminal
$ cd xnat-workshop-vms
$ ./run xnat-21 setup
Starting XNAT build using 'configs/xnat-21' config...
<output snipped>
==> xnat-21: ===========================================================
==> xnat-21: Your VM's IP address is 10.1.7.21 and your deployed
==> xnat-21: XNAT server will be available at xnat-21.xnat.org.
==> xnat-21: ===========================================================
Verify that the VM was set up correctly
On some machines, the Vagrant set up for this VM will not correctly create the ZFS disks. To verify that, open VirtualBox.
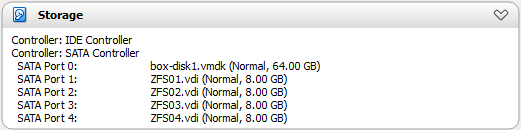
Click on the xnat-21 VM in the left side of the window. That will show you the properties for this VM. Look at the Storage section in the VM's properties.
If you see something like this:

then your VM was set up correctly, and you should continue to Step 2: Creating a ZFS Storage Pool .
If you see something more like

then your ZFS disks were not created. You will have to create them manually using the instructions on this page.
Creating ZFS disks
Power off the VM
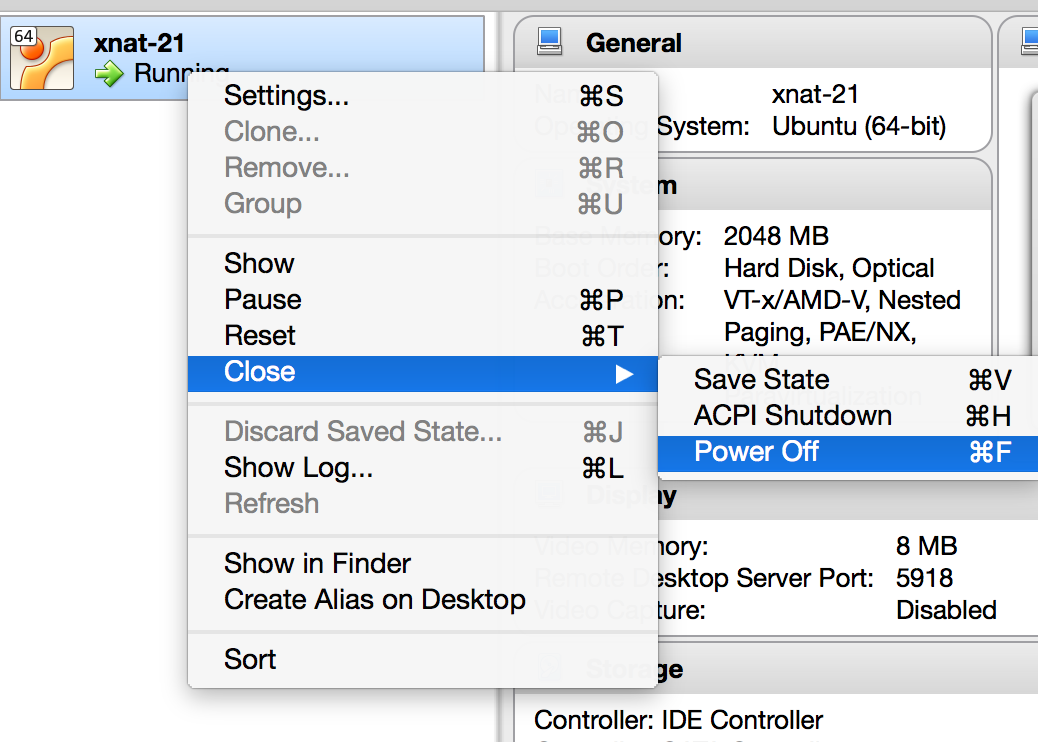
- Edit the settings of the VM. (Right click on the VM in the left pane and click "Settings...")
Windows: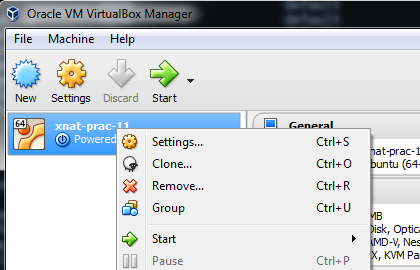
Mac: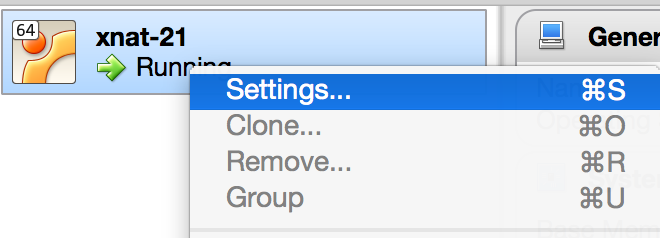
- Select Storage - Controller: SATA Controller
Windows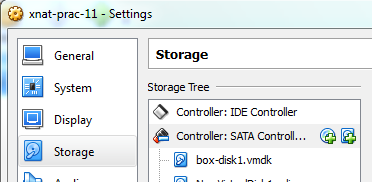
Mac
- Click the add hard disk icon.
Windows: On the "Controller: SATA Controller" entry, click the a little spinning-disk drive with a "+". (The icon on the right)
Mac: On the "Controller: SATA Controller" entry, click the a little spinning-disk drive with a "+". (The icon on the right)
or, also Mac: Click the button at the bottom of the "Storage Tree" pane with the blue square and the "+". (The icon on the left, at the bottom) Then select "Add Hard Disk".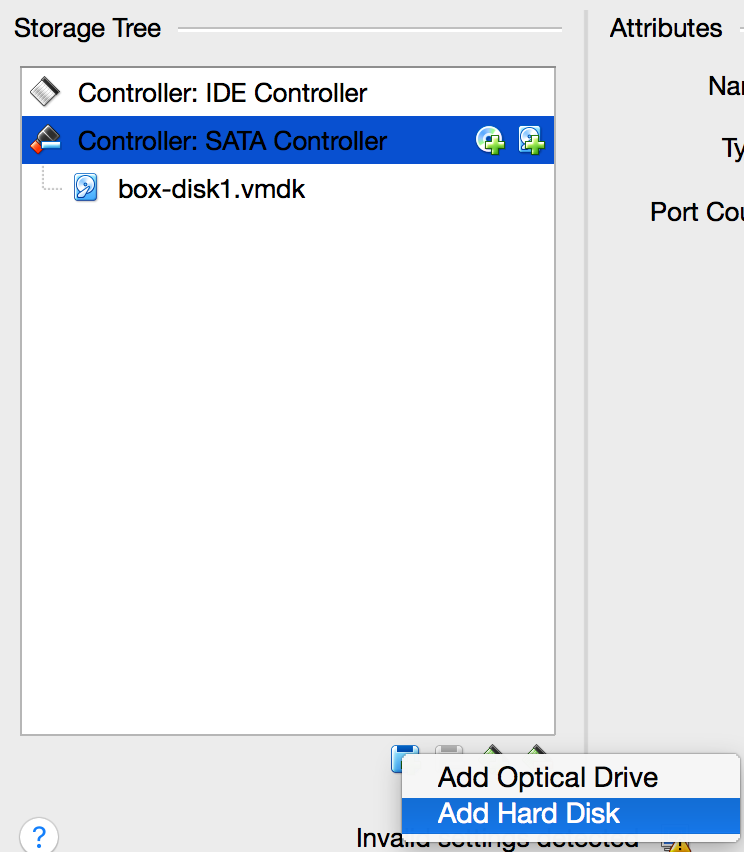
- Click "Create new disk"
Windows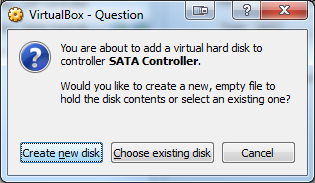
Mac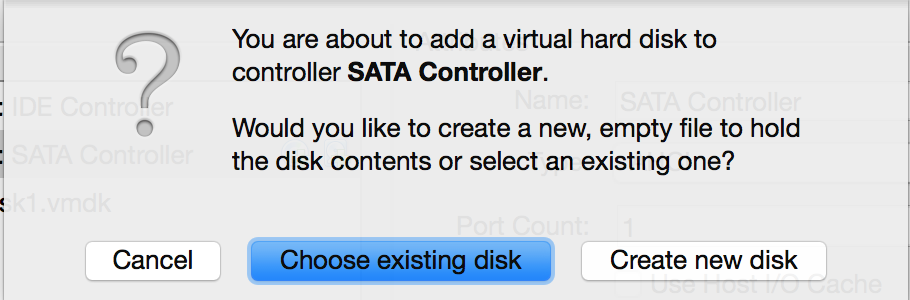
- Leave the default option ("VDI (VirtualBox Disk Image)") selected.
Windows: Click "Next"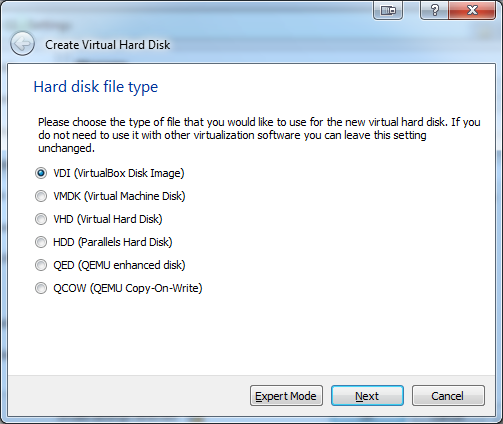
Mac: Click "Continue"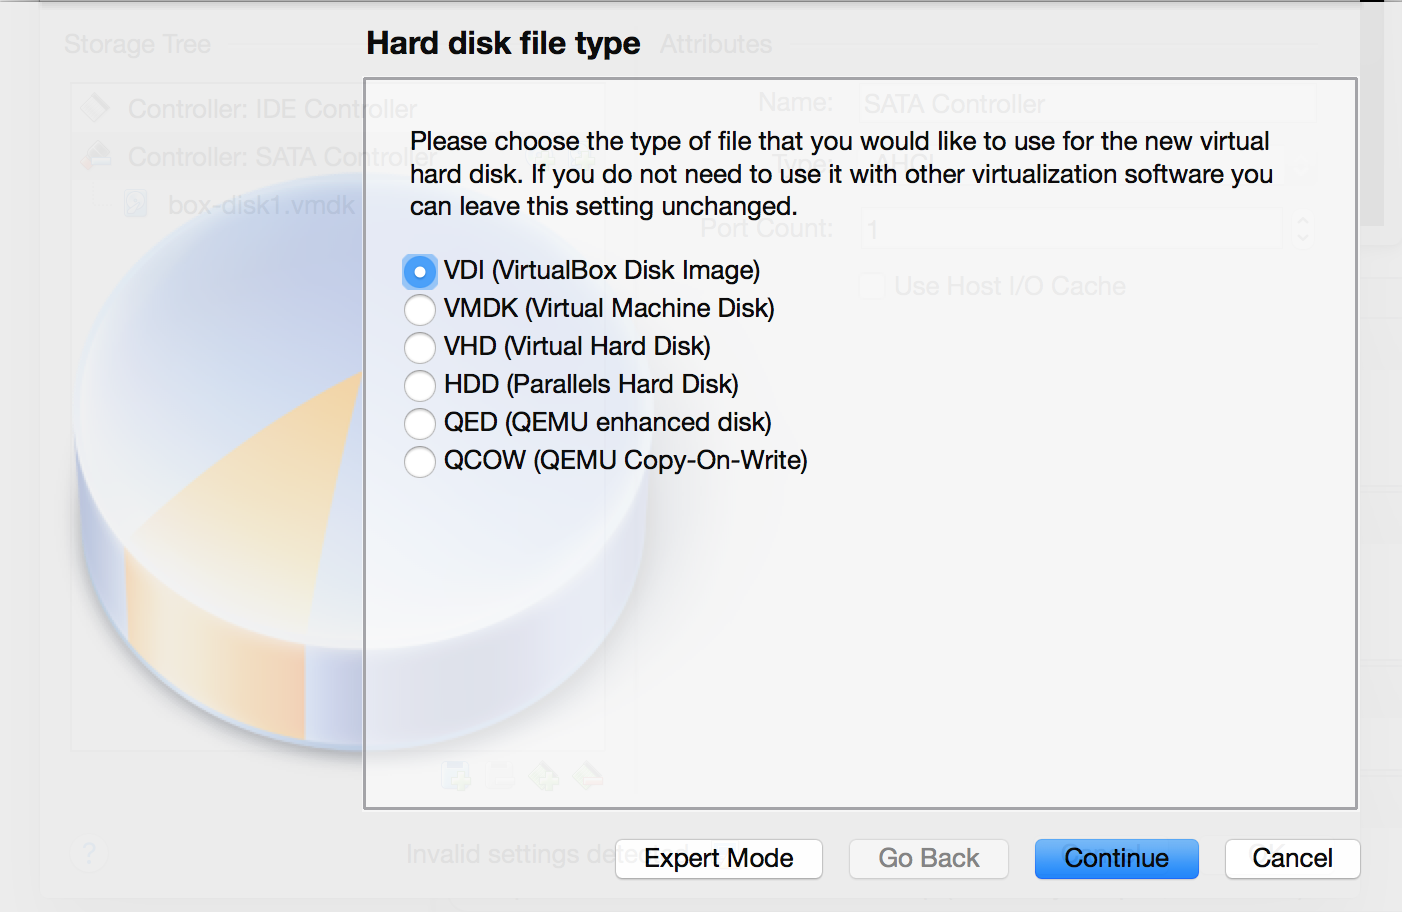
- Leave the default option ("Dynamically allocated") selected.
Windows: Click "Next".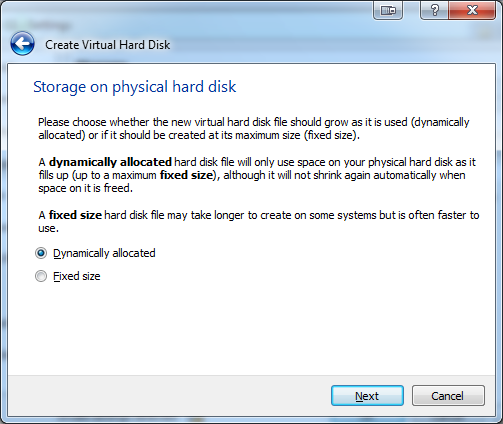
Mac: Click "Continue"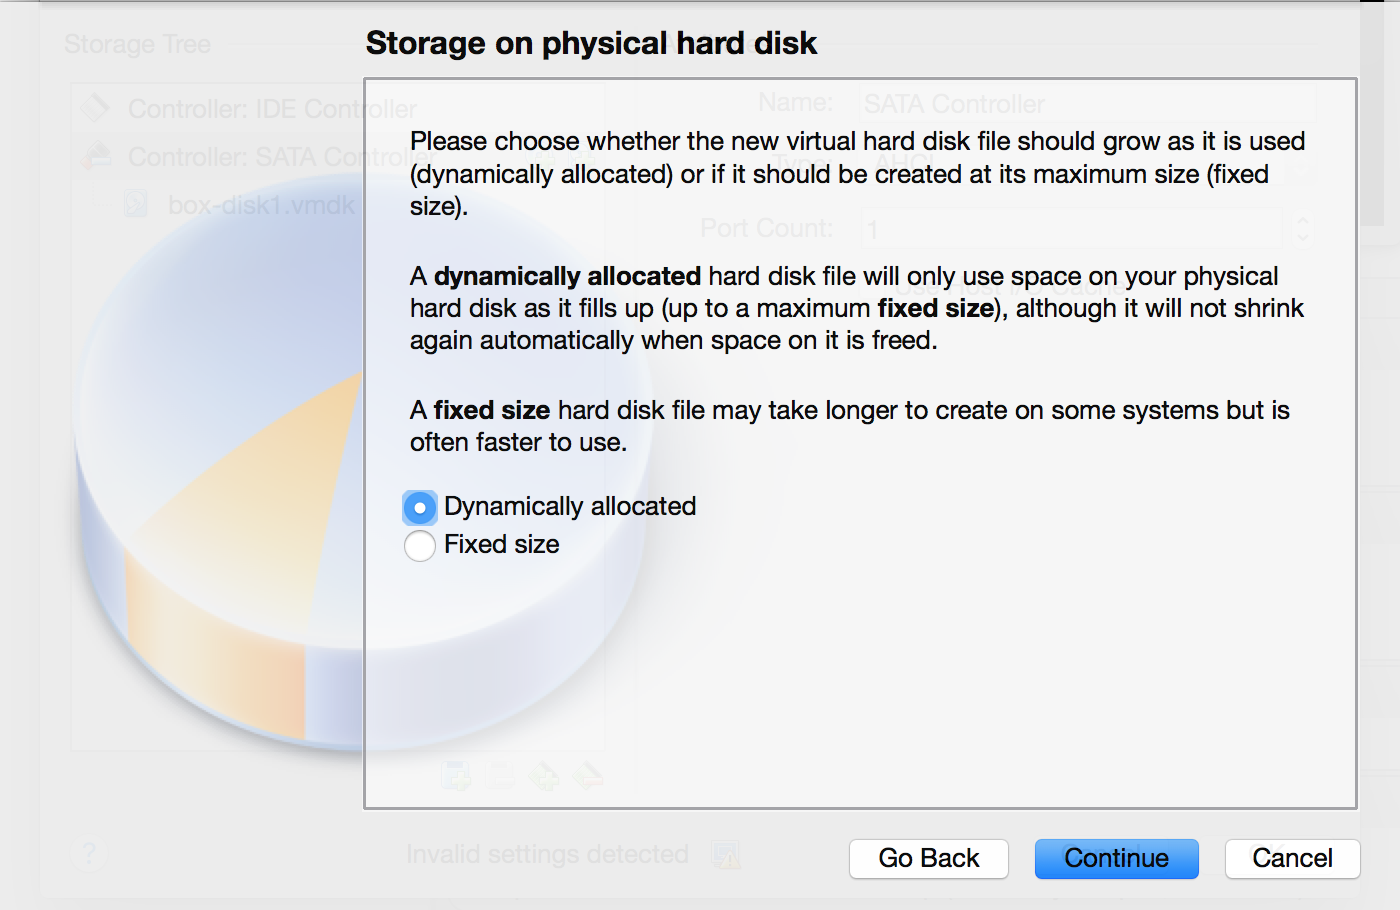
Change the name to ZFS01.
If you have an SSD, leave the size at 8GB.
If you have a spinning disk drive, make the size 24GB.
Click "Create".
Windows:
Mac: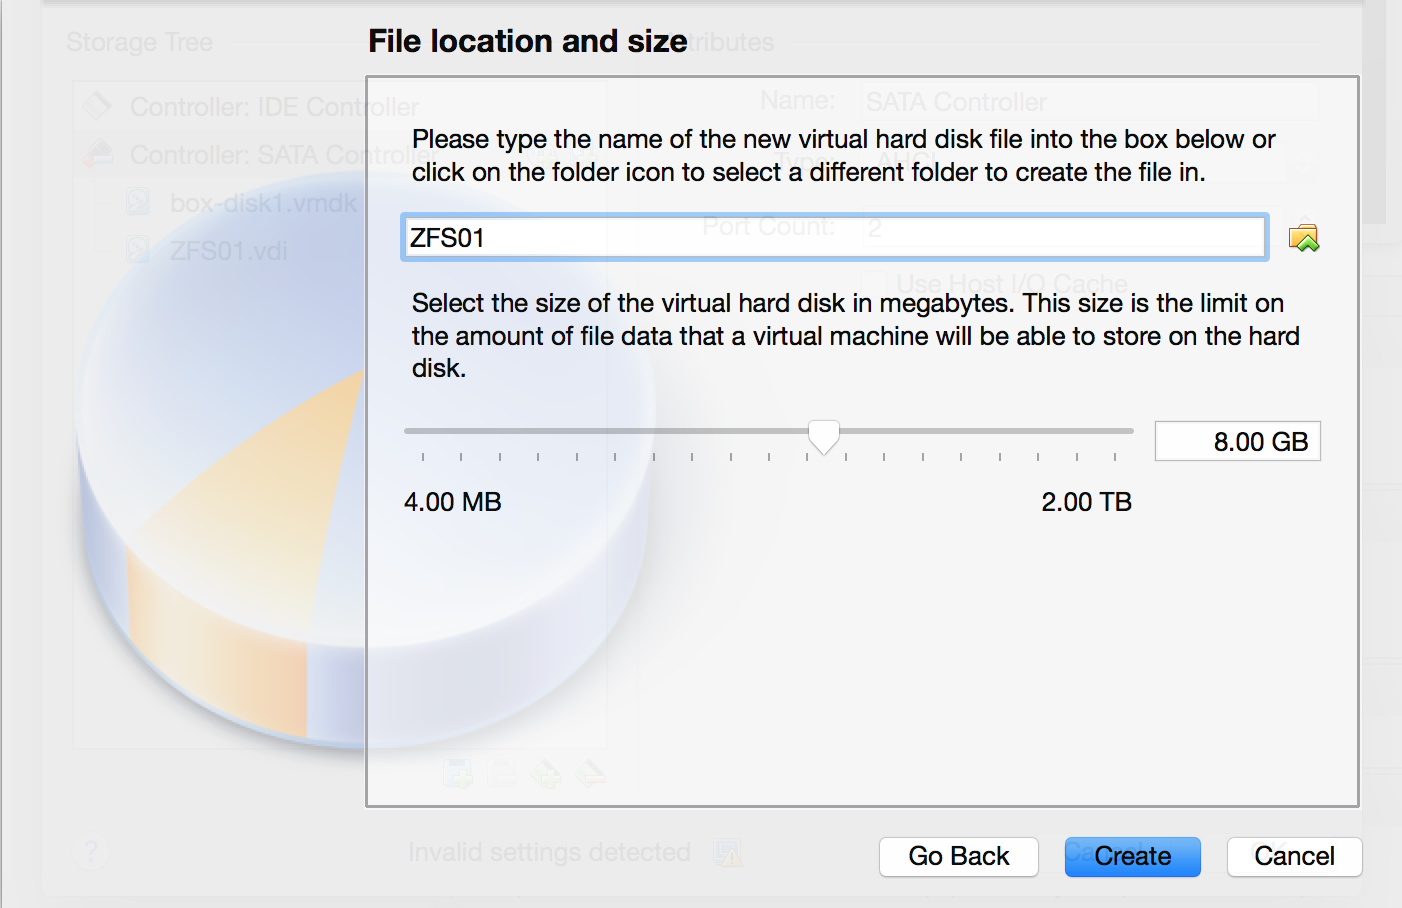
If you have an SSD, repeat steps 4–8 to create more virtual disks named ZFS02, ZFS03, and ZFS04.
If you have a spinning disk drive, do not create any more disks. You will not need them.
- Click OK to exit the Settings
- Confirm all for ZFS disks created:
Power on the VM, click Start:

Step 1 Complete