Retrospective Workflow
Start With Existing Project and Existing Contour Data
The initial assumptions of the Retrospective Workflow are:
- You have DICOM images in an existing XNAT project that are suitable for the segmentation task.
- The project already includes RT Struct objects with consistent organ labels produced by the OHIF viewer.
If you have DICOM images but have not drawn the contours using the OHIF viewer, you can use Pre-Coordinated Workflow but skip the steps for importing images from the PACS.
Create a Project Level Resource For Mapping Organ Labels
This is the same process as described above. The map created is not used by the Event Service but will be used by the Container Service when manually transforming data to the right format.
Launch Containers on Selected Scans to Generate Training Input Files
Navigate to the Session Summary page. This page provides, among other things, a list of scans associated with the session like shown in figure below.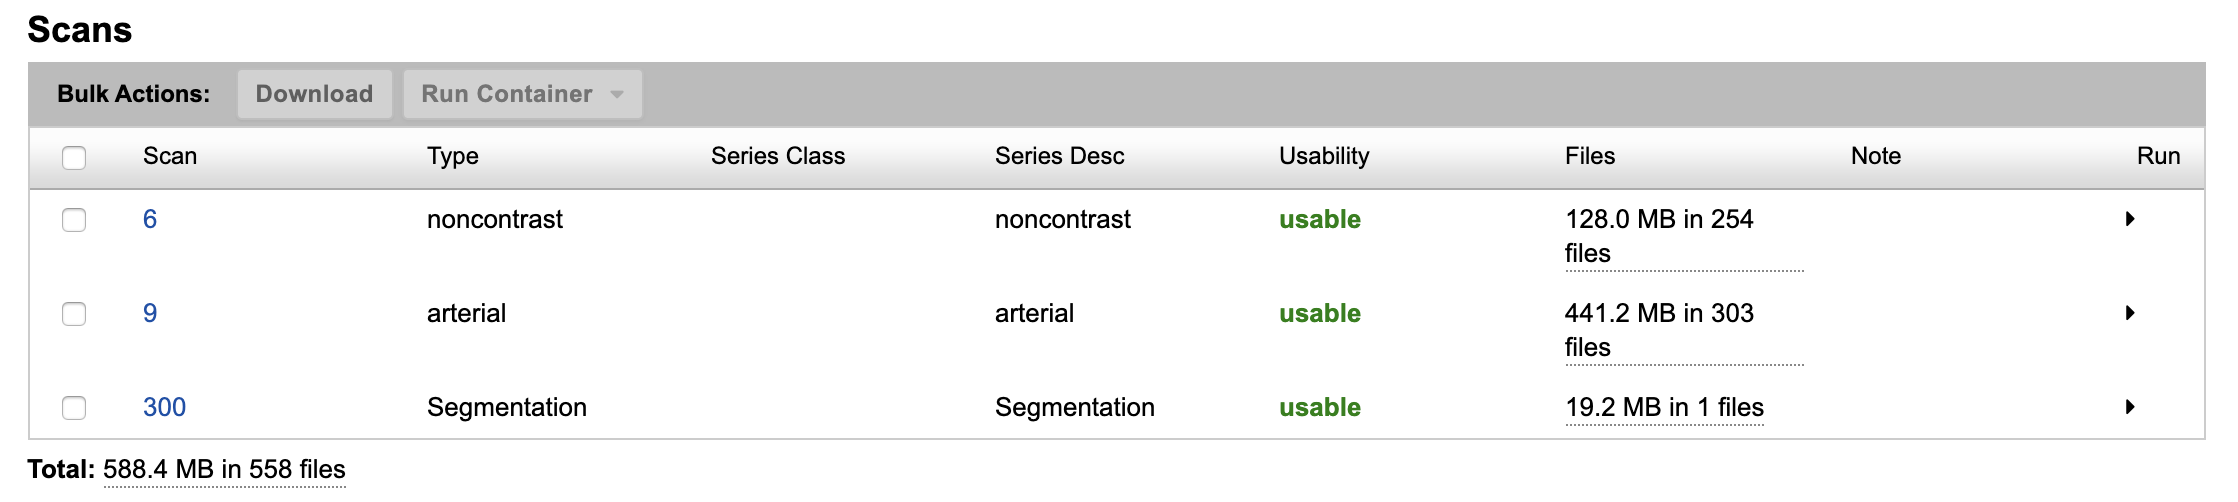
Generate Resampled image data
Image data is typically acquired in DICOM format. Machine Learning models typically require images in NIFTI format and may require voxel size different from that in the original data. Follow these steps to generate a NIFTI version of the data with appropriate sizing.
- The "Run" column provides a drop-down menu listing actions that may be performed on corresponding scans. Open this drop down. Click on nvmidl_dataconvert_scan. This opens a dialog box.
- The dialog box shows default values required by the action and enables editing some values if needed. The figure below shows the dialog box for the arterial-type scan.
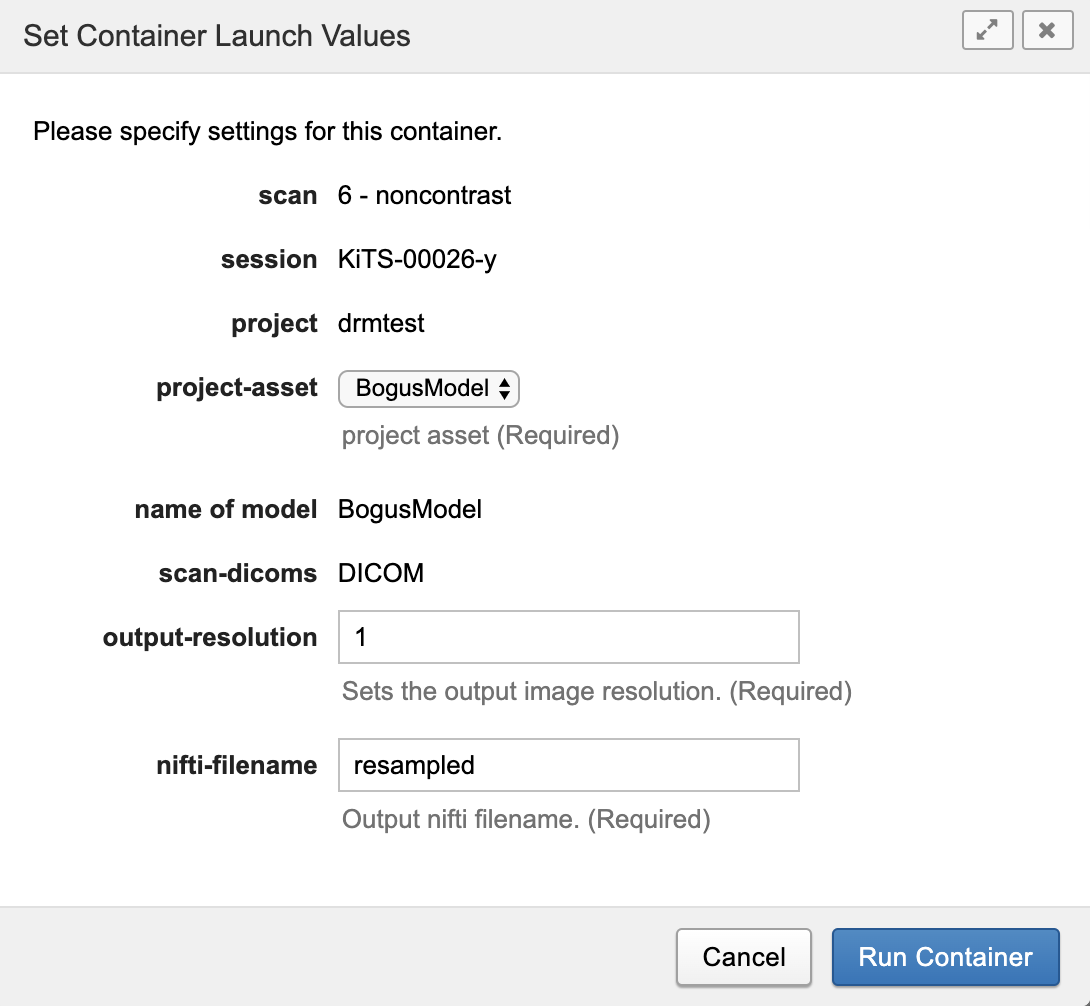
- Select the model from the project-asset drop-down. This is necessary if there are multiple models associated with this project.
- Set required output resolution. The container is built on NVIDIA's data converter, which uses the NVIDIA Clara Train SDK version 2.0, which is now deprecated. Archived Clara Train examples can be found here. Units are in millimeters. Values may be integer or float, e.g. 1 or 1.5. All three dimensions are the same if a single value is specified. Specify x,y,z values independently by separating them with a space, e.g "1.0 1.0 1.5".
- The default nifti-filename should be adequate.
- Click Run Container to launch the conversion action.
- An entry in the History table on the Session Summary page will indicate the status of the action.
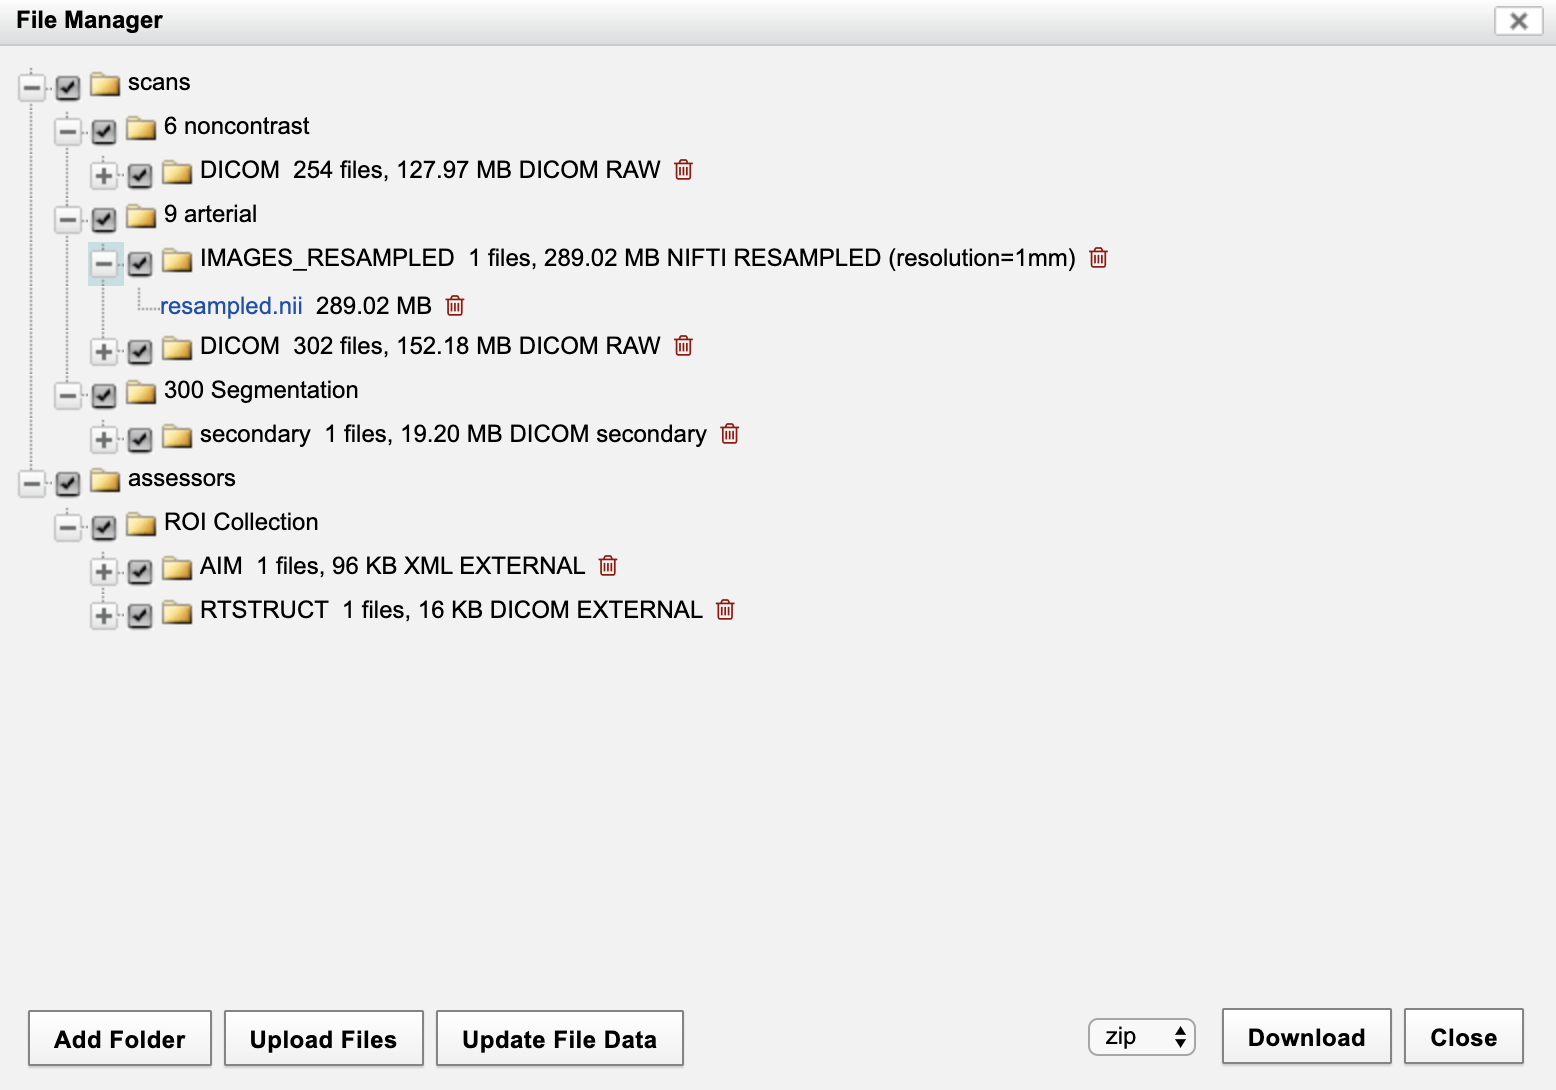
This action results in the original data being resampled and saved in NIFTI format as an XNAT resource on the scan. The generated resource can be seen in the File Manager. On the Session Summary page, click on "File Manager" in the Actions box. This opens the dialog below. Note the file in "IMAGES_RESAMPLED" directory, with the specified name, associated with the arterial-type scan with scan id = 9.
Manually Generate NIFTI mask data from RTSTRUCT
NIFTI-formatted mask data can be manually generated from contours created in the viewer. The contours are stored in ROI Collections as session level assessors. Create mask data, with the same dimensions as the original DICOM images with the following steps.
- Navigate to the Session summary page. ROI Collections will appear in the "Assessments" table at the bottom of the page. Click on the "ROI Collection" link, launching the ROI Collection summary page.
- In the "Actions" box, open the "Run Containers" drop down and select rtstruct2nii-composite-mask to launch the "Set Container Launch Values" dialog.
- Select the model in the project-asset drop-down list. This is necessary if more than one model is associated with the project.
- Click Launch Container. The container will attach the NIFTI-formated mask data as resources on the scan.
Manually Generate Resampled NIFTI Mask Data
The NIFTI mask data generated above will match the voxel size of the original DICOM data. Follow the following steps to generate NIFTI mask data with the voxel size appropriate to the model.
- Navigate to the Session summary page. In the "Scans" table, open the "Run" drop-down menu for the scan to be processed.
- Select nvmidl-dataconvert-mask to launch the "Set Container Launch Values" dialog.
- Specify the appropriate model in the project-asset drop-down list. This is necessary if more than one Machine Learning model is associated with this project.
- Specify the output-resolution (voxel size) for this model. Units are in millimeters. Values may be integer or float, e.g. 1 or 1.5. All three dimensions are the same if a single value is specified. Specify x,y,z values independently by separating them with a space, e.g "1.0 1.0 1.5".
- The default nifti-filename is adequate.
- Click "Run Container". The container will attach the the resampled NIFTI-formated mask data as a resource on the scan.
The file structure will look like the following in the File Manager.
The NIFTI-formated masks and resampled masks have been added as resources on the scan.
Complete the Steps From Pre-Coordinated Workflow
The steps from here are the same as those in Pre-Coordinated Workflow starting with Create a Training Data Set.