How to add or modify custom form data using the XNAT REST API
For reference, see the Custom Form API documentation, or view the APIs in Swagger in your XNAT instance.
This tutorial will show you how use the XNAT REST API to add, edit, or delete custom form data that is associated with a specific XNAT element. Individual instances of custom form data are stored within an object's custom field attribute and thus the custom fields REST API to interact with this data.
Gathering Required Data
In order to utilize the custom fields API you will need to obtain a bit of information related to the custom field you wish to edit. Specifically, you will need to obtain three things:
- an identifier for the custom form
- the name of the field(s) that you wish to input as well as the structure of the custom form
- an API call formation using the label or id of the element you wish to interact with
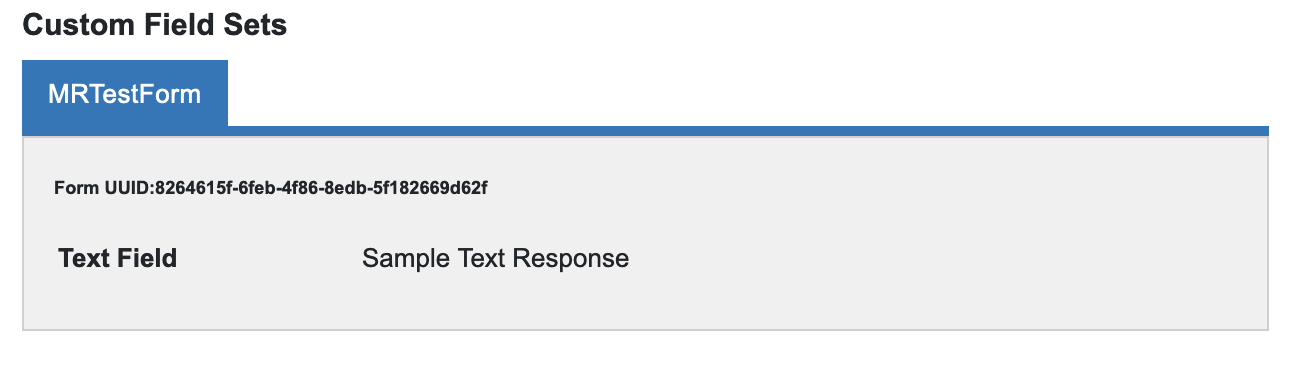
Form Identifier
Each custom form has a unique identifier, also known as its UUID. Within the report and edit pages, the UUID will be found within 'Custom Field Sets' subheader and will look something like this:
If you are a project owner of a given project, the UUIDs of forms associated with your project can be found within the project page by clicking Manage → Custom Form Configuration and then looking in the 'Title' column of the form you wish to obtain a UUID for. Finally, a similar process can be performed for the site-wide forms table if you are a site admin or have been assigned the 'Custom Form Manager' role by clicking Tools → Custom Forms → Manage Custom Forms in the top navigation bar. This will bring you to a table containing all of the custom forms in the system. The UUID of a given form will be located in the 'Title' column of that table.
Name of Form Fields
It will help to have a mental model of how the form data is stored within an object's custom fields.
The XNAT API treats the custom fields value as a JSON key:value object. It can contain whatever data you want, and you can use these APIs to write arbitrary non-form data there if you like.
Note: When updating an existing set of custom form JSON, the custom fields API only validates that your submitted input is a valid JSON object. No checks are performed to see if the input conforms to the format of the custom form on which you are working. As such, it is important to attempt to conform as closely as possible to the custom form JSON as possible for best results.
The custom forms integration expects to see the fields for a particular form stored under a key which is that form's unique identifier. Like so:
Example Custom Field
{
	"<form uuid>": {"<form field name 1>": "<form field value 1>", "<form field name 2>": "<form field value 2>", ...},
	...,
	"a non-form key": "a value"
}
It may help to keep this representation in mind when discussing the APIs.
In order to obtain the form structure for the specific custom form you are working on, you may use the GET API methodology on an already implemented custom field element of the same form. This functionality will be outlined later in this document.
XNAT Element ID/Label API Formation
When entering or retrieving custom form data for a given XNAT element(s), you will also need information to identify the specific element that you wish to interact with. However, within the custom fields API, there are multiple parallel methods by which you can identify certain data which will result in the same data being retrieved or edited. As such, in this section we will outline the different ways one might refer to XNAT objects when writing a custom fields API call. We will refer back to this section later when building API calls to mention that the same call can be built in one of multiple different ways.
When interacting with custom fields for a project, there will only be one way of creating an API call: the project ID. In this case, the API call will be created in the format:
- /projects/{project id}
For subjects, however, you will have multiple to obtain the same data:
- /subjects/{subject accession number}
- /projects/{project id}/subjects/{subject accession number}
- /projects/{project id}/subjects/{subject label}
As you can see, providing the project id will allow you to access subject data using the more easily human readable subject label rather than needing to use the subject accession number. However, you may also access the subject API directly with that number.
For experiments, a similar outline can be created:
- /experiments/{experiment id}
- /projects/{project id}/experiments/{experiment id}
- /projects/{project id}/experiments/{experiment label}
- /projects/{project id}/subjects/{subject accession number}/experiments/{experiment id}
- /projects/{project id}/subjects/{subject label}/experiments/{experiment label}
- /projects/{project id}/subjects/{subject accession number}/experiments/{experiment id}
- /projects/{project id}/subjects/{subject label}/experiments/{experiment label}
This will continue on in a similar fashion, creating an even greater number of possibilities for both scan and image assessors. We will reiterate that for a given element type, each of these options will produce the same results. As such, once you have one you are comfortable using, you way use that in all of the following API constructions rather than needing to memorize all of the possible options.
We would also like to note that when using one of the constructions which include a project id for a subject, experiment, etc. call, you must use the original project of the element. If you have shared data such as a subject or experiment from Project A to Project B, using Project B in the API call to identify one of those shared elements will result in a 404 error.
Retrieve Custom Form Data
The most basic action that can be performed on custom fields data within the XNAT API is retrieval. To do this, you will use a GET method built using one of the formations outlined in the above section. In addition to this, there are two types of data retrieval that can be performed on custom fields: all form retrieval and single form retrieval.
In order to perform a GET method on all of the forms associated with a given element you will need to use only the formation from above without the need for the UUID of a form as mentioned in the 'Name of Form Fields' section. Using a project as an example datatype the API call would be formatted as so:
- /xapi/custom-fields/projects/{project id}/fields
This will get all of the custom form data associated with that project. Using the outline shown in the previous section, you can also obtain data form subjects, experiments, etc.
Conversely, you can utilize a form's UUID to retrieve the custom field information for only a single form. Again using the project as an example datatype you would format your API call as so:
- /xapi/custom-fields/projects/{project id}/fields/{UUID-of-form}
Again, as with the other method, you can replace the project information with another of the element formulations shown in the above section to retrieve data of other datatypes.
Add or Update Form Data
Adding and updating data will be handled with a single overlapping API call. In addition, unlike the above retrieval API, editing one form's data or all forms' data will be handled with the same API call - being differentiated only by the format of the input JSON sent alongside the call. The API call will use the same formatting as the retrieval API which is outlined in the API formation section above. For instance, using project as an example datatype, the PUT API call would be:
- /xapi/custom-fields/projects/{project id}/fields
This call will be sent alongside an input JSON which will hold the data for the custom fields you wish to add or edit. The input JSON will be formatted as outlined in the 'Name of Form Fields' section above and in response, you will receive back the updated JSON of the custom fields associated with the element. In each API call, you may input the form data for one, or many custom forms which are associated with a single element. However, it is important to note, that while omitting an entire form from the API call will cause the form to remain unchanged before and after the call, omitting certain fields from a form input will cause those fields to be changed to empty values. We will illustrate the pitfalls of this now.
If you have two forms (form 1 and form 2 in this case) associated with a single element, the fields for those forms might look something like this when displayed as JSON elements:
Example Two Form Setup
{
	"<form 1 UUID>": {"Text Area 1": "Sample text area response", "Text Area 2": "Another sample response"},
	"<form 2 UUID>": {"Text Area Form 2": "Example"}
}
As you see, the first form has two fields - both text areas in this case - associated with it which the second form contains only one field - again a text area. If you wish to edit the fields for the first text area, you might send in a JSON with your PUT call that looks something like this:
Example Single Form Input
{
	"<form 1 UUID>": {"Text Area 1": "Change to form 1"}
}
This PUT call is sending in information for only one custom field for one of the custom forms - in this case the first text area of the first form. The outcome of this will result in the following being stored for the custom fields for that element.
Example Two Forms After Change
{
	"<form 1 UUID>": {"Text Area 1": "Change to form 1", "Text Area 2": ""},
	"<form 2 UUID>": {"Text Area Form 2": "Example"}
}
As you can see, the input field caused the expected edit to 'Text Area 1' - it now reflects the changes input by the user; however, 'Text Area 2' is now empty. This is because the custom fields API is expecting to receive information for all of the fields associated with a given form. Because it does not receive input information for 'Text Area 2,' it assumes that the input for that field is empty and thus deletes the information that was previously there. As such, to avoid data loss such as this, it is important to input data for all of the fields of a given form - even if you are not changing the values for all of the fields.
However, if you look at form 2 - its fields remain unchanged. This is due to the fact that the API will only edit the fields of forms that have been input. So, because none of the fields associated with form 2 have been input, the value for 'Text Area Form 2' is not lost.
Delete Form Data
Deleting form data is handled in much the same way as the above two actions. You will use the object identifier to create a DELETE API call in the same format. Again, as with the above to sections, you will use the information found in the API formation section above as well as the UUID of the form found in the Name of Form Fields section. We will use the project datatype to illustrate the DELETE API call:
- /xapi/custom-fields/projects/{project id}/fields/{UUID-of-form}
The system will then delete the data for the form referred to by the specified UUID. The system will return an updated JSON output of the element's form data after that deletion has been completed as a response. This can be used to validate the DELETE operation.