Adding a Command
Note about who can administer Container Service features
As of Container Service version 3.7.0+ and XNAT version 1.9.2+, Site Admin can no longer administer features of Container Service. A user with Container Manager Role and Privileged Role can administer the Container Service. These roles can be additionally granted to the Site Admin to be able to administer Container Service.
To run your container via the Container Service, you must first load the Command definition into your XNAT. There are two ways to do this: you can load the Command JSON itself into your XNAT, or if you are using the Docker Standalone backend and have built an "XNAT-Ready" docker image to run your container you can pull that image and the Container Service will read the Command JSON from the image's metadata.
Load a Command JSON
While logged into XNAT with Container Manager permissions, select Administer → Plugin Settings

On the Plugin Settings page, choose Images & Commands. Click the New Command button to bring up a JSON editor.
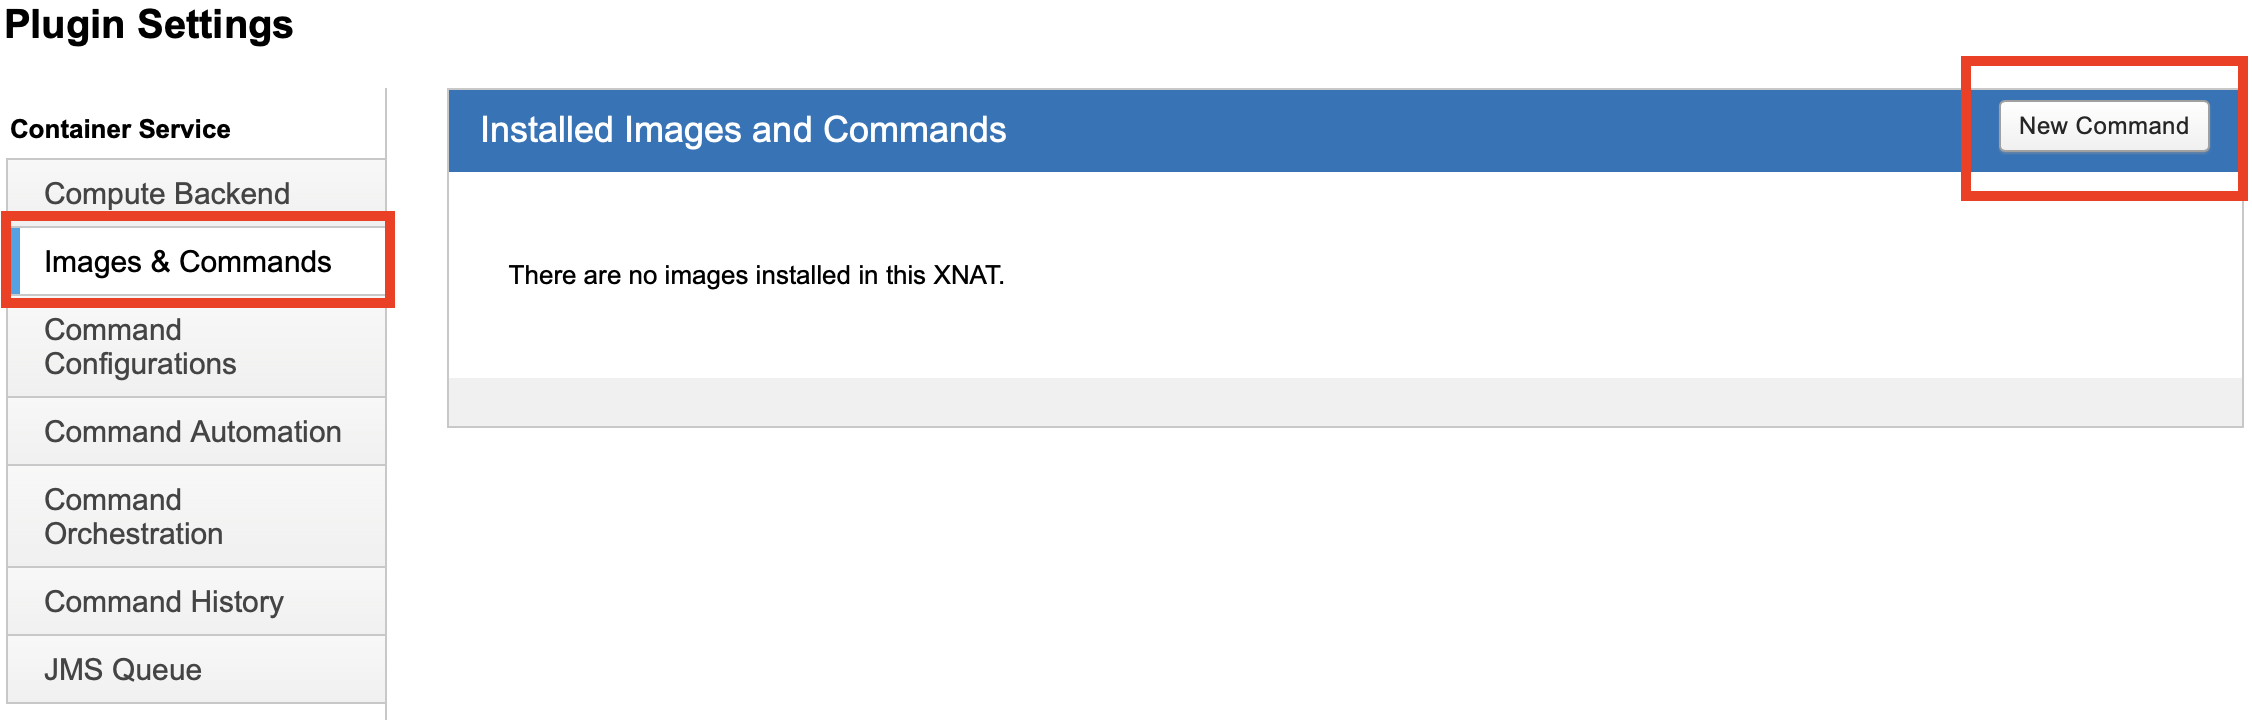
If your Compute Backend is set to Docker or Docker Swarm, you will also see a New Image button. We will discuss that button in a later section.
Paste your Command's JSON definition into the editor window. For instance, in this screenshot we have pasted the xnat-hello-world Command JSON.
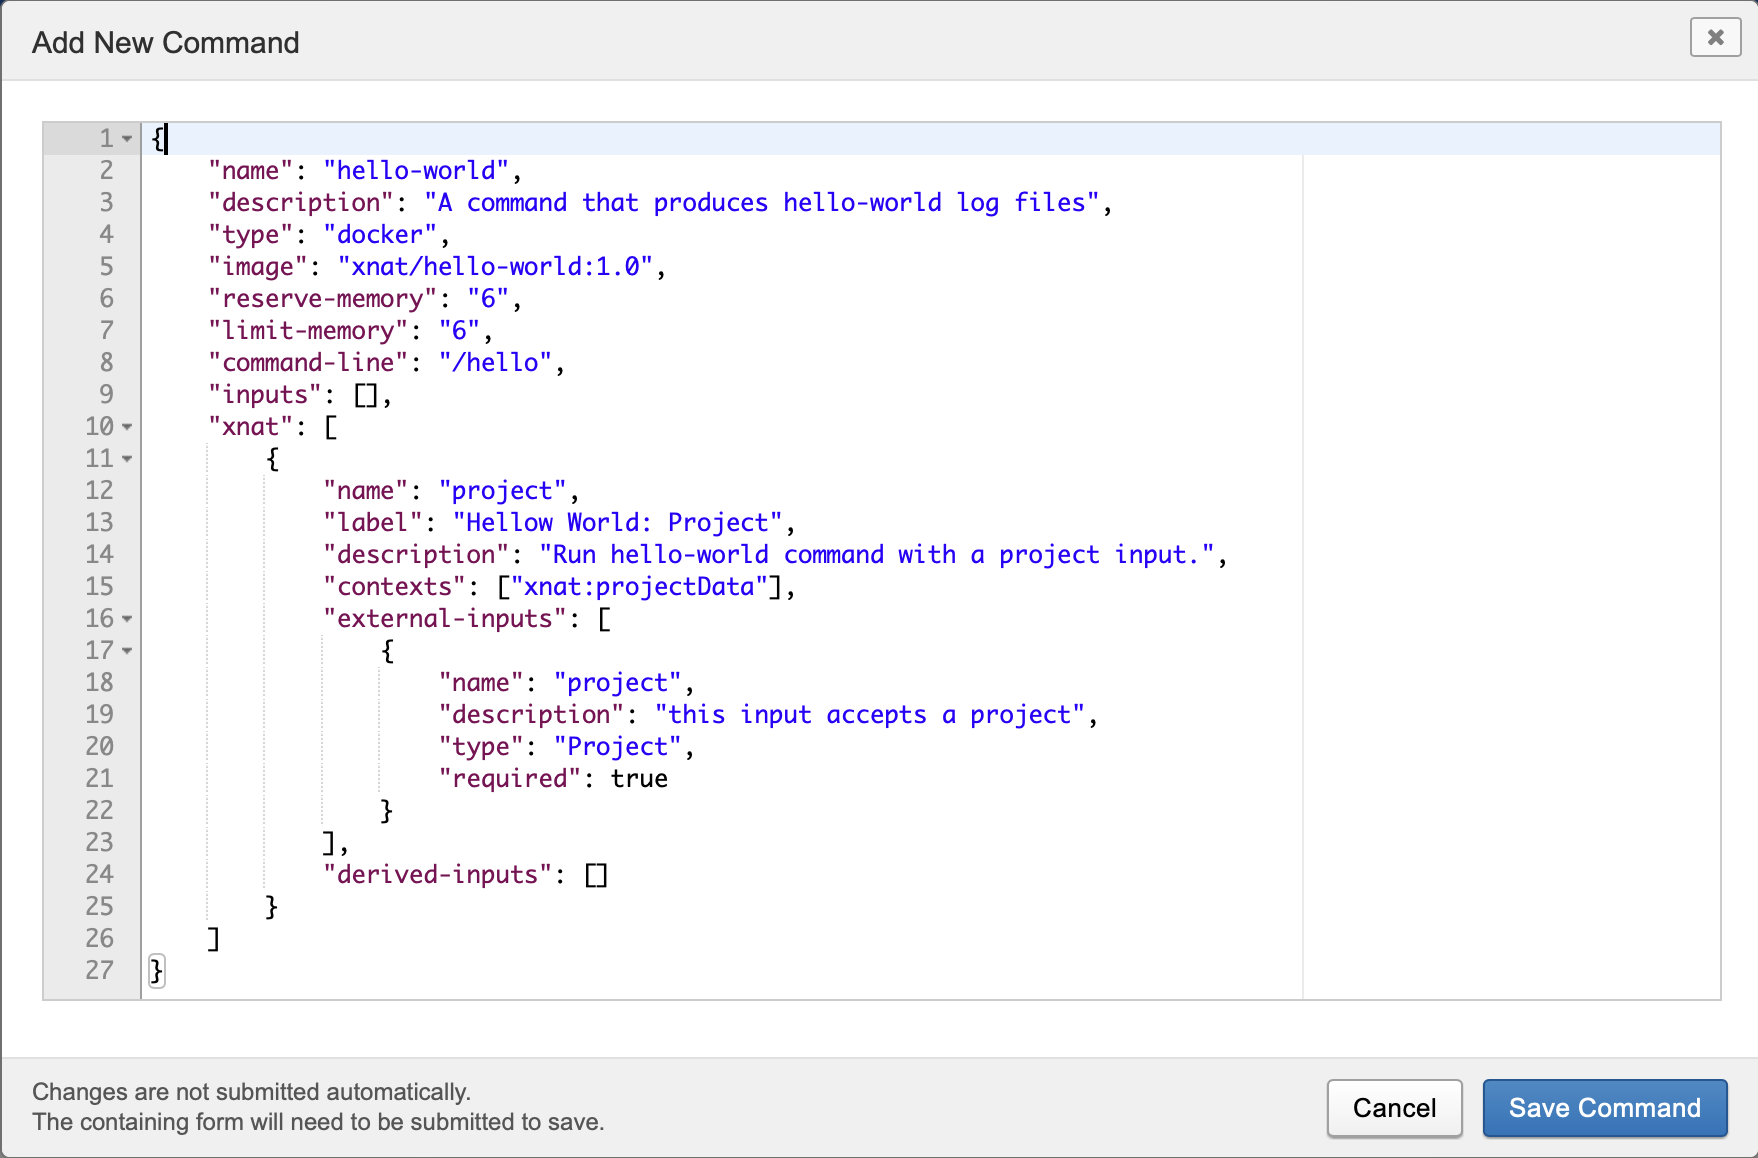
Choose Save Command to save and close the window. This will deserialize, validate, and store the command parameters into the XNAT database.
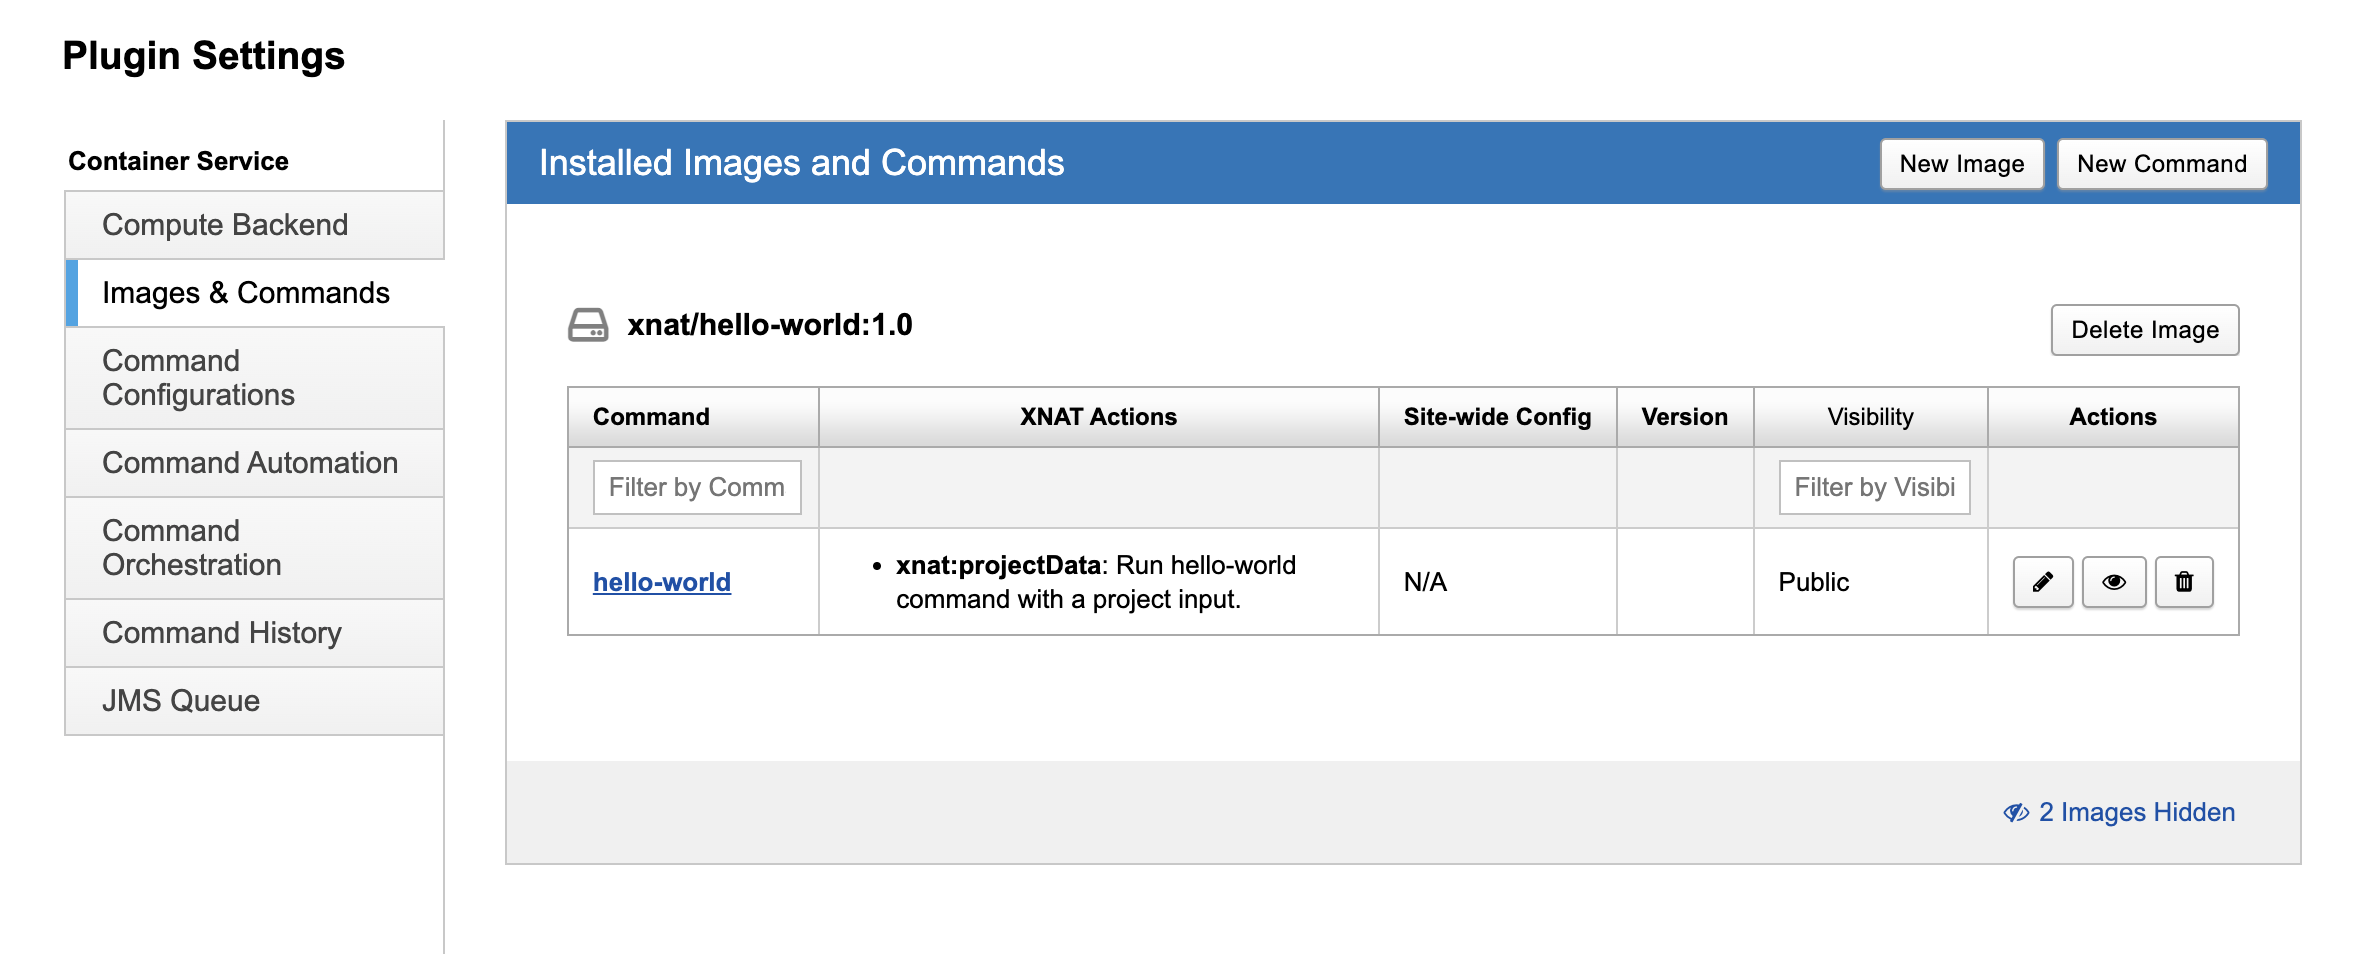
On the Images & Commands screen, you should see your newly associated command and image listed. Note the XNAT Actions column, which shows each command's launch context. This one is designed to launch at the Project level, according to line 15 in the Command JSON.
Command meta-data feature has been added in Container Service version 3.7.0
Command meta-data allows the command json to include the meta-data about the command. This element in the command json is a json blob of free form key-value pairs which could include information about the Author, Citation etc.
...
"command-metadata": {
        "citation": "",
        "authors": [
            "John Doe",
            "Jane Doe"
        ],
        "maintainer": "jane@doe.com",
        "details": "The Extensible Neuroimaging Archive Toolkit (XNAT): An informatics platform for managing, exploring, and sharing neuroimaging data.Marcus, D.S., Olsen T., Ramaratnam M., and Buckner, R.L. (2007) Neuroinformatics 5(1): 11-34.",
        "source": "https://bitbucket.org/xnatdev/container-service"
    },
...
Pull an XNAT-Ready Docker Image
Under certain conditions, you can define Commands by pulling a docker image.
The image must be an "XNAT-Ready" docker image, meaning that the Command JSON is written into the image labels.
Your Compute Backend must be set to Docker or Docker Swarm mode. If your backend is Kubernetes, the Container Service is not able to pull docker images directly. See: Installing Command Definitions in a Kubernetes Environment
If these are true, then when you pull the image to your Compute Backend the Container Service will read its labels and ingest all the Commands it finds there.
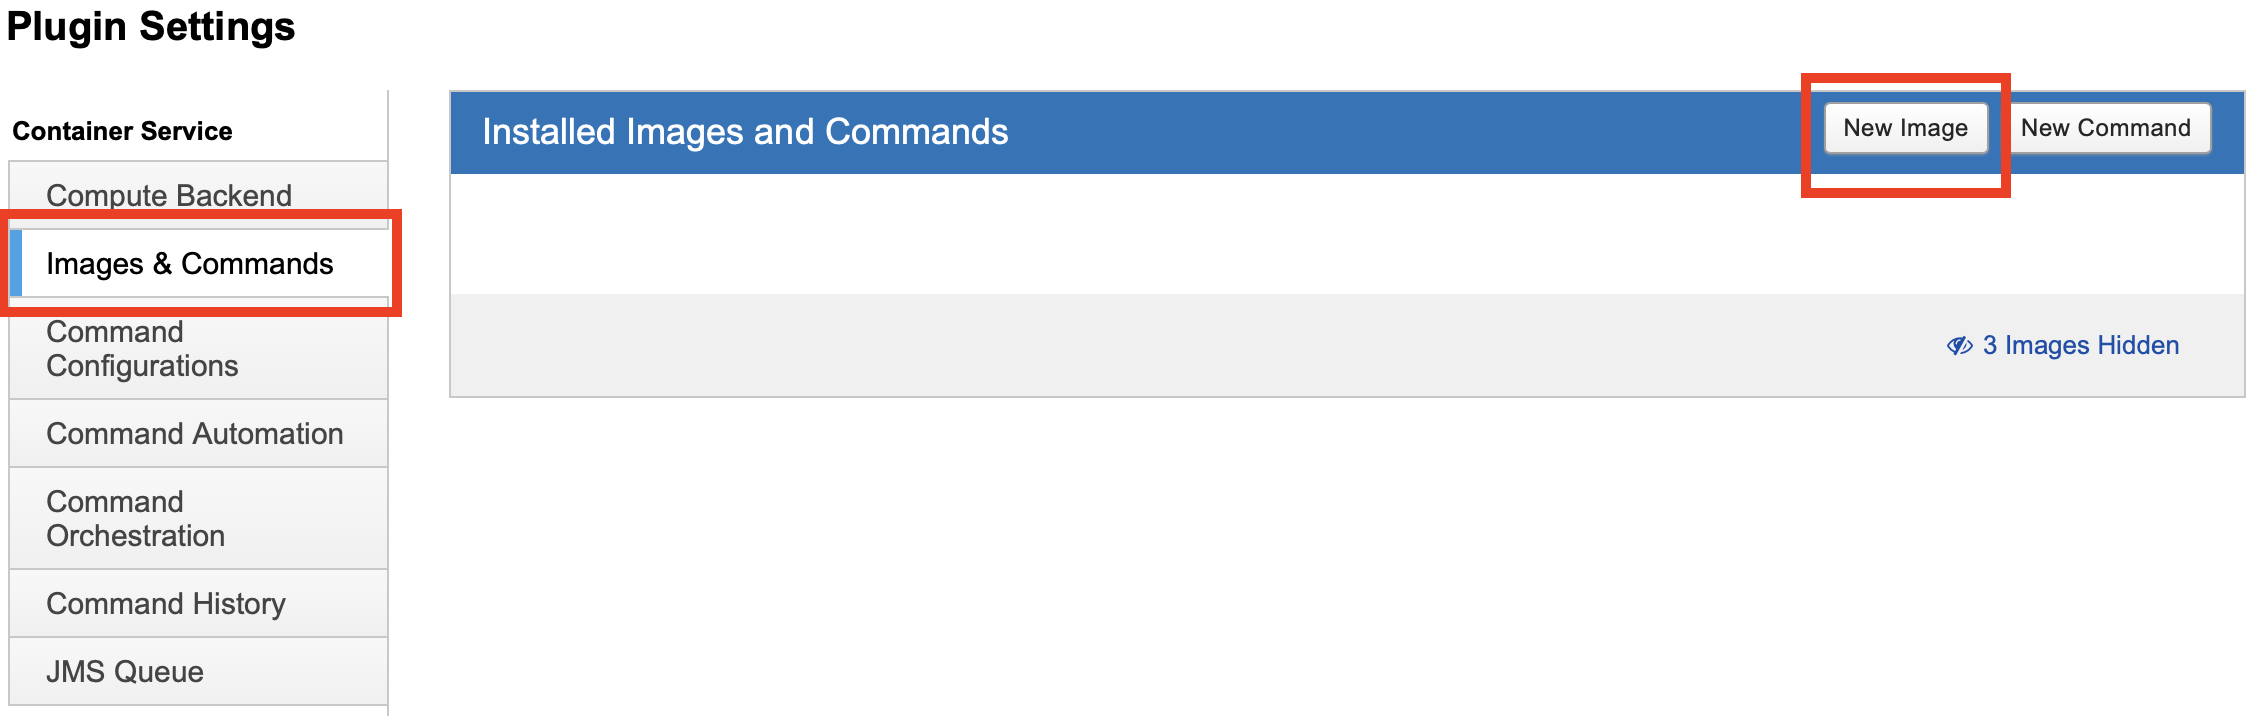
In the XNAT UI, select Administer → Plugin Settings
On the Plugin Settings page, choose Images & Commands. Click the New Image button.
Enter the image's name and version, then click Pull Image.
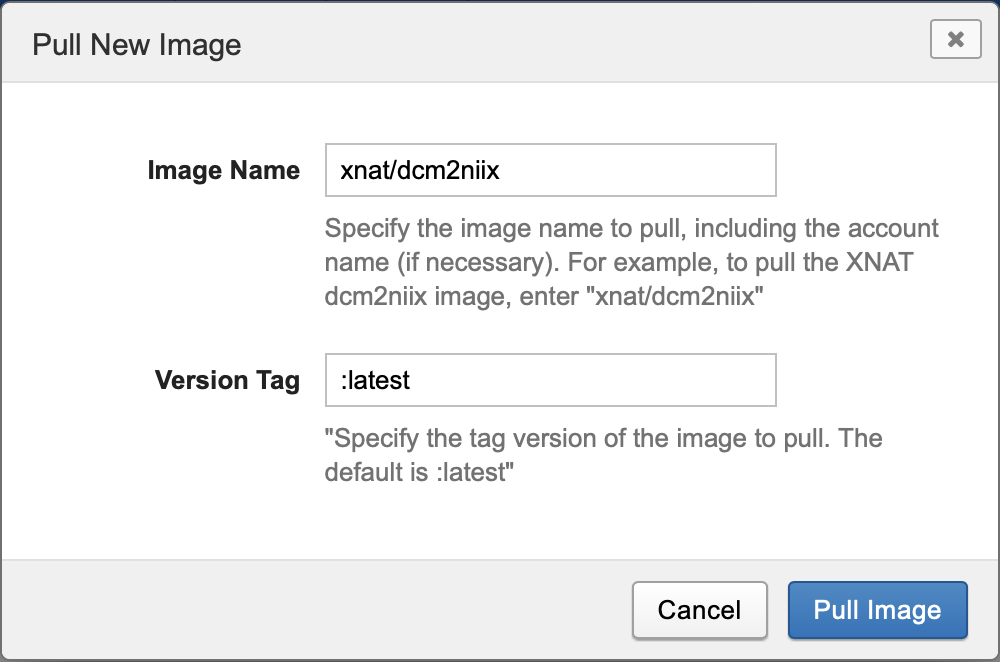
In general when pulling an image the name you use is of the form {image registry}/{image owner}/{image name}. Images that are available on Docker Hub may omit the image registry, and "official" docker images may omit the image owner as well.
Once the image has been pulled to your compute backend, the Container Service will read the Commands from the image's labels. The Images & Commands screen will show the image and its associated commands.
