Jupyter Server Setup
The Jupyter Server Setup documentation provides guidance on configuring and customizing the Jupyter server environments within your XNAT installation. This documentation focuses on three key user interface panels: Jupyter Environments, Hardware, and Constraints. These panels allow administrators to define and manage the Jupyter software environments and hardware configurations available to users when starting their Jupyter servers. Additionally, administrators can easily apply and manage placement constraints. By understanding the functionality and options provided by these panels, you can create tailored and optimized Jupyter servers that align with the specific needs and requirements of your Docker Swarm environment. Access these interfaces by navigating to Administer → Plugin Settings → JupyterHub → Setup.
Jupyter Environments
The Jupyter Environments panel is a crucial component in deploying Jupyter servers with JupyterHub and Docker Swarm. It enables administrators to manage the available Jupyter software environments accessible to users when launching their Jupyter servers. The panel presents a table that displays the configured Jupyter environments, including their names, associated hardware configurations, project and user availability, as well as options to edit, copy, and delete.
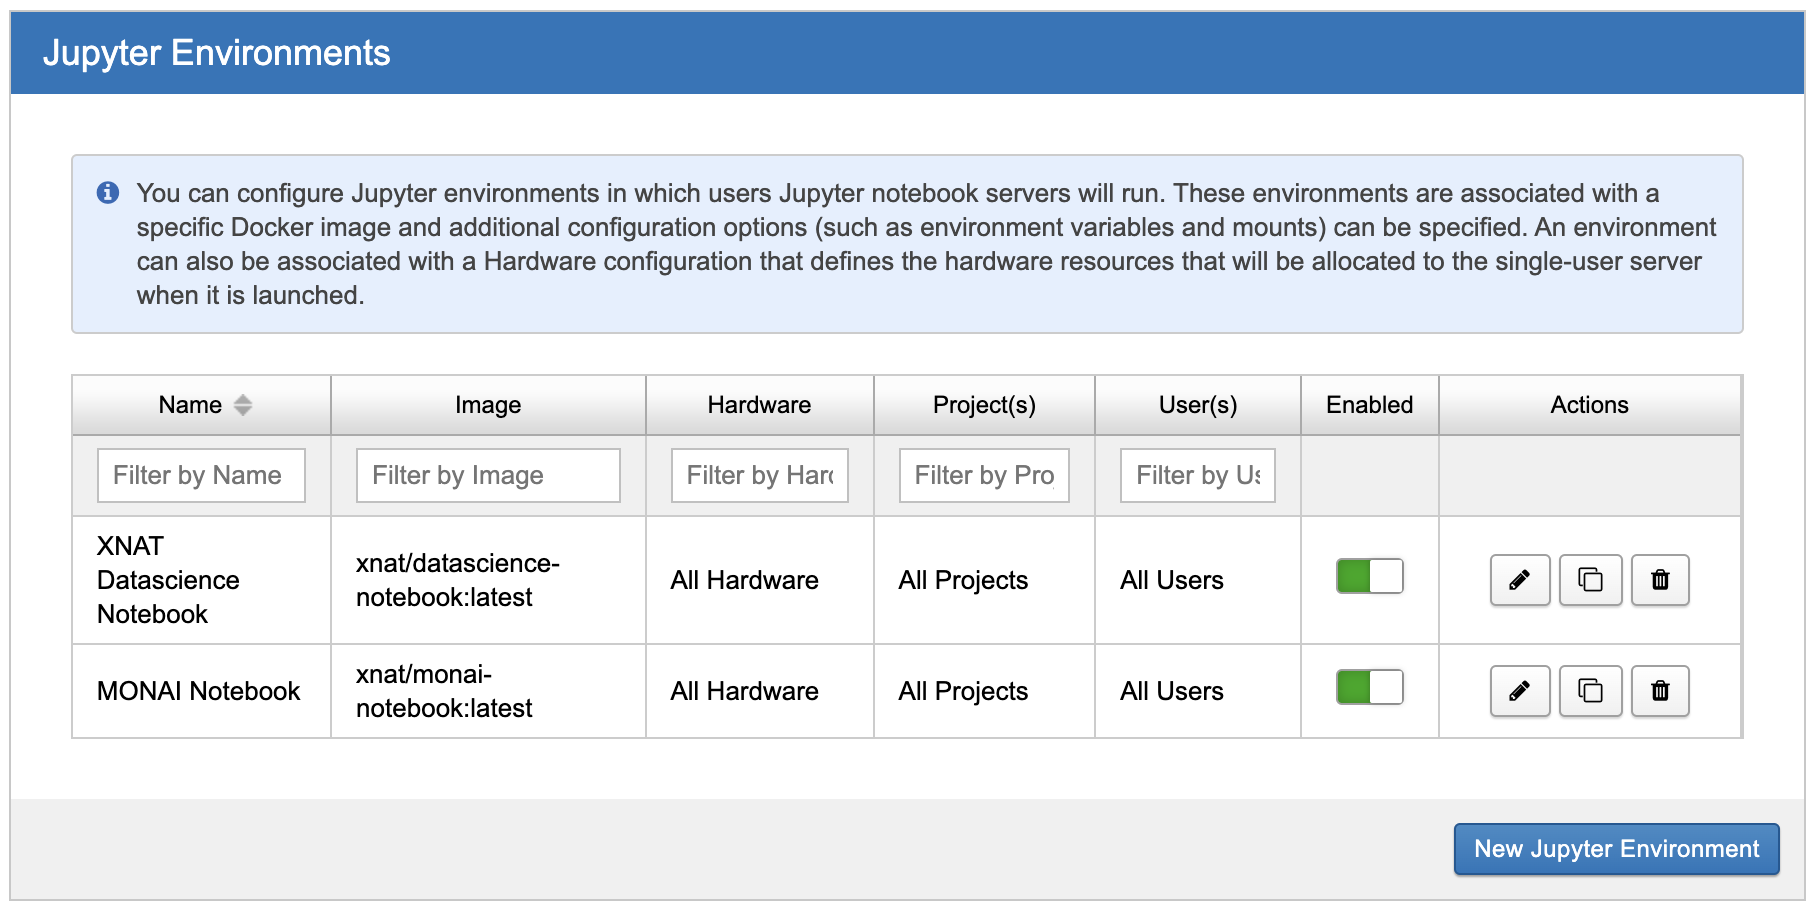
To create a new Jupyter environment, simply click the "New Jupyter Environment" button. This action opens a modal form where you can provide essential details, such as the Docker image, additional environmental variables and mounts, associated hardware configuration, and project and user restrictions. Once created, the new environment will appear in the Jupyter Environment table, and you can further manage it using the available actions.
Please see Picking or building a Docker image for more info on selecting and building Docker images for Jupyter.
Hardware
The Hardware panel plays a significant role in configuring the hardware resources available for Jupyter servers within your JupyterHub and Docker Swarm environment. This panel allows administrators to manage the hardware configurations associated with Jupyter server deployments. It presents a table that displays the configured hardware configurations, including CPU reservations and limits, memory reservations and limits, project and user availability, as well as options to edit, copy, and delete.
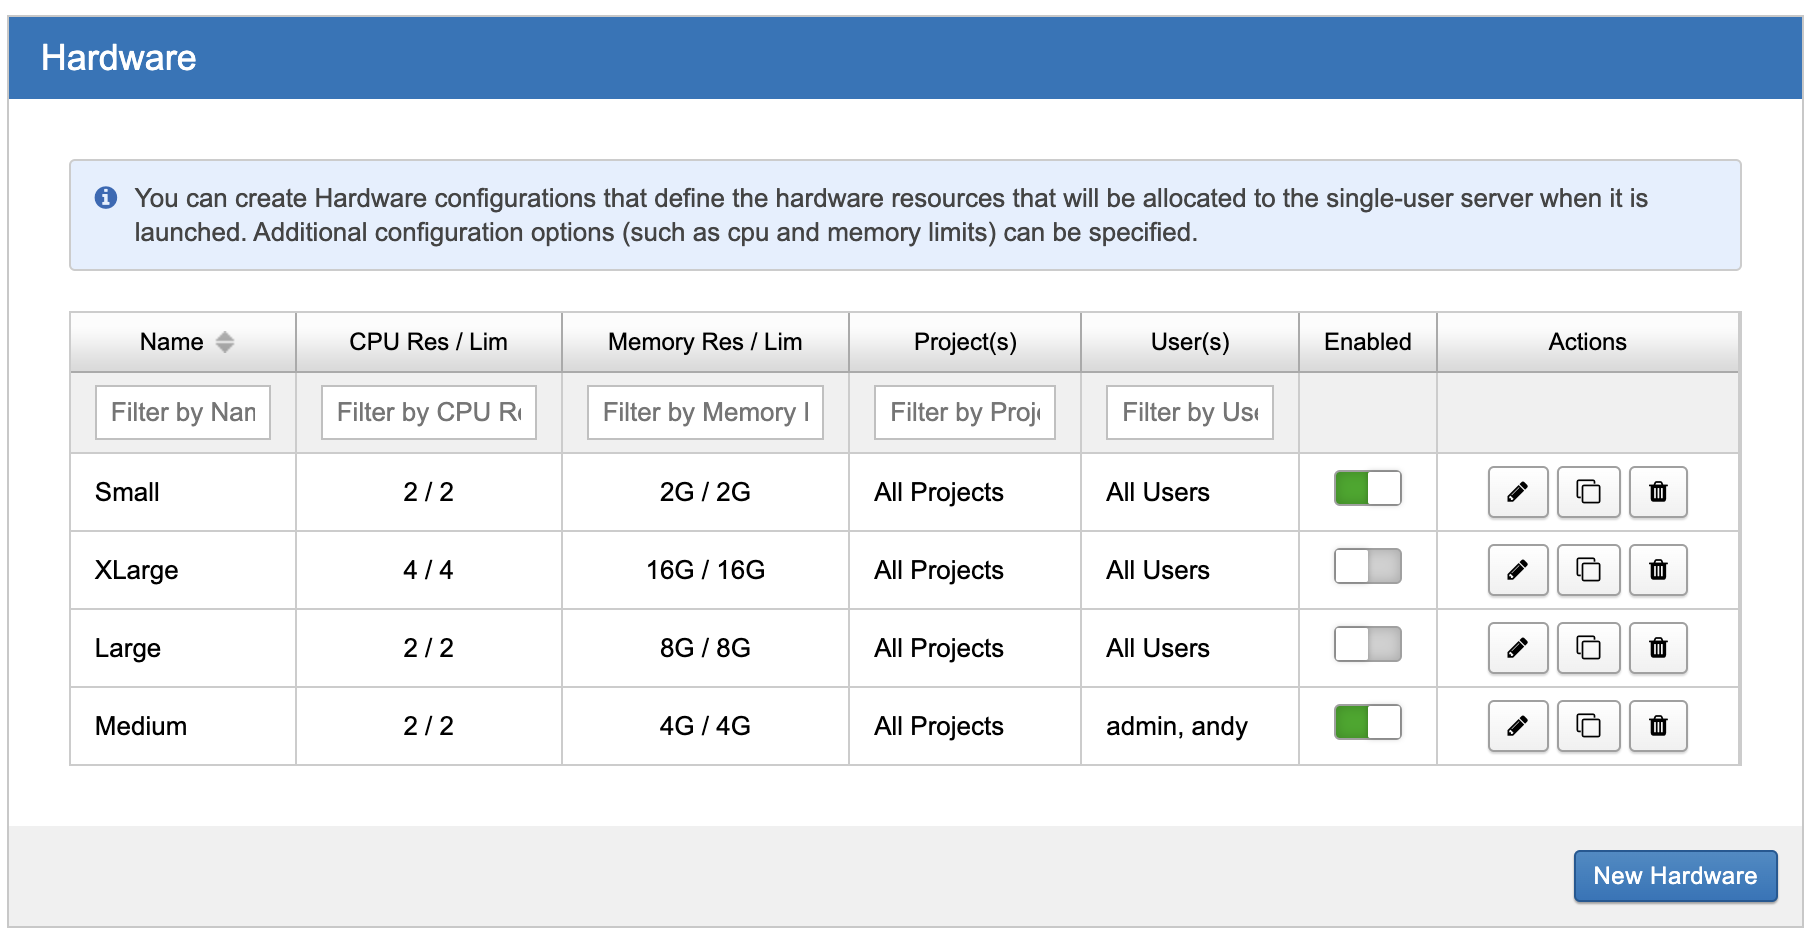
To create a new hardware configuration, simply click the "New Hardware" button. This action opens a modal form where you can provide details such as CPU and memory limits and reservations, environmental variables, generic resources, placement constraints, and project and user restrictions. Once created, the new hardware configuration will be added to the Hardware table, where you can further manage it using the available actions. By leveraging the Hardware panel, administrators can optimize the hardware resources allocated to Jupyter servers, ensuring optimal performance and resource utilization in their JupyterHub and Docker Swarm environment.
Constraints
The Constraints panel is used for managing placement constraints within your JupyterHub and Docker Swarm environment. This panel enables administrators to define and enforce specific constraints that determine where Jupyter servers can be deployed. The Constraints table displays the configured placement constraints, showcasing their details and associated actions, such as edit, copy, and delete.
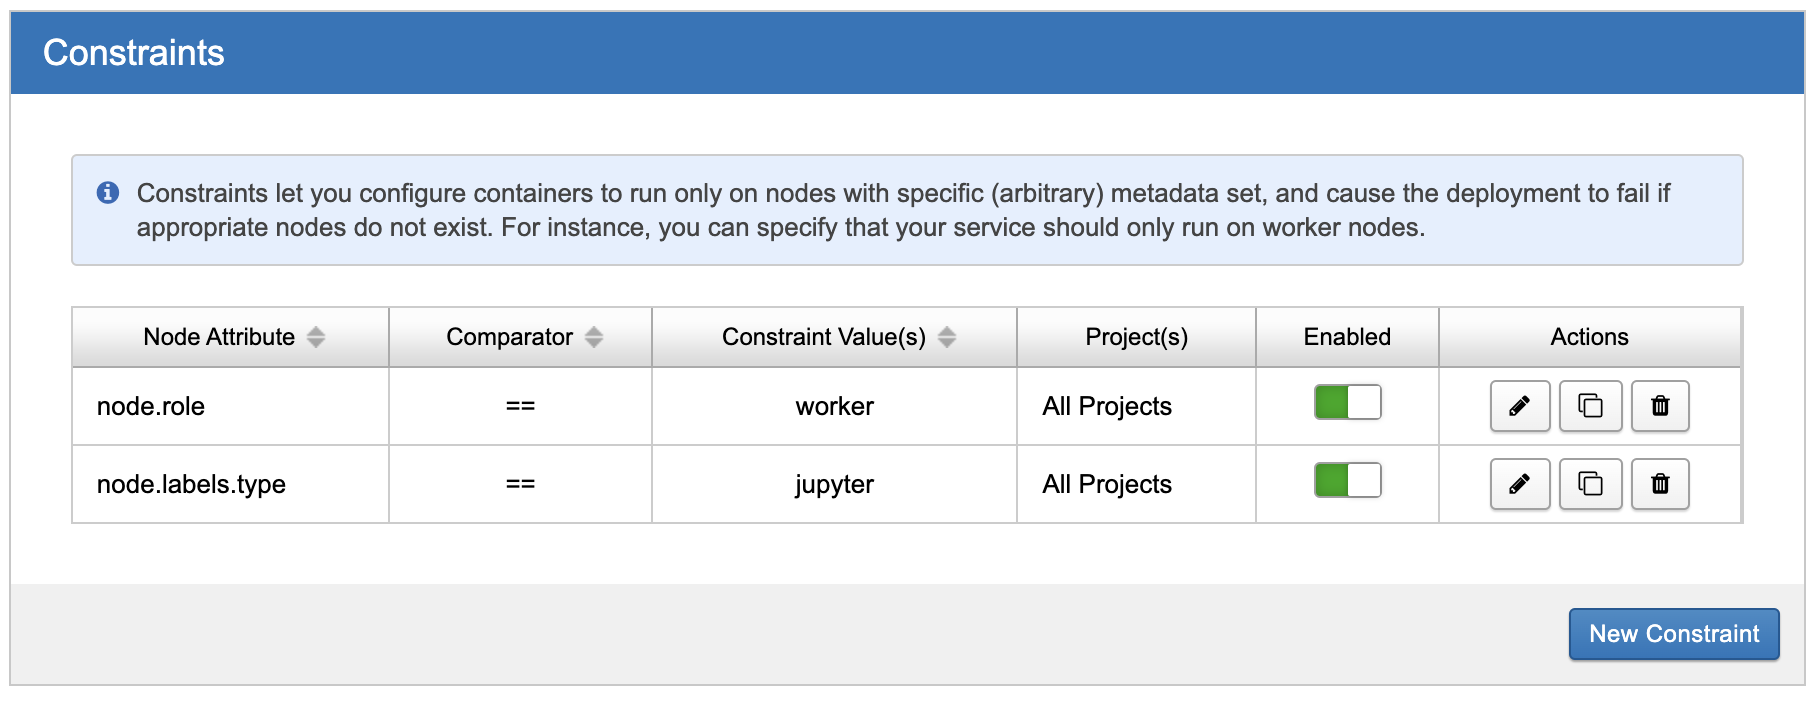
Placement constraints can be applied either globally to all Jupyter servers or restricted to specific projects. By applying constraints, administrators can ensure that Jupyter servers are deployed on designated nodes or worker roles that meet specific criteria or have certain capabilities.
To create a new placement constraint, click the "New Constraint" button. This action opens a modal form where you can define the constraint details. Specify the constraint expression, such as node.role==worker, and choose whether it applies globally or is restricted to a particular project. Once created, the new constraint will be added to the Constraints table, providing further management options.