Step 6 of 8: Create a Custom Variable Set
In this step, we will learn how to quickly add support for new variables in your project without needing to install a new data type or create a new plugin.
It's convenient to be able to create a quick form with a couple variables sometimes without having to write a brand new plug-in.
Custom variables can help you do this; they can be added to any data type in XNAT. Let's try creating some.
Get Started
On your XNAT_2016 project page, click on the Details tab if it is not currently active, and then click on the "Manage Custom Variables" button.
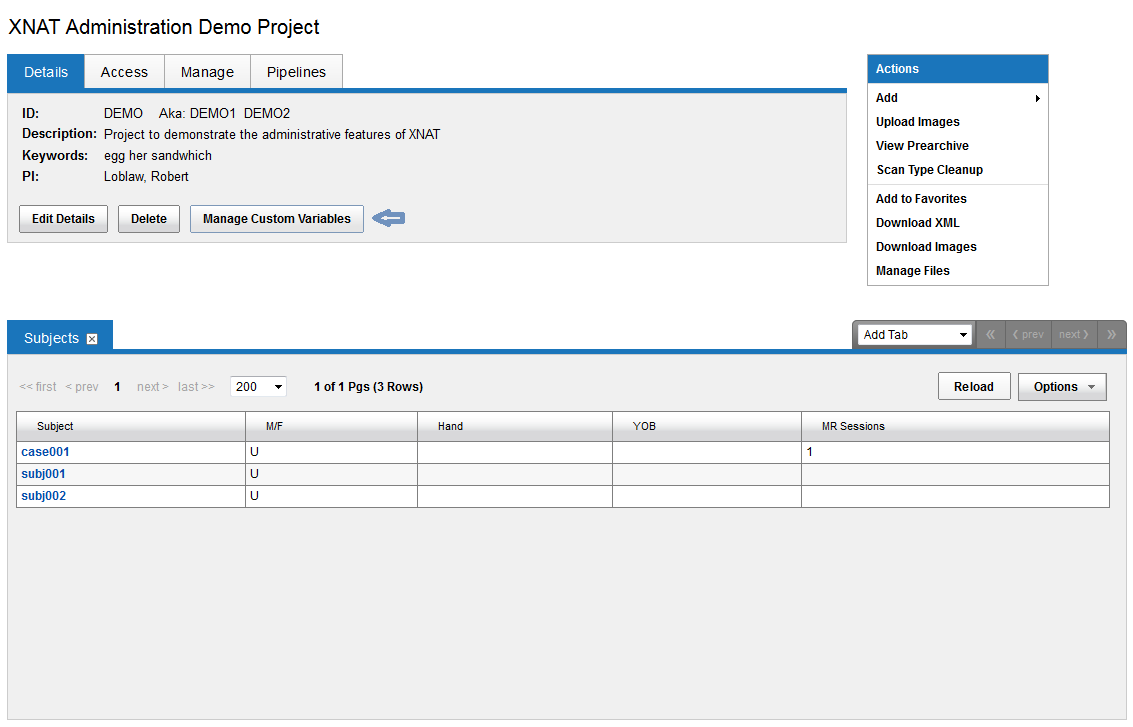
This will launch the form used to create a Custom Variable Set.
Add variable(s):
Select the data type to which we'll add custom variables. For non-longitudinal data, the Subject record often make sense, while for data that will need to be collected upon each visit, choosing a data type that will be present on each visit (like MR session) is best. For this example, we will be choosing MR Session.
XNAT Logout / Login may be required
Only data types that have at least one existing instance in your XNAT will be displayed. You may need to log out and back in to be able to see Subject and MR session if you have not done so since uploading your first MR session in the previous steps.
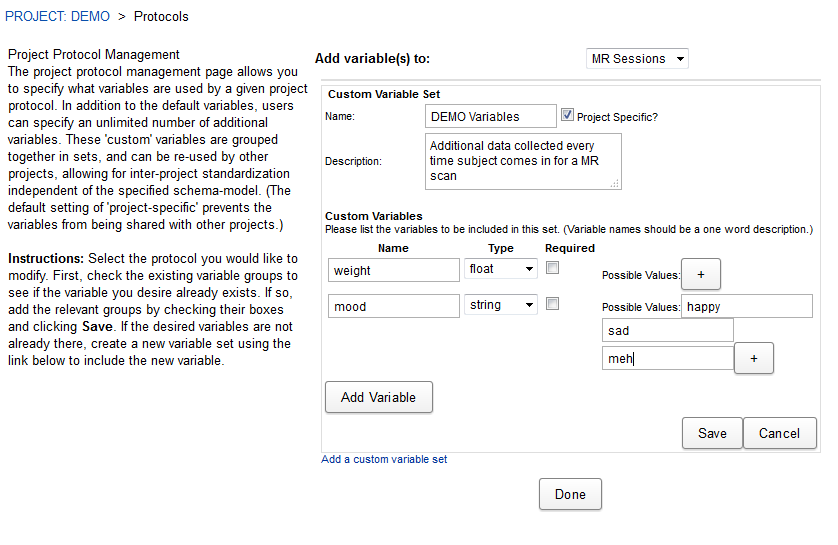
Once you select your data type, click the small, blue "Add a custom variable set" link and the full set of options above will display.
Name: The identifier given to this set of Custom Variables. The Name will appear as the label for your custom variable set on the edit and report pages of the data type you chose.
Project Specific?: This determines whether this Custom Variable set will be displayed as an option to be added to other projects. It's very useful to enable this if you have a standard set of variables you reuse for multiple projects.
Description: This field only appears upon Custom Variable set up.
Custom Variables:
Name: The variable descriptor, which will appear on the data type edit and report pages. No spaces are allowed, but you can use underscore "_".
Type: Type of data expected. Determines the choices available when sorting the custom variable column in a listing.
Required: Selecting this option adds red asterisk next to the field and requires the user to enter a value in order to submit the form.
Possible Values: Allows you to enumerate possible values instead of allowing user to enter them freehand. This allows for much simpler searching and filtering of values later.
Go ahead and create some variables. You can copy the example in the screenshot above or make up your own.
Click "Add Variable" to add another variable. Click "Save", then "Done" when you are finished, and you should be redirected to the project page.
Add Values To Your Custom Variables
Click the "Add Tab" drop down around the middle of the page on the right side and select MR Sessions to display the list of MR sessions in your project. Click the label in the left-most column of the table for an MR session and you will be taken to that session's report page.
On the report page, you should see a blue box below the gray "Details" box with the name you gave your custom variable set. This indicates that your variables have been added to the data type successfully. Click "Edit" in the Actions box in the top right hand corner of the page to edit the session's metadata.
Once the edit page loads, scroll down a bit and you should see a similar small box with the name you gave your custom variable set with options to enter values for your data.
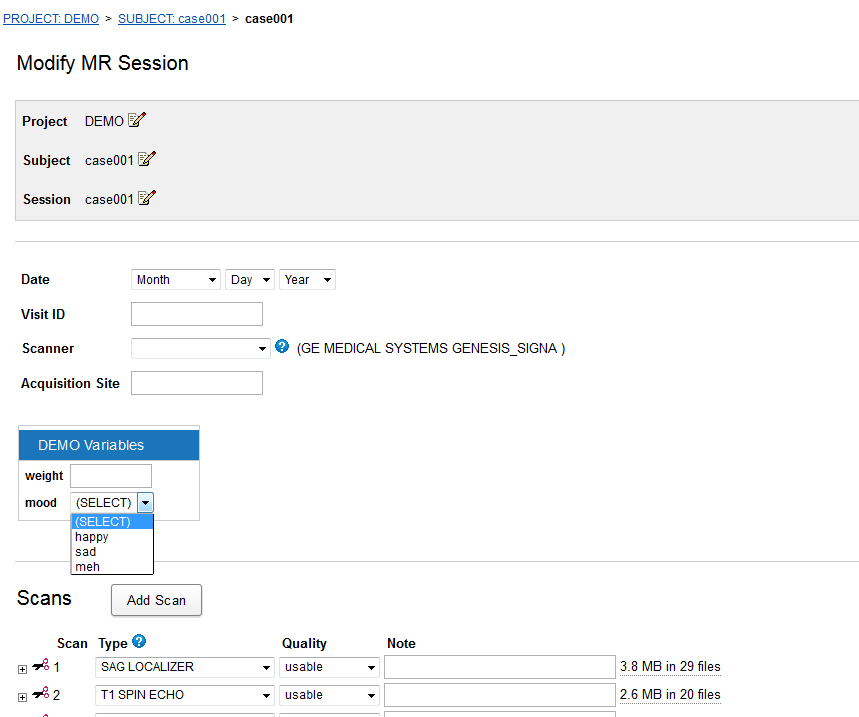
Enter values for the custom variables, then click the "Submit" button. The report page should load, and your new data types should be displayed in the box that previously just had the name of your variable set. Congratulations, you have entered some custom data without having to extend your XNAT through code!
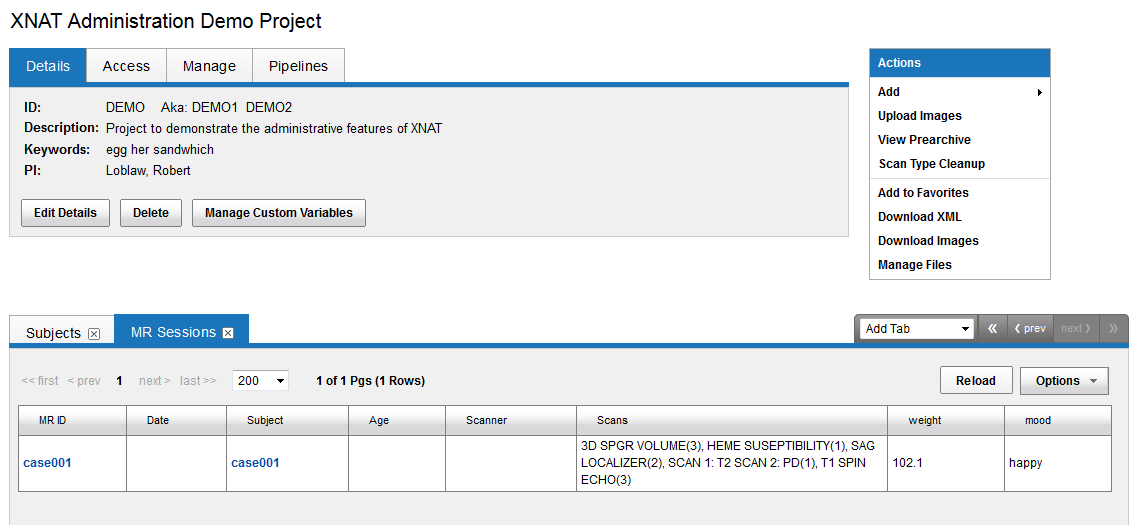
Navigate back to the project page (you can go back through the main page, or click on the "breadcrumb" trail at the top of the page, which shows your session label and provides links back to the subject and the project page). Select the MR Sessions tab if it is not activated, and notice the variables you created already have columns in your listings as well, without any additional work.
Step 6 Complete
You have successfully created and populated custom variables in your project, and you didn't have to touch a line of code!
Continue to Step 7: Add a Project Resource Uploader