How To Use DicomBrowser
Opening files
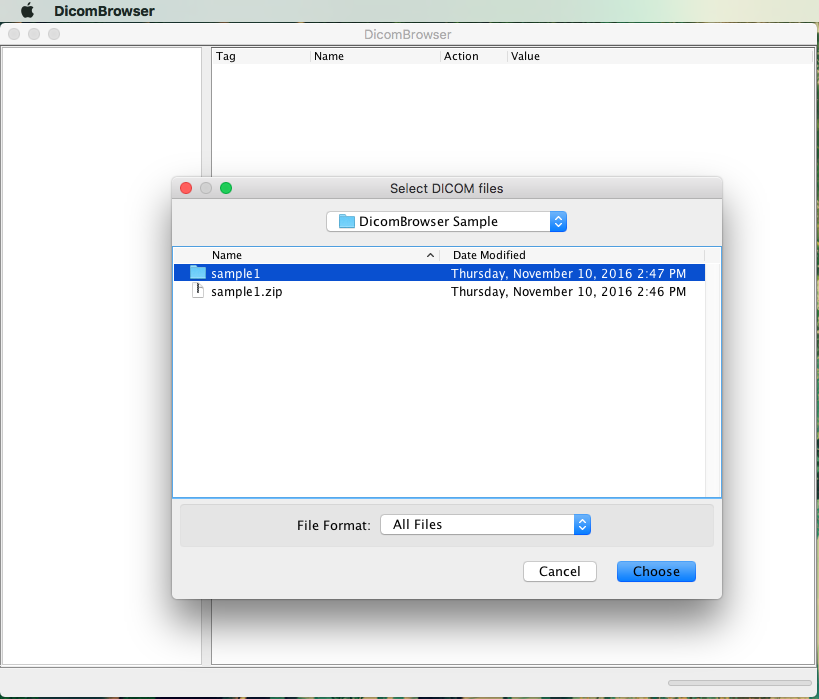
When the DicomBrowser window appears, select the “Open…” item in the “File” menu to open files. A file chooser window appears; select either individual DICOM files or directories. If you select a directory, all DICOM files in that directory and its contained directories are loaded.
The browser can load many thousands of files at a time, but trying to view attributes for more than a few thousand files can exceed the Java memory limit. The memory limit can be increased, but we find that the program gets sluggish for that many files anyway. Really, it’s better to load only as many sessions as your machine can gracefully handle.
Selecting files
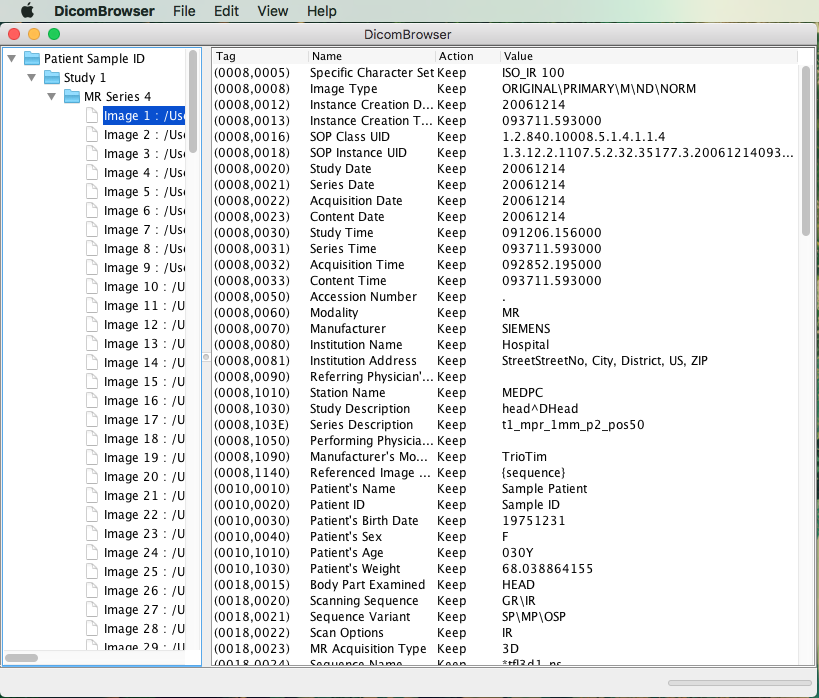
When the files have loaded, a list of Patient IDs appears on the left side of the browser window. DICOM arranges data files in a hierarchy in which Patient is the top level; below Patient is Series, Study, and, at the bottom, Image (or Instance), representing a single DICOM data object. This hierarchy might or might not mirror the organization of these files in directories on your disk.
Each Patient ID label has an expander button to its left; clicking this expander shows all the Studies loaded for that patient. Clicking the expander next to a Study label shows all the contained Series, and clicking the expander next to a Series label shows all the contained Images.
Clicking on a label itself (Patient, Series, Study, or Image) selects that label, which causes the browser to load all the associated attributes. These attributes are displayed in a table on the right side of the browser window. Selecting a single Image causes just one file to be loaded; selecting a Patient may cause hundreds of files to be loaded, which could take a few minutes.
Closing files
Files that have been loaded can be closed and removed from the browser view by selecting them, then choosing the “Close selected files” item in the “File” menu.
Viewing images
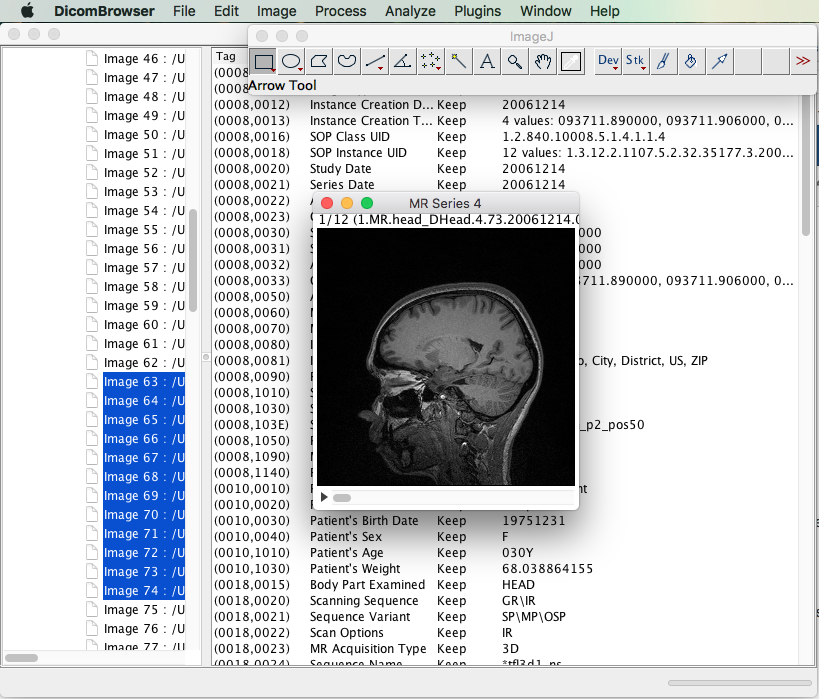
The image data contained in DICOM files can be viewed by selecting files on the left side, then choosing the “View selected images” item in the “View” menu. DicomBrowser uses ImageJ for image viewing; instructions for using ImageJ are here.
Viewing attributes
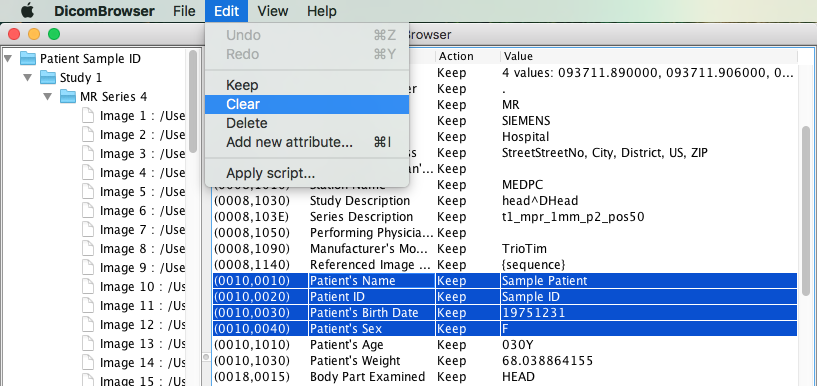
When a selection has been made on the left side, the attributes for all files associated with the selection are shown in a table on the right side. The table shows, for each attribute, its DICOM tag, the name of the attribute, a summary of whether and how the attribute has been modified, and the value(s) of that attribute, after any changes have been applied.
The Action column shows whether each attribute has been changed. When files are first loaded, the label in this column is Keep, meaning that the browser will keep the original values. Other possible values are Clear, if the attribute contents have been erased; Delete, if the attribute has been removed entirely; Assign, if the attribute has been set to a new value; or Mixed, if the current file selection includes multiple files for which different operations have been specified.
Editing attributes
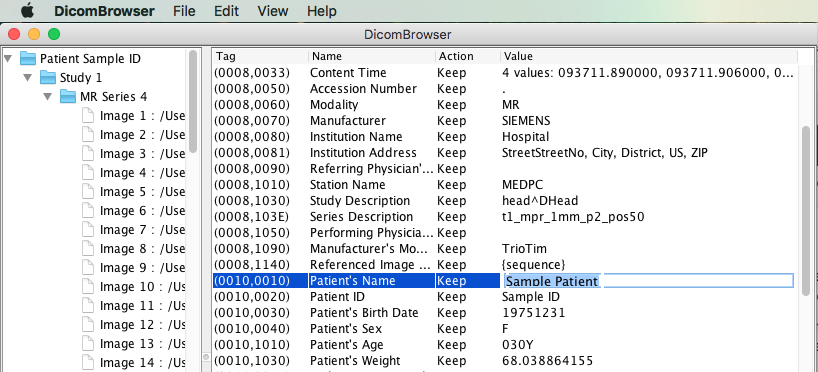
To change the content of an attribute, click in its value field. If the attribute has a single value in your selection, you will be able to edit the text directly in the value field. If the attribute has multiple values, a dialog box will appear that will allow you to select one of the existing values, or to enter a new value.
To change multiple attributes at once, select an attribute by clicking on it (but not in the value field). Clicking another attribute while holding the Shift key selects a range of attributes, while clicking while holding the Control key selects individual additional attributes. When you have selected some attributes, you can choose to Clear or Delete the selection in the Edit menu, or from a popup menu that appears if you click the right mouse button.
No changes are made to the original data unless you explicitly overwrite the original files in the “Save…” dialog, described below.
DicomBrowser can also do batch processing of attribute changes via DicomEdit anonymization scripts. Any change to attribute values can be specified in a script. A script is applied to loaded files by selecting the “Apply anonymization script…” item under the “Edit” menu. The DicomEdit script language is described here.
Saving changes
Select the “Save…” item under the “File” menu to write the modified DICOM files to disk. The dialog box that appears offers several options for naming the saved files:
- Write files in adjacent directory with suffix
For each directory in the original file structure, a new directory is created with the original pathname with the given suffix appended. The new directory is filled with modified versions of the DICOM files in the original directory. - Write files in same directory with suffix
New files are written in the same directory structure as the originals, but each new filename has the given suffix. - Write files under new root directory
A new root directory (specified by the user) is created, and all modified files are written under that root in a directory structure that mirrors the original. - Overwrite existing files
The original DICOM files are replaced by the modified files.
Sending files
Select the “Send…” item under the “File” menu to send the modified DICOM objects to a remote DICOM C-STORE receiver, such as the one bundled within XNAT. Either all loaded files, or only those currently selected, can be sent.
The address of a DICOM C-STORE provider has three components: the Internet (DNS) name of the host, the port number on which the server runs, and the DICOM Application Entity (AE) title. All three must be specified in order to make a connection and send files.
Command-line interface
Tutorial: Using DicomBrowser in the Command Line