Using DQR: Searching the PACS and Importing Data
In order to query for image data from a PACS, three conditions must be met:
Your XNAT must be connected to a PACS system. See DQR Admin: Connecting XNAT with a PACS for DQR Usage
Your project must be DQR-enabled. See DQR Admin: Assigning a DQR-enabled SCP Receiver
Your user account must have permissions to use DQR features. See DQR Admin: How to Restrict PACS Access by User
The DQR Plugin enables the ability to search a connected PACS system for image sessions using a variety of criteria. Here's how this works.
Querying / Searching for Image Sessions
1. Navigate to a DQR-enabled project, and click "Import From PACS" in the Actions Box.
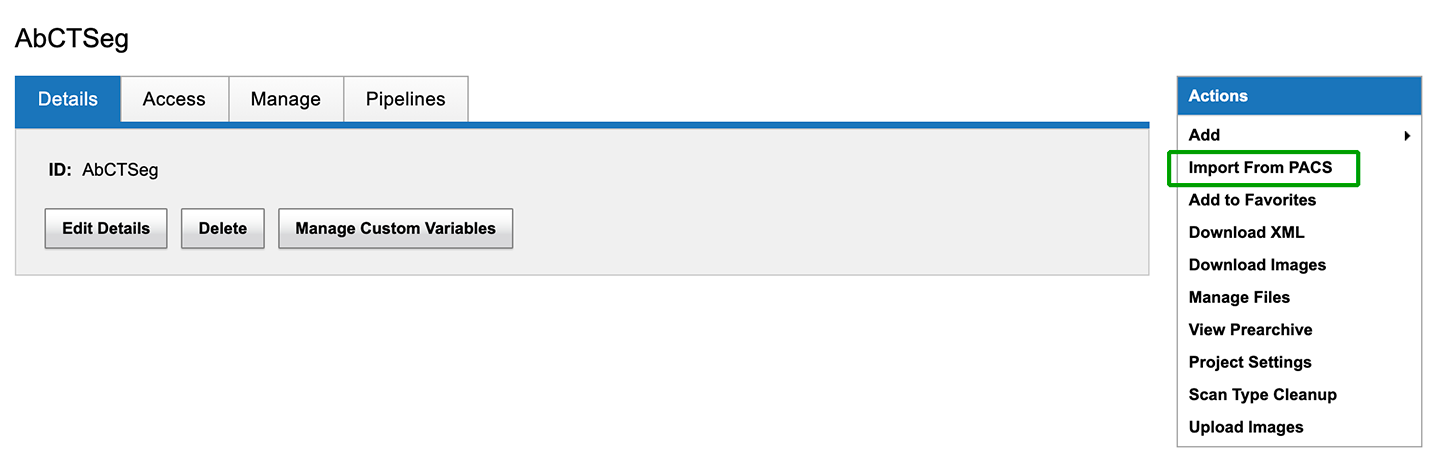
This will take you to the PACS Query interface.
2. Select a PACS to import from
When selecting a PACS via a DIMSE connection, the user will also be prompted to select an XNAT SCP Receiver, as shown in the screenshot.
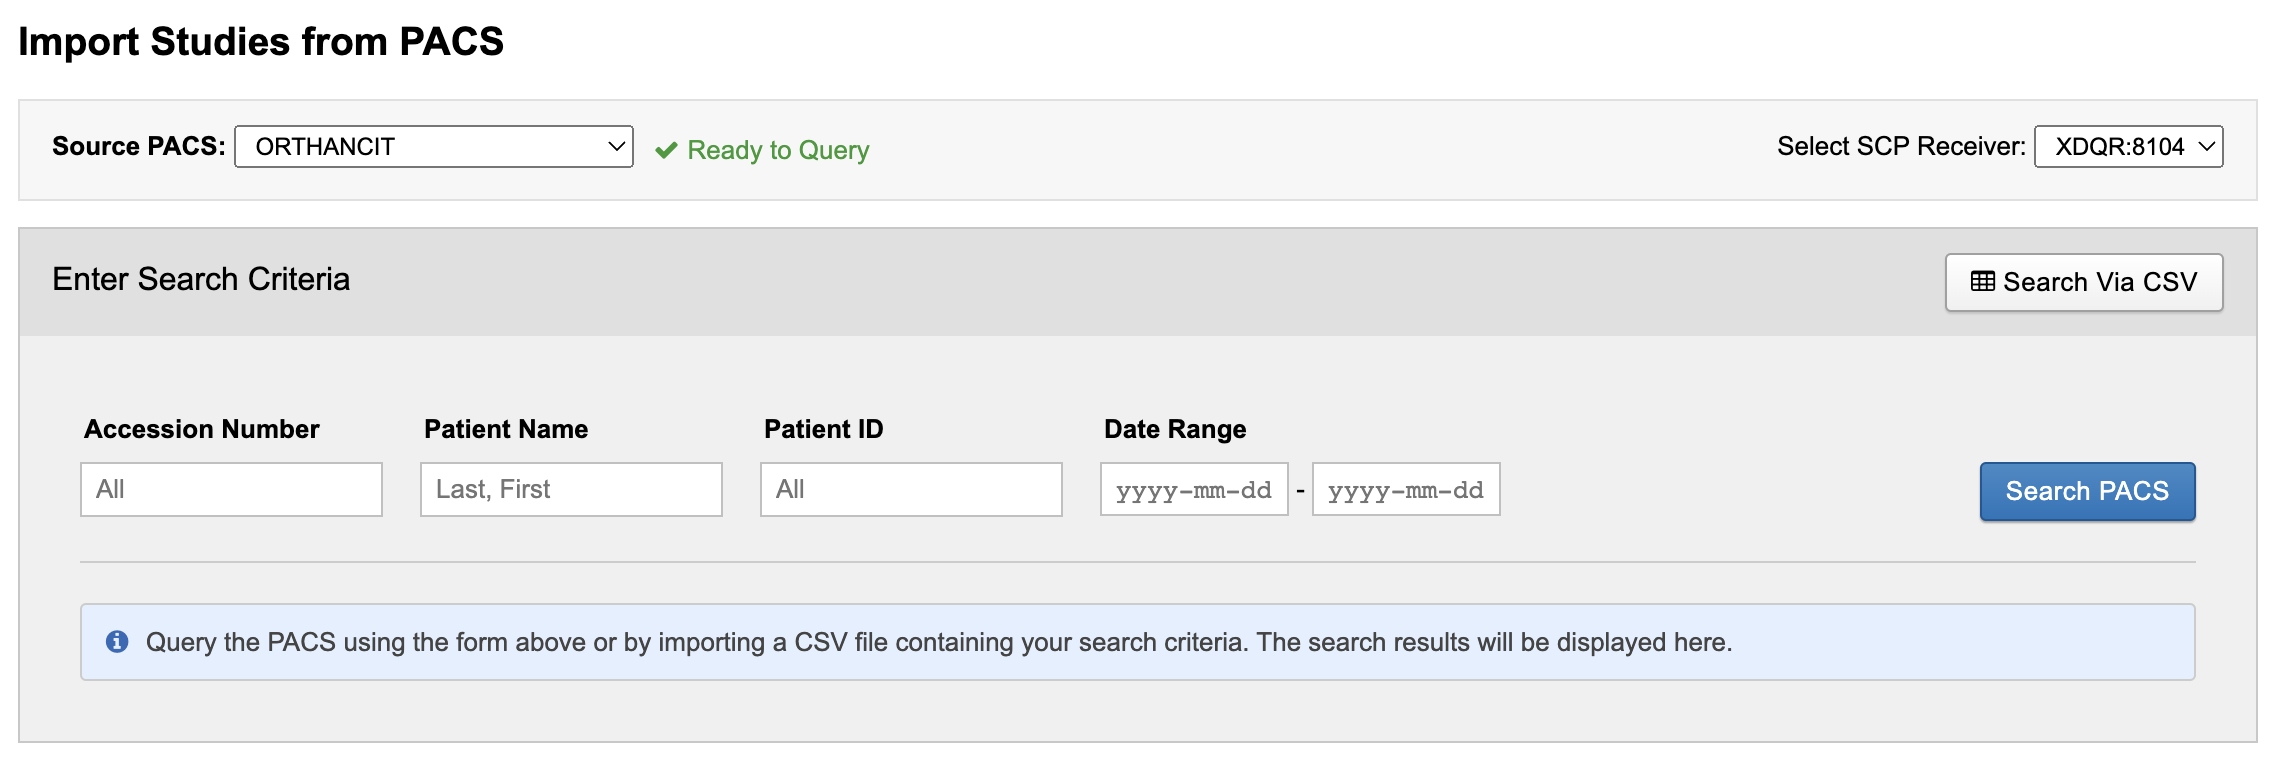
You will see a "Source PACS" selector at the top of the page, above the search form. Your XNAT's defaults will be pre-selected. Upon selecting a PACS, XNAT will ping that PACS to make sure it is up and available on the network.
If you have no defined PACS or if the selected PACS is down, querying will be disabled. See DQR Admin: Connecting XNAT with a PACS for DQR Usage
If you have a PACS but not a valid DQR-enabled SCP Receiver, you can query but importing will be disabled. See DQR Admin: Assigning a DQR-enabled SCP Receiver
3. Enter search criteria
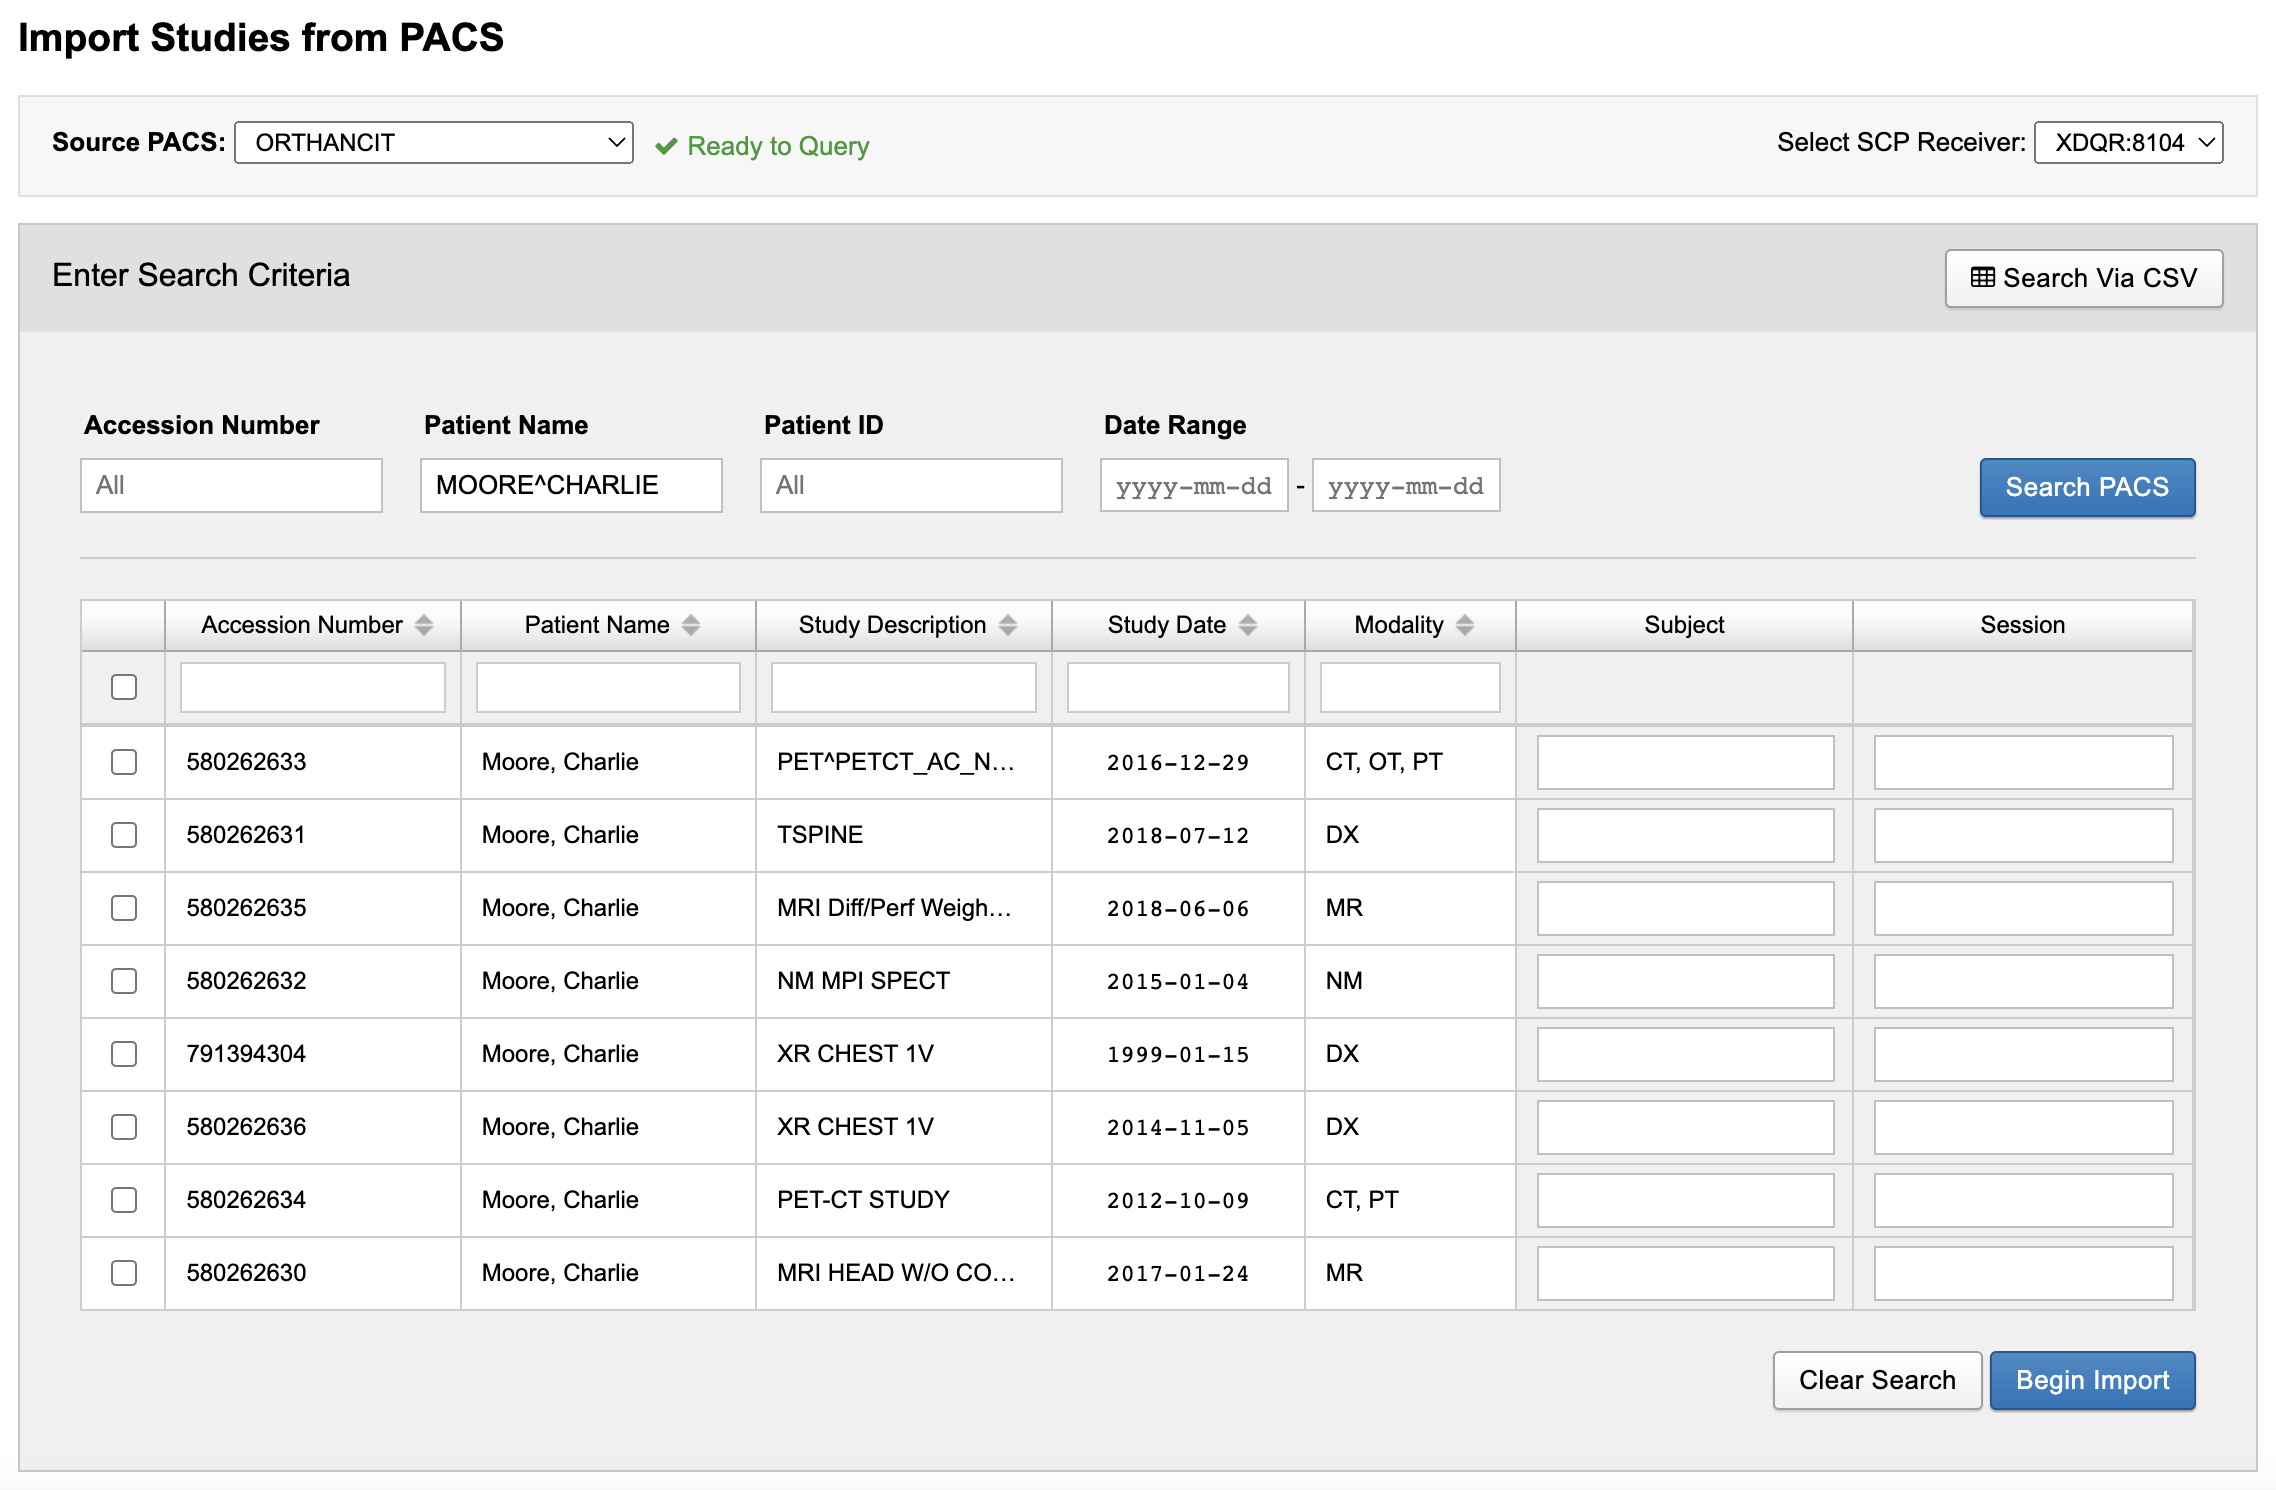
The DQR query interface provides a series of criteria that can be used to find image sessions in a PACS system. Below is an example of a search based on Patient Name.

If you are certain that your PACS only has a small amount of data (for example, if it's a test PACS you configured to experiment with the DQR plugin before deploying it on your production XNAT), you can then click "Search PACS" to execute a search with no criteria and get all the sessions on the PACS returned to you. However, most PACS systems will limit how many results can be returned by such a query.
The more data on the PACS, the more search criteria you will want to include. A search that returns a large number of studies will not be very efficient. Still, on some PACS, it will be hard to avoid sometimes getting large sets of results. In such cases, you can click on a column heading to toggle between the rows being unsorted, sorted based on that column's values in ascending order, and sorted based on that column's values in descending order. If any values, such as Patient Name, are cut off because they are longer than the width of the columns, you can mouse over the value to see the unabridged value.
Requesting Image Data from a PACS
Once your search has returned the results you want, select the sessions to import and enter new label values for the Subject and Session as desired. (This requires Custom Relabeling to be set in the DICOM SCP Receiver).
After clicking "Begin Import", you will see a modal pop up with a list of the Series Descriptions for the series in the studies you selected. When clicking "Begin Import", XNAT will send a second set of queries to the PACS system to retrieve scan information for each selected session.
If this scan retrieval process takes a long time to complete, that might mean you selected too many studies. Unfortunately, even selecting 20 or so studies could cause such problems due to a limitation of the DICOM standard preventing single queries from gathering series level information for multiple studies. Improving this UI is on our list of improvements we want to make to DQR, but for now, we advise to import studies in smaller batches, such as twelve studies at a time.
If the studies you select each contain multiple scan series, the modal that appears after clicking "Begin Import" is your opportunity to uncheck those you don't want. This modal simply displays all the Series Descriptions and number of instances for each scan series that appears in the data selected for import.
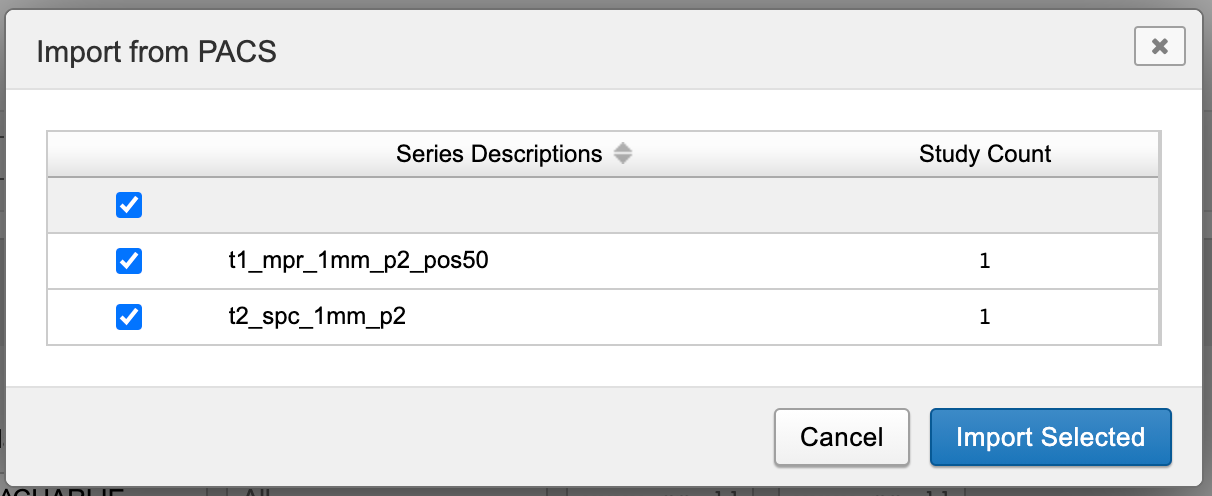
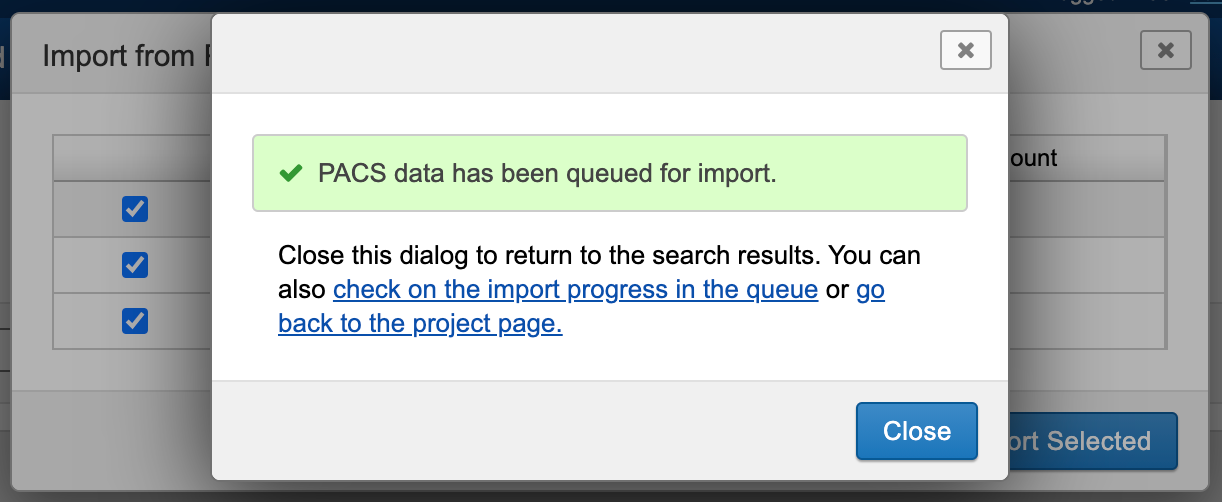
After selecting scans as desired, click "Import Selected" to continue. You will then see a modal saying that the request has been queued, with options to view the import queue.
See: Using DQR: Checking your Query History
How Relabeling Works in DQR
The DQR plugin introduces the ability to apply custom relabeling of data on a per-import basis, bypassing the site-wide and project-specific anonymization scripts. The actual DICOM files are modified and those modified values are then what gets used by XNAT to assign the data to the appropriate subject and session. This feature can be used through the UI by entering values in the Subject and Session columns as shown above. Additional relabeling can be performed when importing via CSV.
If you leave a value blank, no relabeling will be performed for that value. For non-empty values, the following relabelings will be performed when XNAT receives the data:
DICOM Field | Remapped Value |
|---|---|
Patient Name (0010,0010) | Value of "Subject" in the Import UI |
Patient ID (0010,0020) | Value of "Subject" in the Import UI |
Study ID (0020,0010) | Value of "Session" in the Import UI |
Accession Number (0008,0050) | Value of "Session" in the Import UI |
Additionally, XNAT will label the image session using the "Session" value, and assign it to (or create) the subject specified in the "Subject" value.
However, there are some points of caution.
The data still has to be received by XNAT in non-relabeled form, so any PHI in these DICOM fields will still be sent to your XNAT instance, even if the PHI is immediately removed.
The DQR Import History maintains a record of the non-relabeled values of each image session in its history table.
XNAT uses the StudyInstanceUID of a given image session to determine relabeling. If multiple users are requesting an image session with the same StudyInstanceUID at the same time, data may be modified incorrectly. Additionally, if imported data remains in your prearchive, new imports of the same StudyInstanceUID could still be affected.
Querying Data Using a CSV Manifest
You can perform more complex queries and relabeling by importing using a CSV manifest, where each line in your CSV file represents a different import request.
See: Using DQR: Bulk Querying and Importing via CSV File